 0 ITEMS IN CART

GAP AUDIT + NICS ORGANIC CERTIFICATION AT JBG!
01/12/18 — Heydon Hatcher
At the end of 2017, we got Good Agricultural Practices or GAP audit certified! Why does this matter, you ask? Well for a handful of reasons. Put simply and pulled from the GAP site: "GAP is a voluntary audit that verifies that fruits and vegetables are produced, packed, handled, and stored as safely as possible to minimize risks of microbial food safety hazards. GAP & GHP audits verify adherence to the recommendations made in the U.S. Food and Drug Administration’s Guide to Minimize Microbial Food Safety Hazards for Fresh Fruits and Vegetables and industry recognized food safety practices." Even as a certified organic farm, it doesn’t mean that things are going to be microbially safe. So, this audit certification ensures an extra layer of trust to our customers. We opted for a third party to come in and make sure that we are sticking to the highest standard of cleanliness possible, and we passed with flying colors.
![]() Krishna showing Ada the Food Safety Policy Plan. Photo by Scott David Gordon.
Krishna showing Ada the Food Safety Policy Plan. Photo by Scott David Gordon.
GAP audit certification not only makes sure that we are adhering to vital food safety practices but also prepares us for the FDA's Food Safety Modernization Act that Obama signed into legislation during his tenure. This is a sweeping reform that tries to prevent contamination instead of responding to it when it occurs. Hardie's Fresh Foods, a produce distributor in town, sponsored us to get audit certified because not only does it make them more reputable in distributing to businesses in the region, but they provide produce to the Austin Independent School District, and no one wants children getting potentially unsafe foods! In conjunction with Greener Fields Together, which is a program run and administered by PRO*ACT that “engages and involves farmers, distributors, foodservice operators and retail locations in efforts to work toward safer produce from seed to fork,” they helped coach us through the whole process. Despite being sponsored, this was something that we have been interested in obtaining for a long time. With two locations and a number of different employees, it’s beneficial to have good standards on procedures, and in turn aids in the process of better mainline training our staff.
Since we didn't have a written down Food Safety Plan prior to the audit, Our Operations Manager, Krishna Raghavan took the lead in writing up a JBG Food Safety Plan along with our Barn Manager, Tracy Whitehead, and our Farm Manager, Becky. The whole process took more than two months to complete. We had procedures in place, but had not gone through each step and written out the standard operating procedures for all aspects of the farm in both locations and in all departments. Needless to say, this has been quite the logistical feat. Tracy, our Barn Manager, went through the Produce Safety Alliance Grower Training, and was deeply vital in preparing the SOPs and aiding in training all the other JBG employees on the New Food Safety Guidelines as a part of FSMA. This includes everything from how we sanitize bins, check temperatures in the coolers, ensuring water is managed properly, hand washing methods and frequency, dress code, scenarios on how to deal with sickness and injury, how we manage and rotate produce, where we keep supplies, how to sanitize supplies, how to transport vegetables, and the list goes on. The work is decentralized, so everyone does their bit to adhere to the guidelines.
![]() Tracy cleaning the tools. Photo by Scott David Gordon.
Tracy cleaning the tools. Photo by Scott David Gordon.
Not only did this audit occur at the Hergotz barn, but also out at the River Road farm. Becky was immensely integral in educating the farm about implementing GAP procedures. Out at the River Road location, we had to provide field history, water system information, soil amendments information and procedure, sanitation of farm vehicles and equipment, harvest crew hygiene, storage of tools, and so on.
We even had to do a mock recall of kale and retrace the “contaminated” vegetable from the customer back to the field. Our Operations Manager, Krishna, was most proud of this feat. Starting from our Wholesale Manager, Mike Mo, we have such detailed documentation that it is possible to track the vegetable back to the exact tract of land from whence it came. We can figure out when it was fertilized, what kind of fertilizer was used and how often, if it was transplanted or direct seeded, and even where the seeds came from initially. Pretty wild, right?
![]() Krishna and Becky with the NICS inspector.
Krishna and Becky with the NICS inspector.
After we went through the GAP Audit on November 15th, it was time for us to get ready for the annual NICS Organic Certification Inspection. This is our annual inspection to ensure that we are using organic practices in all aspects of the farm from seed to harvest. Just in case you were wondering, we are certified organic by Nature's International Certification Services (NICS), based out of Wisconson. The NICS inspector started off with a thorough inspection of the seeds cooler and the storage shed where we keep our fertilization and spray supplies. She also inspected the facilities, tools, amendments, soils, etc. After the field visit, the inspection continued to the barn / packing shed and conducted a sit-down inspection / interview with Krishna on all our records from the previous year (on all the inputs, to make sure the seeds are organic and or untreated and the inputs are compatible with organic certification guidelines). We also had a walk through audit of a crop: tracking the purchase of seed through our greenhouse and planting in the field, to weeding and pest management, to harvest and finally to the customer (the opposite of the GAP audit which warrants a tracking from customer to seed). We went into the details of everything from our buffer zones around the farm, to logo colors and placement on our CSA boxes. It's an extremely long and detailed process, but thanks to a hard working staff, we have all of our ducks in a row.
After the organic certification inspection, Krishna went through the exit interview with the inspector and all the concerns if any were listed by the inspector. We are proud that this year we did not have any issues listed at the time of exit interview and all the documents were submitted to the inspector's satisfaction. Yeehaw! So enjoy those certified veggies, folks. 'Til next time!
![]() Krishna with the JBG Food Safety Policy Plan. Photo by Scott David Gordon.
Krishna with the JBG Food Safety Policy Plan. Photo by Scott David Gordon.
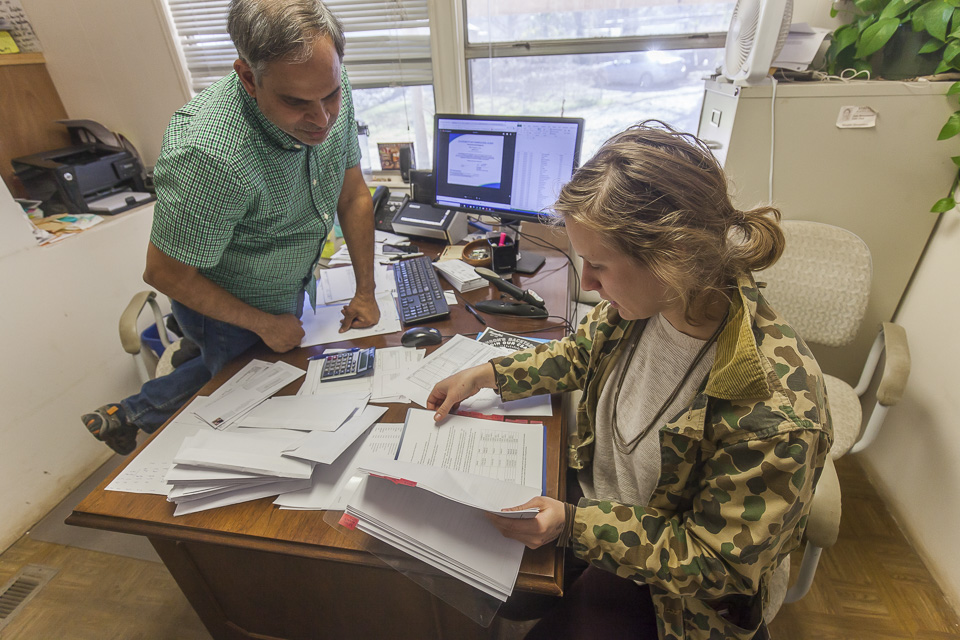 Krishna showing Ada the Food Safety Policy Plan. Photo by Scott David Gordon.
GAP audit certification not only makes sure that we are adhering to vital food safety practices but also prepares us for the FDA's Food Safety Modernization Act that Obama signed into legislation during his tenure. This is a sweeping reform that tries to prevent contamination instead of responding to it when it occurs. Hardie's Fresh Foods, a produce distributor in town, sponsored us to get audit certified because not only does it make them more reputable in distributing to businesses in the region, but they provide produce to the Austin Independent School District, and no one wants children getting potentially unsafe foods! In conjunction with Greener Fields Together, which is a program run and administered by PRO*ACT that “engages and involves farmers, distributors, foodservice operators and retail locations in efforts to work toward safer produce from seed to fork,” they helped coach us through the whole process. Despite being sponsored, this was something that we have been interested in obtaining for a long time. With two locations and a number of different employees, it’s beneficial to have good standards on procedures, and in turn aids in the process of better mainline training our staff.
Since we didn't have a written down Food Safety Plan prior to the audit, Our Operations Manager, Krishna Raghavan took the lead in writing up a JBG Food Safety Plan along with our Barn Manager, Tracy Whitehead, and our Farm Manager, Becky. The whole process took more than two months to complete. We had procedures in place, but had not gone through each step and written out the standard operating procedures for all aspects of the farm in both locations and in all departments. Needless to say, this has been quite the logistical feat. Tracy, our Barn Manager, went through the Produce Safety Alliance Grower Training, and was deeply vital in preparing the SOPs and aiding in training all the other JBG employees on the New Food Safety Guidelines as a part of FSMA. This includes everything from how we sanitize bins, check temperatures in the coolers, ensuring water is managed properly, hand washing methods and frequency, dress code, scenarios on how to deal with sickness and injury, how we manage and rotate produce, where we keep supplies, how to sanitize supplies, how to transport vegetables, and the list goes on. The work is decentralized, so everyone does their bit to adhere to the guidelines.
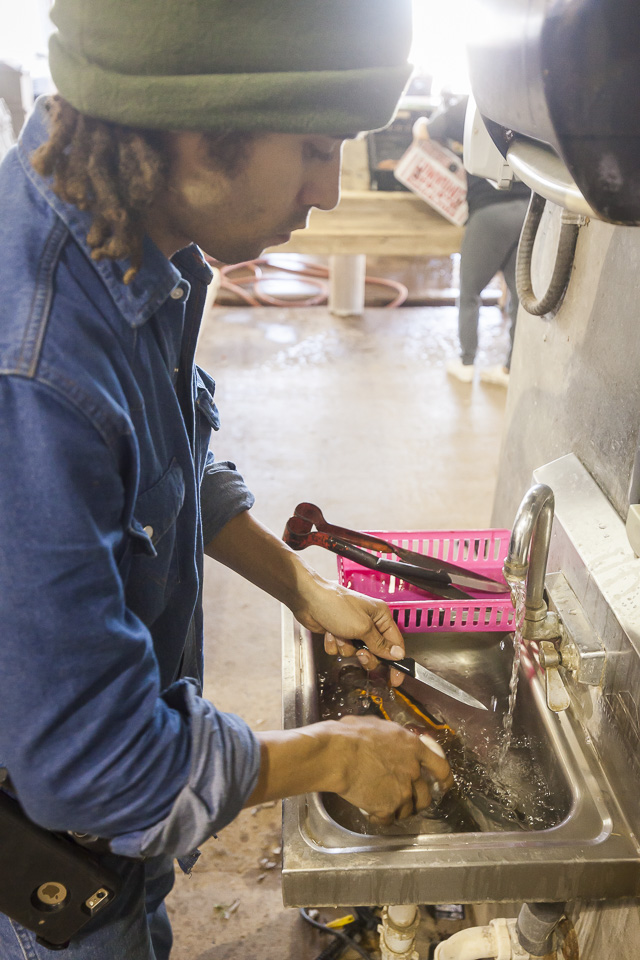 Tracy cleaning the tools. Photo by Scott David Gordon.
Not only did this audit occur at the Hergotz barn, but also out at the River Road farm. Becky was immensely integral in educating the farm about implementing GAP procedures. Out at the River Road location, we had to provide field history, water system information, soil amendments information and procedure, sanitation of farm vehicles and equipment, harvest crew hygiene, storage of tools, and so on.
We even had to do a mock recall of kale and retrace the “contaminated” vegetable from the customer back to the field. Our Operations Manager, Krishna, was most proud of this feat. Starting from our Wholesale Manager, Mike Mo, we have such detailed documentation that it is possible to track the vegetable back to the exact tract of land from whence it came. We can figure out when it was fertilized, what kind of fertilizer was used and how often, if it was transplanted or direct seeded, and even where the seeds came from initially. Pretty wild, right?
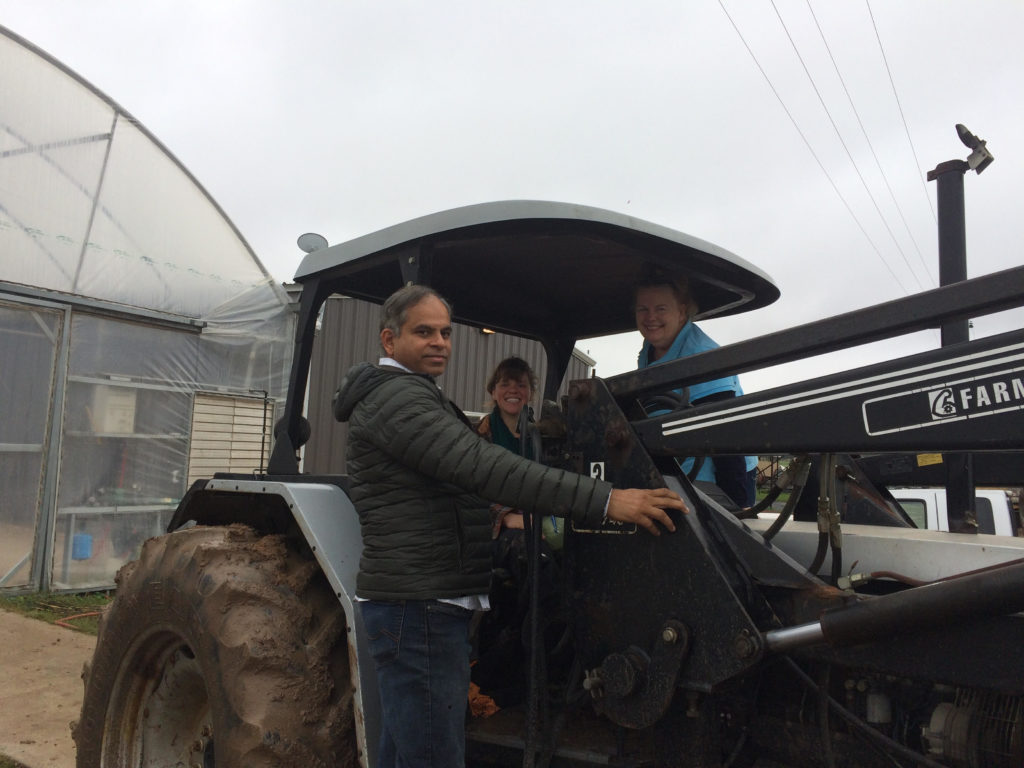 Krishna and Becky with the NICS inspector.
After we went through the GAP Audit on November 15th, it was time for us to get ready for the annual NICS Organic Certification Inspection. This is our annual inspection to ensure that we are using organic practices in all aspects of the farm from seed to harvest. Just in case you were wondering, we are certified organic by Nature's International Certification Services (NICS), based out of Wisconson. The NICS inspector started off with a thorough inspection of the seeds cooler and the storage shed where we keep our fertilization and spray supplies. She also inspected the facilities, tools, amendments, soils, etc. After the field visit, the inspection continued to the barn / packing shed and conducted a sit-down inspection / interview with Krishna on all our records from the previous year (on all the inputs, to make sure the seeds are organic and or untreated and the inputs are compatible with organic certification guidelines). We also had a walk through audit of a crop: tracking the purchase of seed through our greenhouse and planting in the field, to weeding and pest management, to harvest and finally to the customer (the opposite of the GAP audit which warrants a tracking from customer to seed). We went into the details of everything from our buffer zones around the farm, to logo colors and placement on our CSA boxes. It's an extremely long and detailed process, but thanks to a hard working staff, we have all of our ducks in a row.
After the organic certification inspection, Krishna went through the exit interview with the inspector and all the concerns if any were listed by the inspector. We are proud that this year we did not have any issues listed at the time of exit interview and all the documents were submitted to the inspector's satisfaction. Yeehaw! So enjoy those certified veggies, folks. 'Til next time!
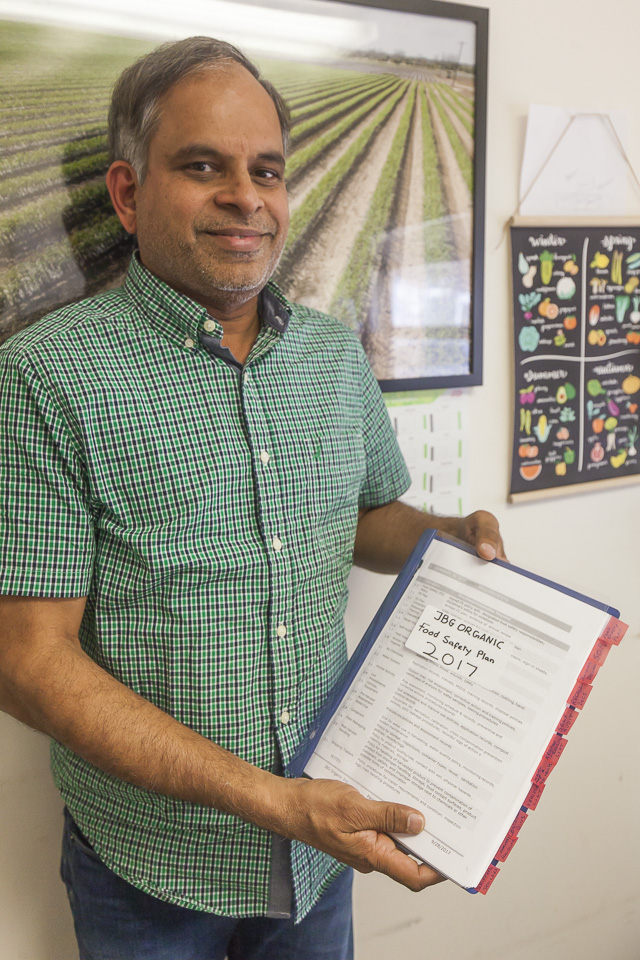 Krishna with the JBG Food Safety Policy Plan. Photo by Scott David Gordon.
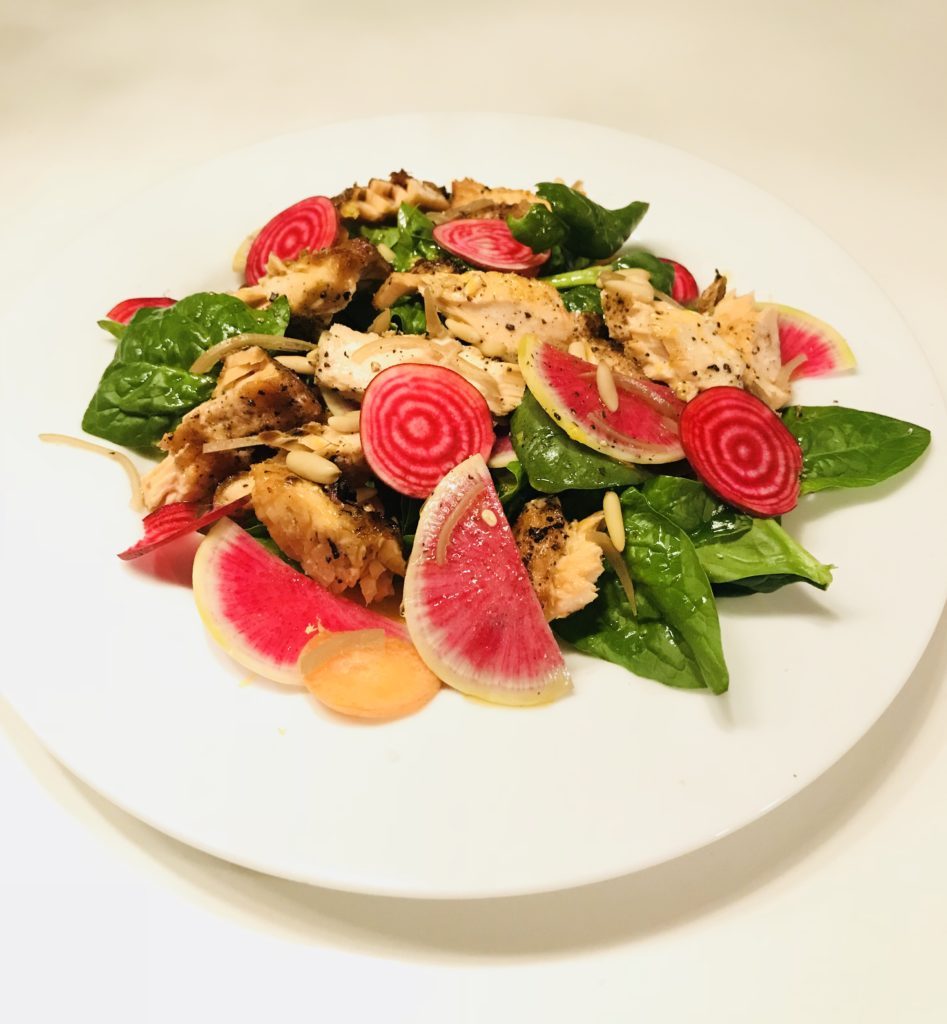
MOROCCAN-STYLE SPINACH SALAD WITH GRILLED SALMON AND CRUNCHY ROOT VEGETABLES
01/11/18 — Heydon Hatcher
Recipe and Photo by Nadia Tamby
Perhaps you made a resolution to eat healthier this year? Maybe you already eat plenty salads and you’re looking for something a little different. I recently traveled for the holidays and came back with some exotic spices to mix up my meals – but don’t worry, you should be able to find all of these at your local grocery store. This salad has so many interesting flavors, components, and textures. You can prepare ahead by grilling the salmon (or protein of your choice) up to two days before (and serving it cold, if you’re into that), or you can grill it the day of and serve it warm on the salad. The dressing is addictive - make double or triple the dressing and use it to top grilled or roasted vegetables later in the week to spice up the rest of your CSA box!
![]()
Ingredients:
Dressing:
Topping:
Instructions:
Zest and juice the lemon into a bowl and add grated garlic (if using), salt and pepper and honey.
Using a mortar and pestle or spice grinder, coarsely grind the cumin and coriander seeds. In a small sauté pan, heat up olive oil then add all 4 spices and fry until fragrant. This should only take a minute, so keep an eye on it. Remove from the heat and drizzle into the lemon-honey mixture and whisk to emulsify (the honey helps to keep the oil and citrus juice from separating too much). I like to use a Microplane grater for the citrus zest and follow up with the garlic clove – and it saves you from the tedious task of chopping garlic.
Use the same sauté pan to toast the pine nuts until lightly browned (watch them carefully as well – they will burn quickly!)
Cut preserved lemons into quarters to make it easier to remove and discard the flesh. Stack up the 4 quarters and slice them very thinly.
Serve the greens and arrange the sliced vegetables and chunks of grilled salmon on each plate.
Drizzle the dressing on the salad and top with the toasted pine nuts and sliced preserved lemon.
Perhaps you made a resolution to eat healthier this year? Maybe you already eat plenty salads and you’re looking for something a little different. I recently traveled for the holidays and came back with some exotic spices to mix up my meals – but don’t worry, you should be able to find all of these at your local grocery store. This salad has so many interesting flavors, components, and textures. You can prepare ahead by grilling the salmon (or protein of your choice) up to two days before (and serving it cold, if you’re into that), or you can grill it the day of and serve it warm on the salad. The dressing is addictive - make double or triple the dressing and use it to top grilled or roasted vegetables later in the week to spice up the rest of your CSA box!
Ingredients:
- Grilled salmon fillet (about 1/3 lb per person)
- 1 bunch spinach, washed and dried, thick stems removed
- Assortment of colorful vegetables cut into different shapes (for this salad I used raw sliced carrots, watermelon radish and Chioggia beets*)
- ½ cup cooked quinoa or other grain
- Salt and pepper, to taste
Dressing:
- 1/3 cup extra virgin olive oil
- ½ teaspoon of each (whole spices): cumin, coriander
- ½ teaspoon of each (ground): cinnamon, paprika (spicy or mild, your choice)
- 1 lemon, zest and juice
- 2 tablespoons raw honey
- 1 garlic clove, grated (optional)
- Salt and pepper, to taste
Topping:
- 1 tablespoon finely sliced preserved lemon* (remove flesh and discard first – you only want to use the peel)
- 2 tablespoons toasted pine nuts
Instructions:
Zest and juice the lemon into a bowl and add grated garlic (if using), salt and pepper and honey.
Using a mortar and pestle or spice grinder, coarsely grind the cumin and coriander seeds. In a small sauté pan, heat up olive oil then add all 4 spices and fry until fragrant. This should only take a minute, so keep an eye on it. Remove from the heat and drizzle into the lemon-honey mixture and whisk to emulsify (the honey helps to keep the oil and citrus juice from separating too much). I like to use a Microplane grater for the citrus zest and follow up with the garlic clove – and it saves you from the tedious task of chopping garlic.
Use the same sauté pan to toast the pine nuts until lightly browned (watch them carefully as well – they will burn quickly!)
Cut preserved lemons into quarters to make it easier to remove and discard the flesh. Stack up the 4 quarters and slice them very thinly.
Serve the greens and arrange the sliced vegetables and chunks of grilled salmon on each plate.
Drizzle the dressing on the salad and top with the toasted pine nuts and sliced preserved lemon.
CSA BOX CONTENTS WEEK OF JAN 8TH
01/08/18 — Scott
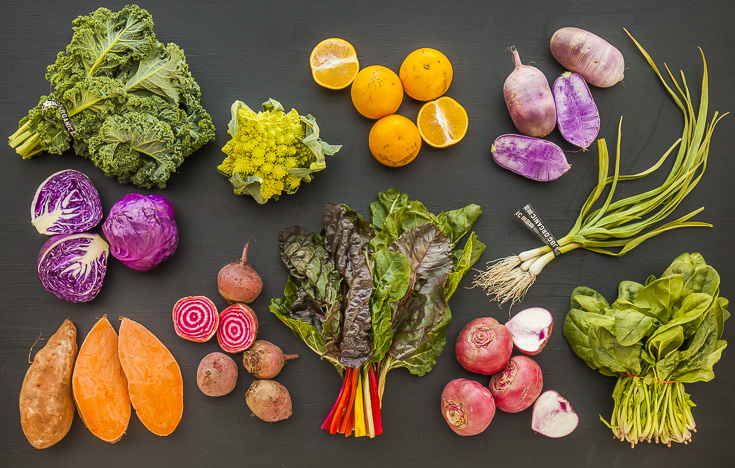 CSA Box Contents Week of Jan 8th
Large Box
Beet, Golden
Broccoli
Carrot, Orange
Citrus, Mixed
Garlic, Green
Greens, Collards
Greens, Kale, Dino
Kohlrabi, Purple
Lettuce, Romaine
Onion, Spring Red
Potato, Sweet
Turnip, Rutabaga
Beet, Golden
Broccoli
Carrot, Orange
Citrus, Mixed
Garlic, Green
Greens, Collards
Greens, Kale, Dino
Kohlrabi, Purple
Lettuce, Romaine
Onion, Spring Red
Potato, Sweet
Turnip, Rutabaga
Medium Box
Beet, Golden
Carrot, Orange
Cauliflower, Romanesco
Garlic, Green
Greens, Kale, Curly
Greens, Spinach
Kohlrabi, Purple
Turnip, Rutabaga
Beet, Golden
Carrot, Orange
Cauliflower, Romanesco
Garlic, Green
Greens, Kale, Curly
Greens, Spinach
Kohlrabi, Purple
Turnip, Rutabaga
Small Box
Broccoli
Carrot, Orange
Greens, Kale, Dino
Greens, Spinach
Onion, Spring Red
Potato, Sweet
Radish, Purple Daikon
Broccoli
Carrot, Orange
Greens, Kale, Dino
Greens, Spinach
Onion, Spring Red
Potato, Sweet
Radish, Purple Daikon
Individual Box
Carrot, Orange
Greens, Collards
Lettuce, Romaine
Potato, Sweet
Radish, Purple Daikon
Carrot, Orange
Greens, Collards
Lettuce, Romaine
Potato, Sweet
Radish, Purple Daikon
WEEK 1 IN PHOTOS
01/05/18 — Heydon Hatcher
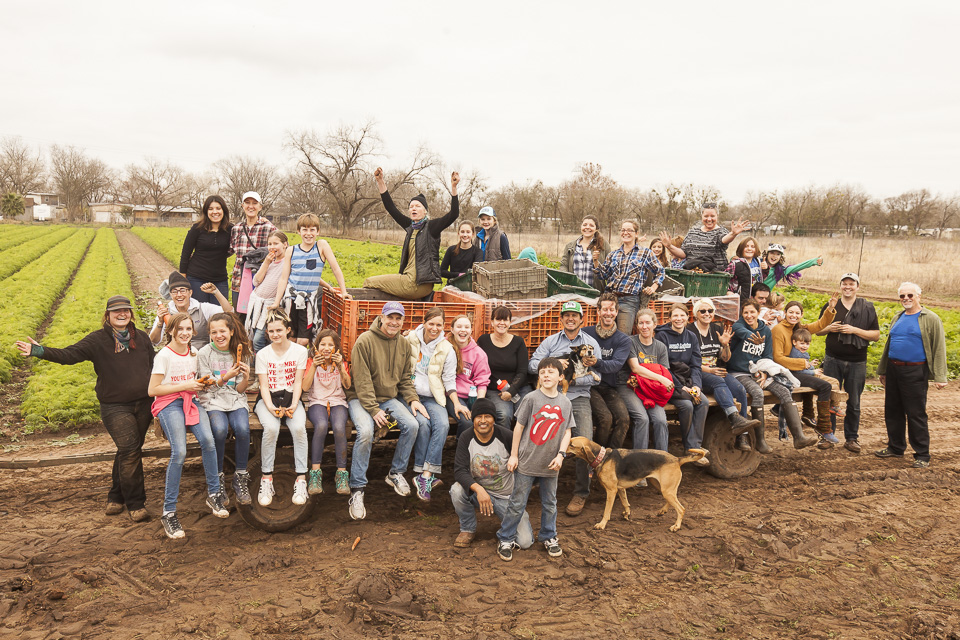 Our incredible volunteers. Photo by Scott David Gordon.
Happy 2018! Right before the start of the fresh, new year, we reached out to our Austin community via Instagram and a mass email pleading for extra hands to aid in harvesting storage crops before an impending freeze. The freeze can wreak havoc upon crops, so getting this produce into storage was of utmost importance. To our surprise, we received an astounding response and had more than 60 people happily show up for us at the farm the following day. These incredible volunteers harvested over 1500 pounds, or 22 bulk bins of produce (specifically carrots, black Spanish radishes, and daikon radishes). Time and time again we are floored by the support of our community, so, we extend the biggest thank you for being there for us this past week.
Speaking of the freeze, everything is just now thawing out at the farm from this past week's deep freeze, and we are still assessing the damage. You can expect a little less variety at markets this weekend, as well as slightly decreased quality in certain crops. Most of our delicate and tender leafy-crops (like lettuces and cilantro) are likely lost. We're crossing our fingers that hardier greens like kale and collards have sustained some damage, but that the plants themselves have not died. Root crops like carrots and beets hopefully sustained minimal damage as they were underground during the freeze.
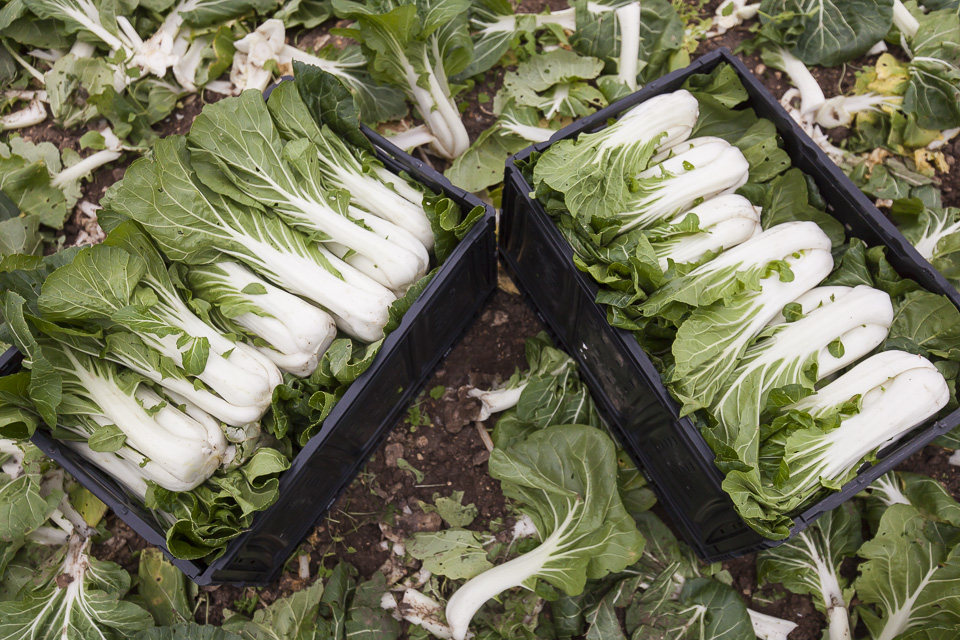 Bok choy. Photo by Scott David Gordon.
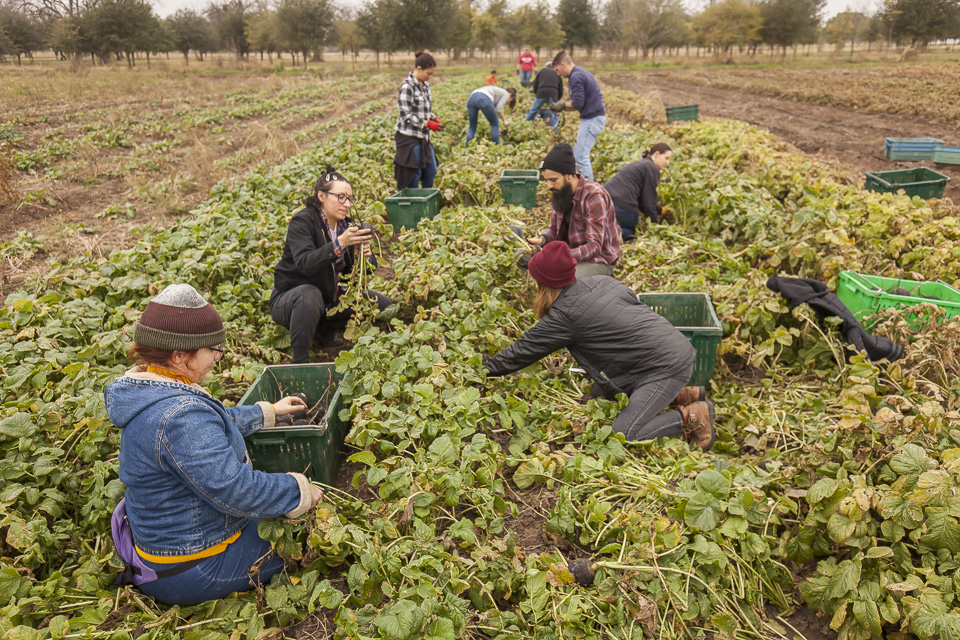 Black Spanish Radish harvest. Photo by Scott David Gordon.
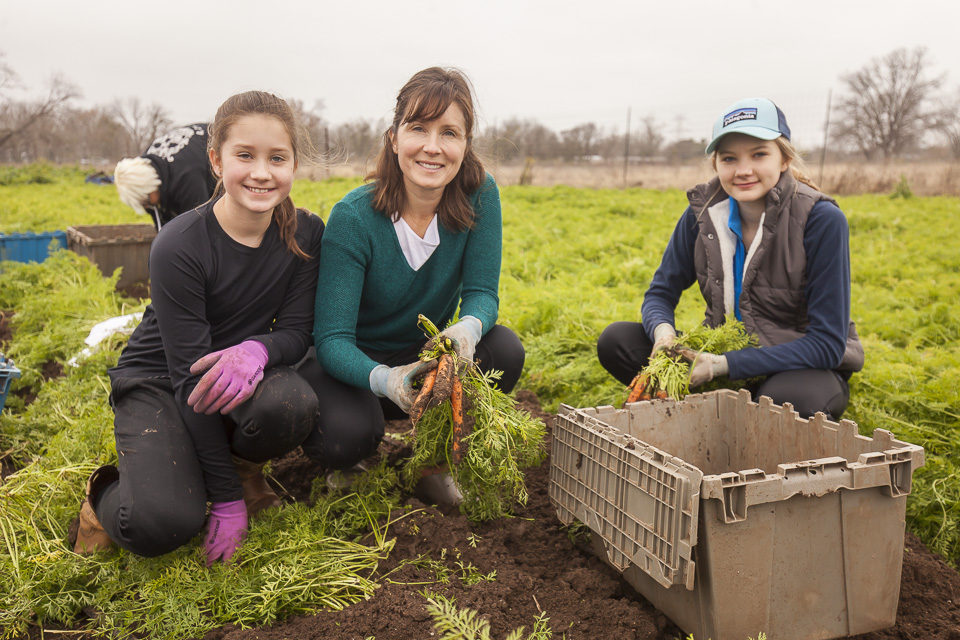 Carrot harvest. Photo by Scott David Gordon.
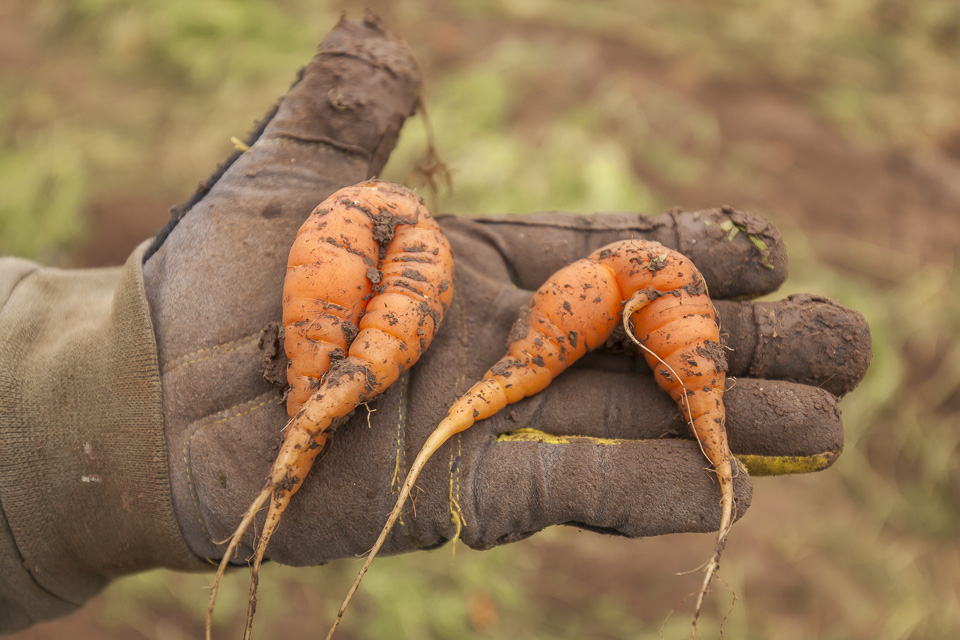 Carrot legs. Photo by Scott David Gordon.
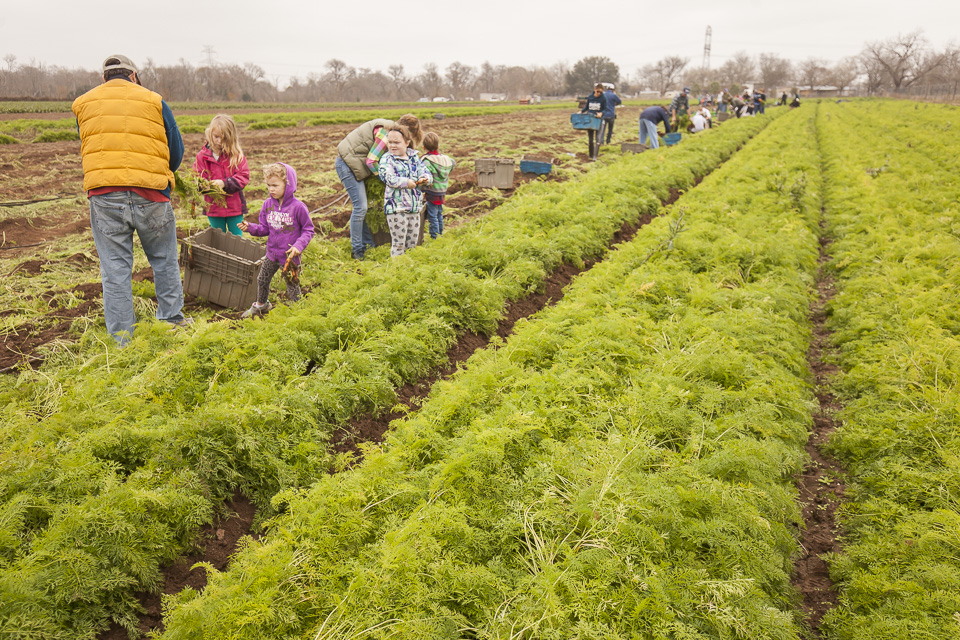 Volunteers all the way down. Photo by Scott David Gordon.
 Gals and their carrots. Photo by Scott David Gordon.
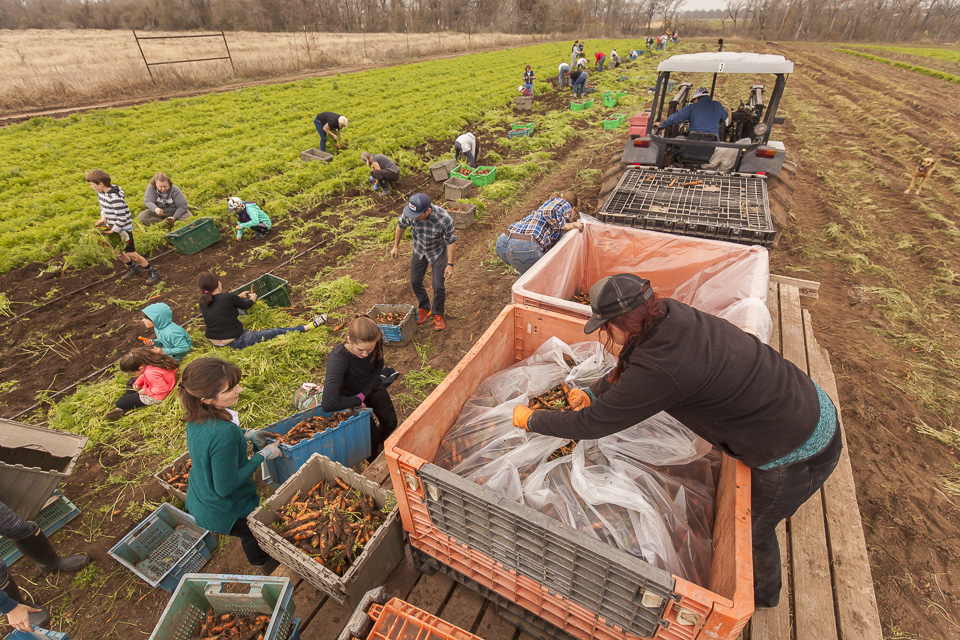 Filling up the bulk bins. Photo by Scott David Gordon.
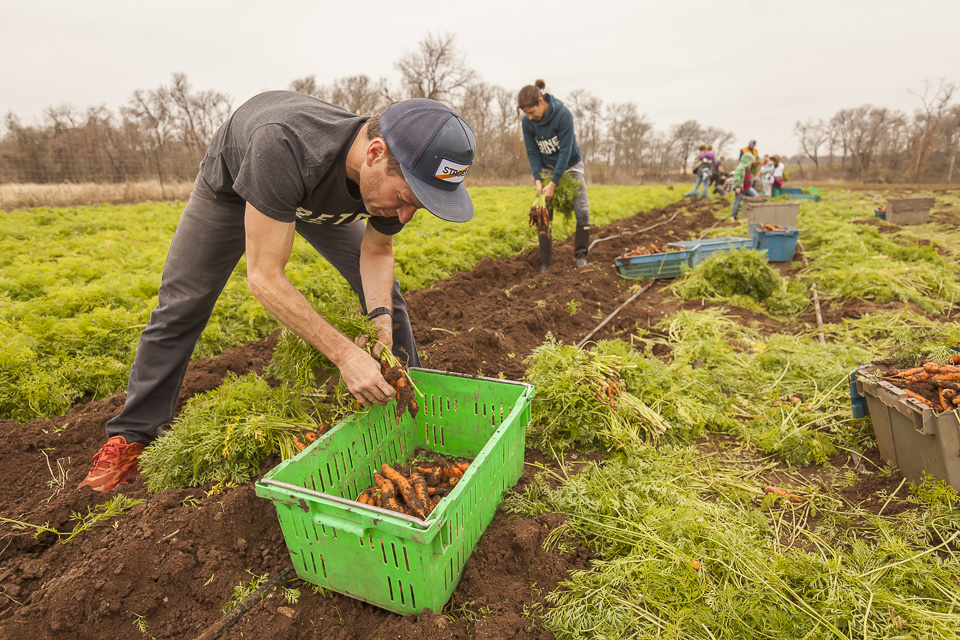 Carrot harvest action shot. Photo by Scott David Gordon.
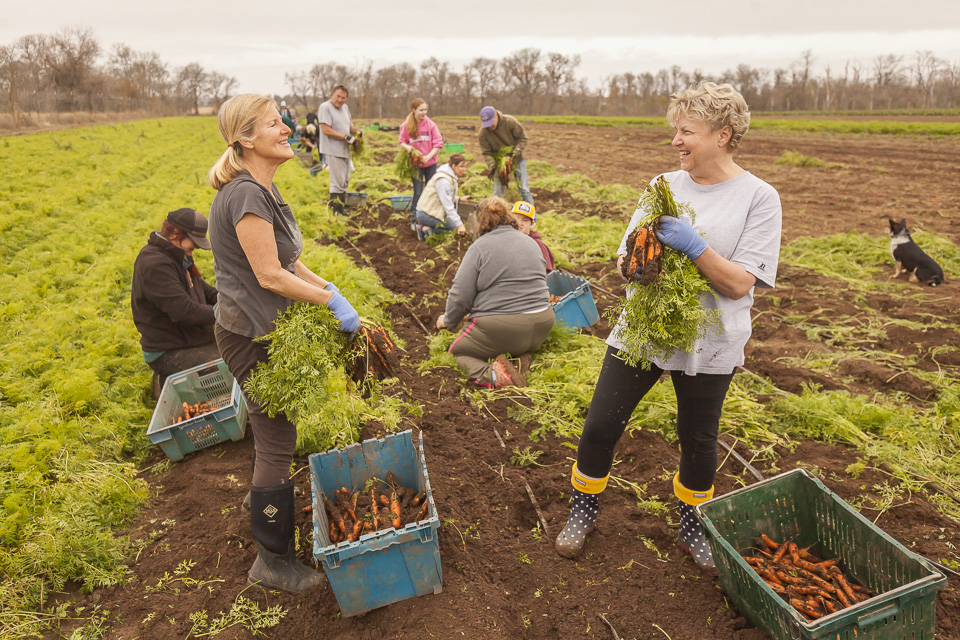 Carrot harvest convo. Photo by Scott David Gordon.
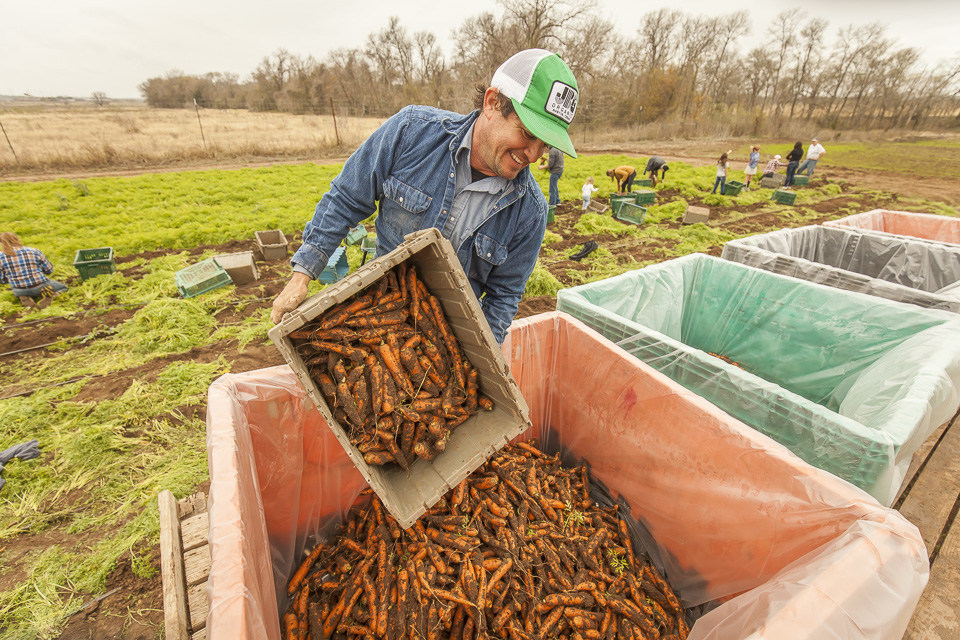 Head farmer, Brenton, emptying out his carrots. Photo by Scott David Gordon.
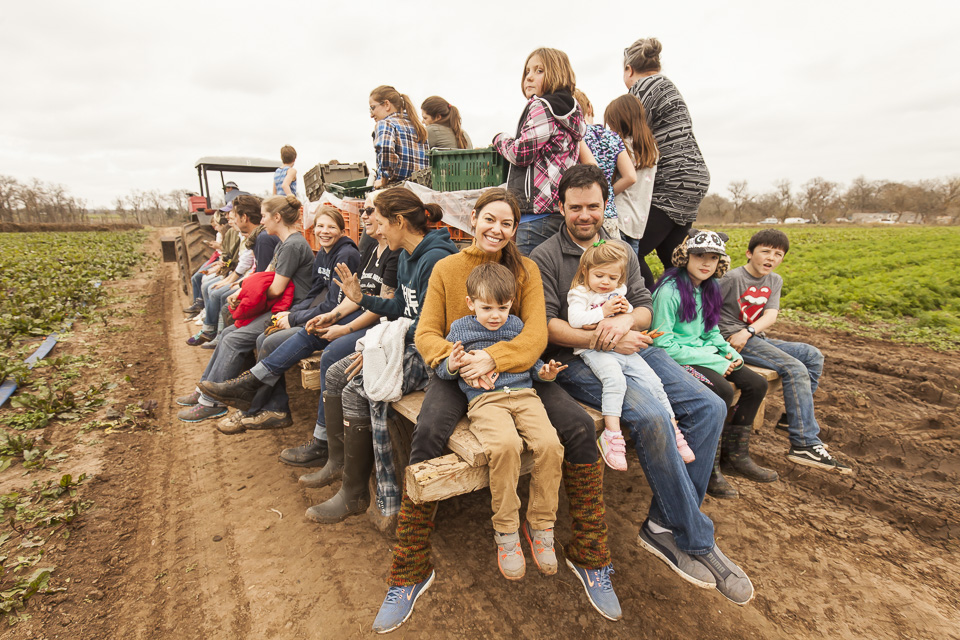 Bundled up on the trailer. Photo by Scott David Gordon.
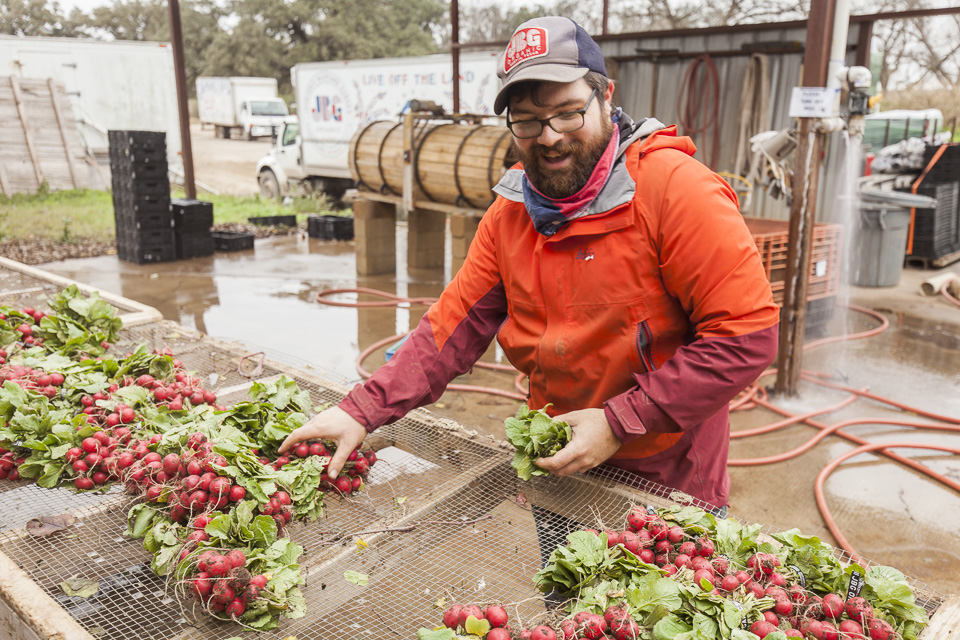 Ryan and the radishes. Photo by Scott David Gordon.
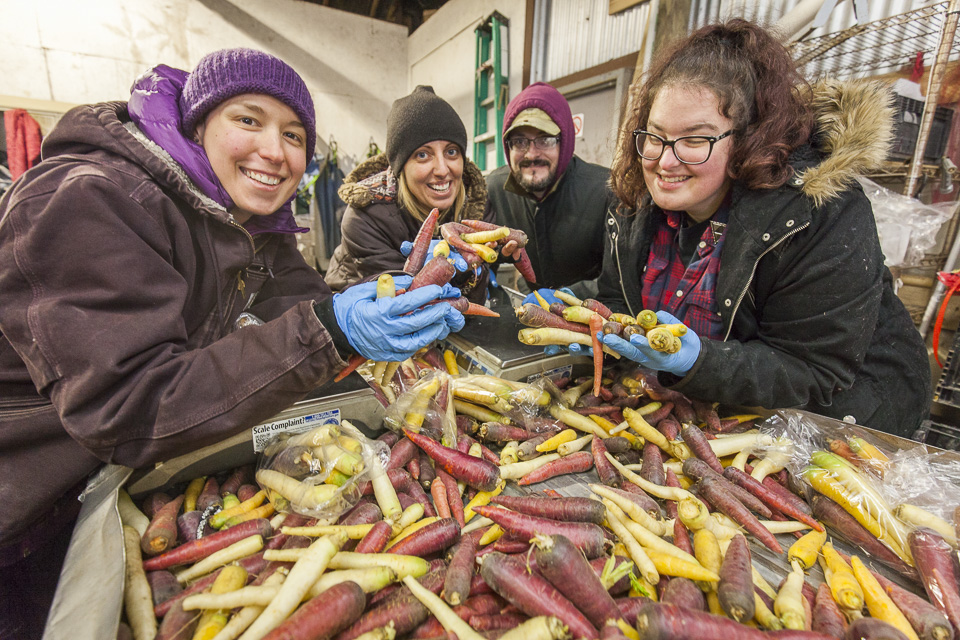 Carrot sorting at the barn. Photo by Scott David Gordon.
JOIN THE CSA IN 2018 + FAVORITE SEASONAL RECIPES FROM JBG-ERS
01/05/18 — Heydon Hatcher
2018 has arrived! A new year offers the opportunity to start fresh and assess old habits. Why not join our CSA in the New Year?
![]() CSA bounty. Photo by Scott David Gordon.
CSA bounty. Photo by Scott David Gordon.
Let’s create intentions that set us up to attain overall better well-being. We could all do a little more for our bodies, and in 2018, why don’t we all aim to brighten our plates, make more meals, become more in tune with our environment, and ameliorate our diets once and for all. Easy enough, right? As we all strive for health in the new year, consider one life hack that is sure to bring welcome and easy change, our CSA! A simple and painless delivery service that ensures organic and fresh produce will be integrated into your diet week after week!
If you are a new customer or have been taking a hiatus, sign up now through the end of January and get your first box free! Yep, you heard us right, FREE! A new year means a new you. It’s a great way to integrate fresh, organic produce into your daily regimen. It’s the perfect nudge you’ve been waiting for, so don’t dally, the offer ends January 31st! To join (or rejoin) the CSA click here and use the promo code: getcookin2 or call the farm at 512.386.5273.
![]() Farmers Market CSA pickup. Photo by Scott David Gordon.
Farmers Market CSA pickup. Photo by Scott David Gordon.
Cultivated in East Austin and harvested no more than a day or two before reaching your doorstep, our certified organic fruits and vegetables (Over 200 varieties) are at peak nutrition and flavor. Getting a CSA share with JBG means you know exactly where your food is coming from and how it's grown. GMO? Heck no! You might even see a bunch of flowers in your share during certain months!
Eating locally connects you to the seasons, to the land, and to your own health and wellness. Cucumbers will cool you down in the summer, while braised collards will warm you up when the temperatures start to drop. Enjoy the best pico de gallo of your life during the short window when cilantro, onions, peppers, and tomatoes all overlap, and we promise you'll never go back to the store-bought stuff again. You'll get acclimated with the seasons on a whole new level, and learn about what naturally grows when and why. speaking of cooking: we love this challenge The idea is simple - cook all your meals at home for 30 days, and refrain from going out to eat or picking anything up, and with a weekly CSA the recipe options are endless!
![]() Longtime CSA Member, E. McQueen, enjoying her box at home. Photo by Scott David Gordon.
Longtime CSA Member, E. McQueen, enjoying her box at home. Photo by Scott David Gordon.
Beautifully put by our farm friend, Johannes Courtens: “'Community Supported Agriculture' is a commitment by people, not just for getting food as a reward for paying money, but it’s the idea that they are behind you, and believe in what you are doing. If the farm fails with something during the season, the finances are going to be okay since you have people backing the farm. By providing funds up front, the farm is able to run as efficiently as possible, and not being tied up by all the other clutter, like building the capital.
Trying to grow food first and then sell it is kind of an insane thing. Food is not a commodity, it’s a living thing, but it is a commodity in our economy. What CSA says is that it’s not a commodity, it’s a commitment. It’s something that’s hard to do. If people rally around a farm, it’s like crowdfunding. People are saying, I really think this product idea is awesome. It’s crowdfunding for food. The reward is high quality vegetables for weeks on end.”
![]() Beautiful watermelon radishes. Photo by Scott David Gordon.
Beautiful watermelon radishes. Photo by Scott David Gordon.
That being said, behind the veggies, are people. When you support our farm, you are supporting the people that toil ceaselessly week after week to plant, harvest, clean, pack, and deliver your veggies. In honor of those people, we thought that we would share some of our favorite seasonal recipes that utilize our favorite wintertime crops.
![]() Ada. Photo by Scott David Gordon.
Ada. Photo by Scott David Gordon.
Winter Thai-ish Curry
All of the ingredients and measurements are suggestions! This recipe works best when you use it as a clean-out technique. Use what you have!
Ingredients:
2. To make the curry, cook your onions in the oil. After soft, add the ginger and garlic and cook for another half minute, or so.
3. Add your carrots and sweet potatoes to the onion mixture. Add a dash of water to help steam those veggies and to prevent burning. After your carrots are about half-way done, add your curry paste and stir to combine.
4. Next, plop in the coconut milk, as well as a 1/2-1 cup of water or broth and a skimpy tablespoon of sugar. Add your greens, and any remaining vegetables. Bring to a simmer, reduce heat, and cook until all vegetables are tender-to your liking. Shouldn't be longer than 20 minutes, probably somewhere around 10.
5. Remove pot from the heat, and add the magic! Season with lime juice, soy sauce, and fish sauce. If it needs more sweet, add some honey or agave nectar. More spice? Top with yellowbird, chili oil, or red pepper flakes.
![]() Fawn at the Farmers Market. Photo by Scott David Gordon.
Fawn at the Farmers Market. Photo by Scott David Gordon.
Creamy Carrot Soup
With a slotted spoon, transfer the carrots and rice to the container of a blender or food processor, leaving as much of the cooking liquid behind you as you can. Puree the mixture. Then, with the machine still running, pour the cooking liquid in through the feed tube or hole in the lid of the container. Blend until the soup is very smooth. Pour the blended soup back into the saucepan and bring to a boil, stirring. Add the milk and heat through without boiling.
Serve soup sprinkled with chopped chives.
**Makes 4 servings
![]() Taylor spraying down the veggies. Photo by Scott David Gordon.
Taylor spraying down the veggies. Photo by Scott David Gordon.
Black Eyed Pea Collard Rolls are hearty, healthy, tangy and plant-based! Bring on the BBQ y'all!
**Vegan + GF **Prep Time 45 minutes **Cook Time 25 minutes **Total Time 1 hour 10 minutes **Servings 8 -9 Rolls
**Author Traci York | Vanilla And Bean
Ingredients
For the Rolls:
For the Filling:
Fill a large stockpot 2/3 full of water and bring to a boil. Rinse the collards well and chop off the stem at the base of all the collards. Choose the most intact 9 leaves available for the rolls, set aside. Chop enough of the remaining collards for 3 C packed to be used in the filling. Rinse these in a colander with plenty of water as collards tend to be a bit dirty. Set aside. Place the 9 whole collard leaves in the boiling water and boil for about 6 minutes. If you have a few whole leaves left, you can boil those too, using them to line the casserole dish. Carefully drain the whole leaves in a colander and rinse with cold water. Place a few kitchen towels or paper towels on the counter. Place each leaf, flat, on the towel. Be careful here as the leaves are tender and tear easily.
In a large sauté pan, melt down 1 Tbs of coconut oil. Cook the mushrooms on medium heat until softened and fragrant, stirring only occassionally for about 5 minutes, then add the chopped collards. Cook until just wilted. Turn the heat down to low and add the black eyed peas to the pan and stir to combine ingredients. Add 1/4 C (86g) of the BBQ sauce to the collard mixture. Now is a good time to adjust seasoning to taste. Include Tabasco and salt and pepper.
To Assemble the Rolls:
Preheat oven to 350F. Use pan spray (coconut oil) to coat the bottom and sides of a medium casserole dish. Line the casserole with any extra leaves. Take one collard leaf and place it flat on your work surface. Test the collard to see if the stem will easily bend, as if you're rolling up the collard. If not, gently slice the stem out of slice it so it's thinner. Take about 4 1/2 Tbs of the collard/mushroom/pea mixture and place it towards the base of the collard leaf. Very carefully, begin to roll up the collard leaf, folding the sides over the mixture while continuing to roll (think burrito). If the collard tears a bit, just keep folding and rolling. It will come together. Place the roll into the prepared casserole dish.
Repeat this process until all of the leaves and filling is used up. Cover the casserole dish with foil and bake for 25 minutes, or until the inside of each roll is heated throughly (use a fork to heat-test a roll). If they bake too long, the leaves will begin to lose their vibrant green color. Meanwhile, warm the remaining BBQ sauce in a pan on low for 5 minutes. Drizzle 1/2 of the remaining sauce on rolls and use the final 1/2 for anyone who wants extra! Serve with a side of Jalepenos Cheese Grits.
JALAPEÑO CHEESE GRITS
2. Add jalapeños and garlic and lightly smash with a fork into the butter.
3. Add box recommendations for preferred serving of chicken broth and Grits and cook according to box directions.
4. Once Grits have boiled and simmered, remove from heat and stir in cheese. Add Jalapeño Salt to taste and serve warm.
For a vegan option try substituting the broth with a Not Chik'n Bouillion cube mixed to package directions and Nutritional Yeast for the cheese.
![]() Mike Mo. Photo by Scott David Gordon.
Mike Mo. Photo by Scott David Gordon.
![]() Casey working hard, delivering food donations. Photo by Scott David Gordon.
Casey working hard, delivering food donations. Photo by Scott David Gordon.
Carrot-Fennel Salad
**Makes 8 servings
**Prep time: 20 minutes
Also, here's a bit about simple veggie fermenting:
Take a mix of whatever veggies you have on hand, I used broccoli, cauliflower, cabbage, carrots and garlic.
Add whatever seasoning you want. I did crushed red pepper and black pepper.
Add all the veggies and seasoning to a jar with a tight sealing lid.
Make a brine (enough to cover all the veggies) of a ratio of 2 cups of water to 1.5 Tbsp of sea salt.
Pour the brine into the jar and seal it tightly.
Let it sit at room temperature for 3-5 days. The longer it ferments, the more flavor and softer the veggies will be.
Be sure to de-gas the mason jar by opening it a couple times during the process since gas will build up inside the jar.
ENJOY!
Your commitment provides so much for the farm - upfront costs for seeds, fuel, and labor to grow the best organic vegetables around, improvements to our CSA offerings like customization and flex scheduling, and wiggle room to invest in larger improvements. There are so many more projects we'd love to take on to continue improving, but we can't do it without your support. Here's to a healthy and happy 2018! 'Til next time!
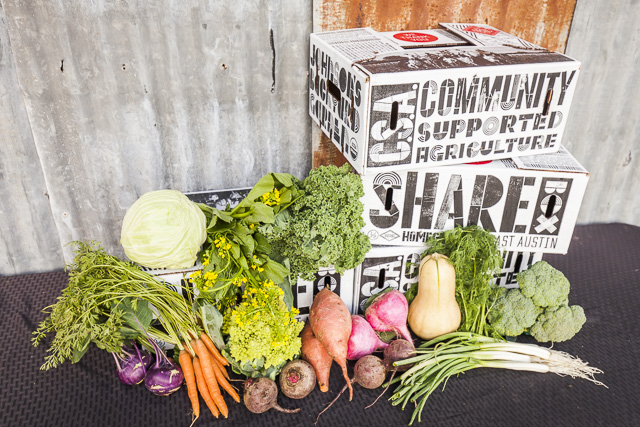 CSA bounty. Photo by Scott David Gordon.
Let’s create intentions that set us up to attain overall better well-being. We could all do a little more for our bodies, and in 2018, why don’t we all aim to brighten our plates, make more meals, become more in tune with our environment, and ameliorate our diets once and for all. Easy enough, right? As we all strive for health in the new year, consider one life hack that is sure to bring welcome and easy change, our CSA! A simple and painless delivery service that ensures organic and fresh produce will be integrated into your diet week after week!
If you are a new customer or have been taking a hiatus, sign up now through the end of January and get your first box free! Yep, you heard us right, FREE! A new year means a new you. It’s a great way to integrate fresh, organic produce into your daily regimen. It’s the perfect nudge you’ve been waiting for, so don’t dally, the offer ends January 31st! To join (or rejoin) the CSA click here and use the promo code: getcookin2 or call the farm at 512.386.5273.
 Farmers Market CSA pickup. Photo by Scott David Gordon.
Cultivated in East Austin and harvested no more than a day or two before reaching your doorstep, our certified organic fruits and vegetables (Over 200 varieties) are at peak nutrition and flavor. Getting a CSA share with JBG means you know exactly where your food is coming from and how it's grown. GMO? Heck no! You might even see a bunch of flowers in your share during certain months!
Eating locally connects you to the seasons, to the land, and to your own health and wellness. Cucumbers will cool you down in the summer, while braised collards will warm you up when the temperatures start to drop. Enjoy the best pico de gallo of your life during the short window when cilantro, onions, peppers, and tomatoes all overlap, and we promise you'll never go back to the store-bought stuff again. You'll get acclimated with the seasons on a whole new level, and learn about what naturally grows when and why. speaking of cooking: we love this challenge The idea is simple - cook all your meals at home for 30 days, and refrain from going out to eat or picking anything up, and with a weekly CSA the recipe options are endless!
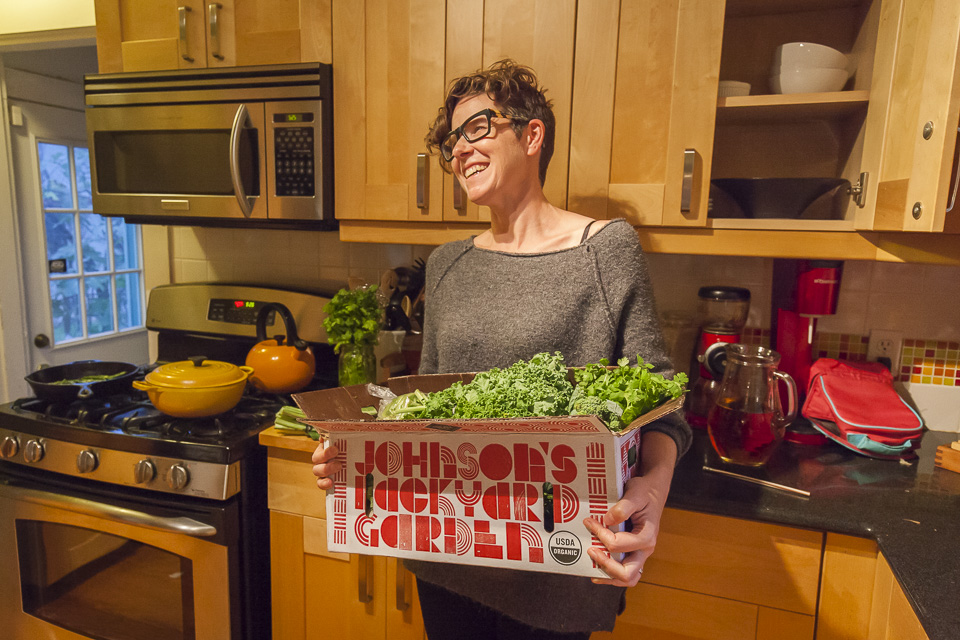 Longtime CSA Member, E. McQueen, enjoying her box at home. Photo by Scott David Gordon.
Beautifully put by our farm friend, Johannes Courtens: “'Community Supported Agriculture' is a commitment by people, not just for getting food as a reward for paying money, but it’s the idea that they are behind you, and believe in what you are doing. If the farm fails with something during the season, the finances are going to be okay since you have people backing the farm. By providing funds up front, the farm is able to run as efficiently as possible, and not being tied up by all the other clutter, like building the capital.
Trying to grow food first and then sell it is kind of an insane thing. Food is not a commodity, it’s a living thing, but it is a commodity in our economy. What CSA says is that it’s not a commodity, it’s a commitment. It’s something that’s hard to do. If people rally around a farm, it’s like crowdfunding. People are saying, I really think this product idea is awesome. It’s crowdfunding for food. The reward is high quality vegetables for weeks on end.”
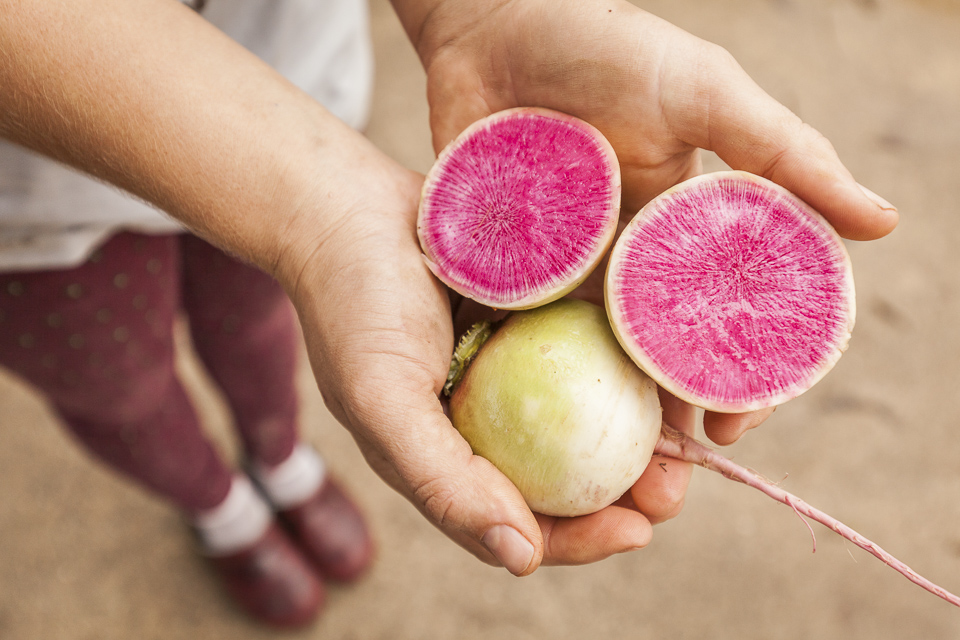 Beautiful watermelon radishes. Photo by Scott David Gordon.
That being said, behind the veggies, are people. When you support our farm, you are supporting the people that toil ceaselessly week after week to plant, harvest, clean, pack, and deliver your veggies. In honor of those people, we thought that we would share some of our favorite seasonal recipes that utilize our favorite wintertime crops.
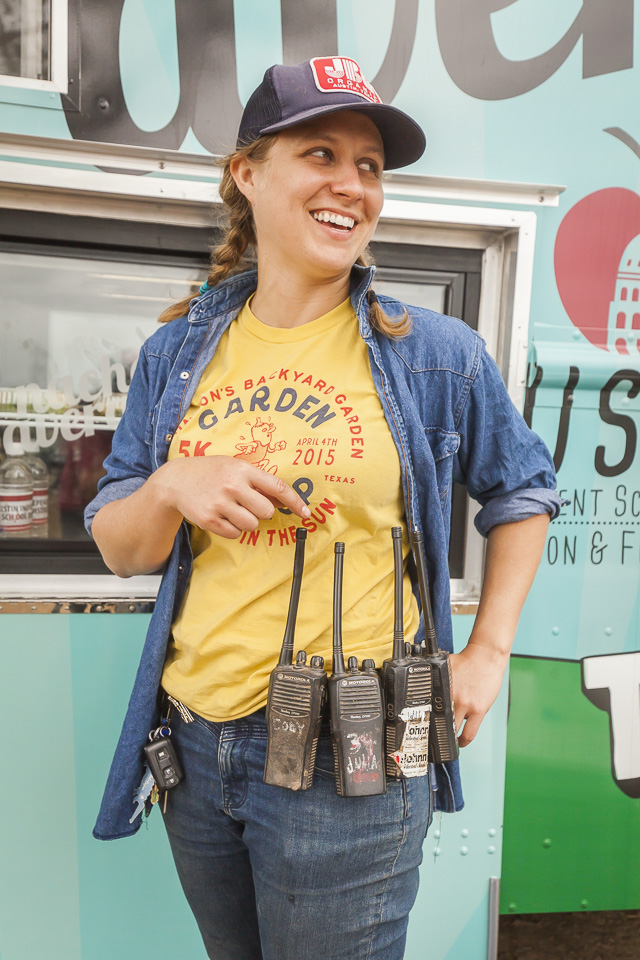 Ada. Photo by Scott David Gordon.
ADA (Marketing and CSA Manager):
Thai flavors strike a cord with my pallet. The mixture of sweet, spicy, and sour when coupled with any degree of coconut milk is really like instant bliss in my mouth. A flavor party, perfect for winter nights. Growing up in a somewhat-traditional Cajun kitchen, everything gets served over short-grained rice. Sub the short-grain for jasmine or even brown, and you've got instant comfort food in my opinion. Cooking traditional Thai food intimidates me, but cooking with Thai flavors is something I do often. Below is less of a recipe, and more of a technique for emptying out your CSA box. Any melange of vegetables, cooked with coconut milk and a few "special" spices, and you've got dinner (and lunch for the next day if you're lucky).Winter Thai-ish Curry
All of the ingredients and measurements are suggestions! This recipe works best when you use it as a clean-out technique. Use what you have!
Ingredients:
- 1 1/4 cups of rice. brown, jasmine, or otherwise. I always make extra rice: leftover and somewhat stale rices makes the best stir fry, and believe it or not, cooked rice freezes well. Steam it in the microwave, top with veggies and a fried egg for a back-pocket meal.
- 1 tablespoon of coconut oil or vegetable oil.1 onion or 1 bunch of JBG spring onions, chopped
- 1 tablespoon of ginger, grated. Fresh works best, but I usually use a tablespoon of this that stays stocked in my fridge.
- 2 cloves of garlic, minced.
- 3 carrots, washed and sliced (rounds or matchsticks!)
- About 1/2 cup of sweet potatoes, washed and cubed
- 1-2 cups of kale, collards, or spinach (even cabbage!), chopped.
- Broccoli? Cauliflower? Gold Beets? Kohlrabi? These could all get thrown in as well!
- 2 tablespoons of Thai curry paste
- 1 can of regular coconut milk (not the reduced fat bs). I try to keep this stocked in my pantry for this very dish.
- 1 tablespoon of soy sauce
- Several dashes of fish sauce
- A generous glug of rice vinegar or fresh lime juice (preferable)
- Garnish with cilantro, green onions, or even a sliced watermelon radish. Basil if it's in season.
2. To make the curry, cook your onions in the oil. After soft, add the ginger and garlic and cook for another half minute, or so.
3. Add your carrots and sweet potatoes to the onion mixture. Add a dash of water to help steam those veggies and to prevent burning. After your carrots are about half-way done, add your curry paste and stir to combine.
4. Next, plop in the coconut milk, as well as a 1/2-1 cup of water or broth and a skimpy tablespoon of sugar. Add your greens, and any remaining vegetables. Bring to a simmer, reduce heat, and cook until all vegetables are tender-to your liking. Shouldn't be longer than 20 minutes, probably somewhere around 10.
5. Remove pot from the heat, and add the magic! Season with lime juice, soy sauce, and fish sauce. If it needs more sweet, add some honey or agave nectar. More spice? Top with yellowbird, chili oil, or red pepper flakes.
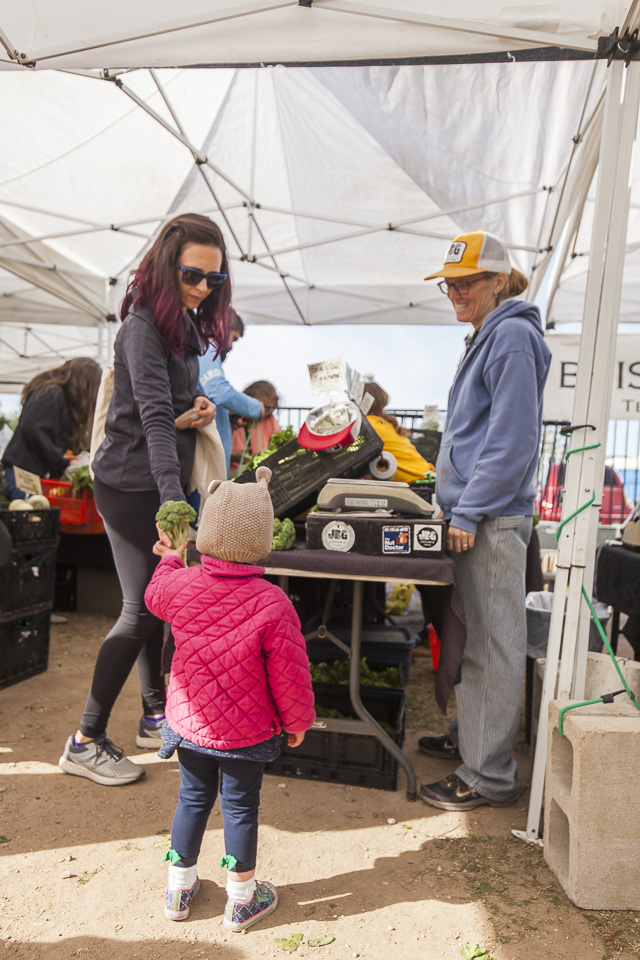 Fawn at the Farmers Market. Photo by Scott David Gordon.
FAWN (Farmers Market Manager):
It's soup season! Attached: creamy carrot soup recipe! Using my own veggie broth, which includes JBG carrots, green onions, parsley, turnips, lemongrass, and really any "leftover" parts of veggies like rutabaga peelings, broccoli stems, fennel stems, carrot tops! Etc.Creamy Carrot Soup
- 1 tbsp butter or vegetable oil
- 1 small onion, chopped
- 1 lb carrots, diced (about 6 medium carrots)
- 2 cups vegetable broth
- 2 tbsp raw white rice
- 1 tsp salt
- Pepper to taste
- ½ tsp crumbled dried thyme
- Bay leaf
- ½ cup of milk
- Sour cream
- 1 tbsp chopped chives for garnish
- Lemongrass and garlic
With a slotted spoon, transfer the carrots and rice to the container of a blender or food processor, leaving as much of the cooking liquid behind you as you can. Puree the mixture. Then, with the machine still running, pour the cooking liquid in through the feed tube or hole in the lid of the container. Blend until the soup is very smooth. Pour the blended soup back into the saucepan and bring to a boil, stirring. Add the milk and heat through without boiling.
Serve soup sprinkled with chopped chives.
**Makes 4 servings
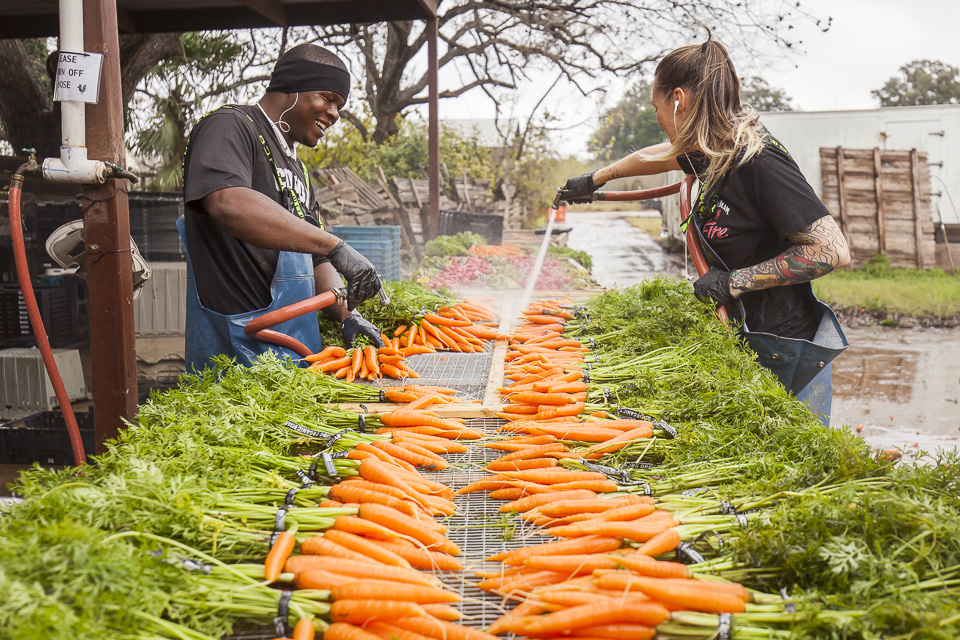 Taylor spraying down the veggies. Photo by Scott David Gordon.
TAYLOR (Spray Crew):
BBQ Black Eyed Pea Collard RollsBlack Eyed Pea Collard Rolls are hearty, healthy, tangy and plant-based! Bring on the BBQ y'all!
**Vegan + GF **Prep Time 45 minutes **Cook Time 25 minutes **Total Time 1 hour 10 minutes **Servings 8 -9 Rolls
**Author Traci York | Vanilla And Bean
Ingredients
For the Rolls:
- 2 Bunches of Collards enough for 9 Whole Large Leaves, and 3 C Chopped Collards (about
- 1.2lbs / 616g total)
- 1 tsp Coconut Oil
- 1 1/2 C (430g) Slow Cooked Black Eyed Peas drained*
- 2 C (150g) Crimini Mushrooms, stemmed and chopped in small dice
- 3 dashes of Tabasco, or to taste
- 1/8 tsp Salt
- 1/8 tsp Pepper
- 1 BBQ Sauce of choice, we used King's Hawaiian Kona Coffee BBQ Sauce
For the Filling:
Fill a large stockpot 2/3 full of water and bring to a boil. Rinse the collards well and chop off the stem at the base of all the collards. Choose the most intact 9 leaves available for the rolls, set aside. Chop enough of the remaining collards for 3 C packed to be used in the filling. Rinse these in a colander with plenty of water as collards tend to be a bit dirty. Set aside. Place the 9 whole collard leaves in the boiling water and boil for about 6 minutes. If you have a few whole leaves left, you can boil those too, using them to line the casserole dish. Carefully drain the whole leaves in a colander and rinse with cold water. Place a few kitchen towels or paper towels on the counter. Place each leaf, flat, on the towel. Be careful here as the leaves are tender and tear easily.
In a large sauté pan, melt down 1 Tbs of coconut oil. Cook the mushrooms on medium heat until softened and fragrant, stirring only occassionally for about 5 minutes, then add the chopped collards. Cook until just wilted. Turn the heat down to low and add the black eyed peas to the pan and stir to combine ingredients. Add 1/4 C (86g) of the BBQ sauce to the collard mixture. Now is a good time to adjust seasoning to taste. Include Tabasco and salt and pepper.
To Assemble the Rolls:
Preheat oven to 350F. Use pan spray (coconut oil) to coat the bottom and sides of a medium casserole dish. Line the casserole with any extra leaves. Take one collard leaf and place it flat on your work surface. Test the collard to see if the stem will easily bend, as if you're rolling up the collard. If not, gently slice the stem out of slice it so it's thinner. Take about 4 1/2 Tbs of the collard/mushroom/pea mixture and place it towards the base of the collard leaf. Very carefully, begin to roll up the collard leaf, folding the sides over the mixture while continuing to roll (think burrito). If the collard tears a bit, just keep folding and rolling. It will come together. Place the roll into the prepared casserole dish.
Repeat this process until all of the leaves and filling is used up. Cover the casserole dish with foil and bake for 25 minutes, or until the inside of each roll is heated throughly (use a fork to heat-test a roll). If they bake too long, the leaves will begin to lose their vibrant green color. Meanwhile, warm the remaining BBQ sauce in a pan on low for 5 minutes. Drizzle 1/2 of the remaining sauce on rolls and use the final 1/2 for anyone who wants extra! Serve with a side of Jalepenos Cheese Grits.
JALAPEÑO CHEESE GRITS
- 1/4 cup tamed jalapeños
- 1 Tablespoon butter
- 1 Tablespoon chopped garlic
- I box Quick Cooking Grits
- 1/2-1 cup shredded cheese of choice
- Fiesta Brand Jalapeño Salt (optional)
2. Add jalapeños and garlic and lightly smash with a fork into the butter.
3. Add box recommendations for preferred serving of chicken broth and Grits and cook according to box directions.
4. Once Grits have boiled and simmered, remove from heat and stir in cheese. Add Jalapeño Salt to taste and serve warm.
For a vegan option try substituting the broth with a Not Chik'n Bouillion cube mixed to package directions and Nutritional Yeast for the cheese.
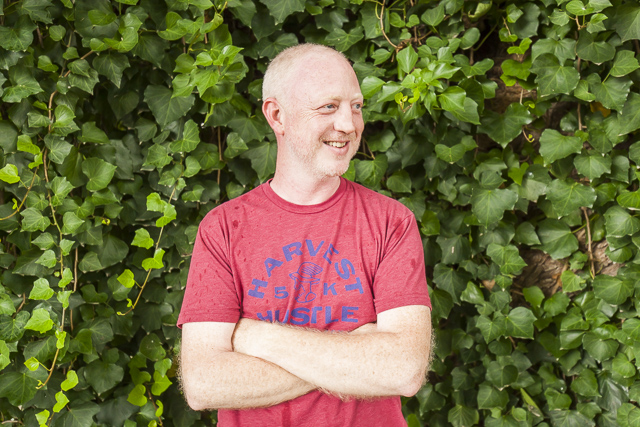 Mike Mo. Photo by Scott David Gordon.
MIKE MO (Wholesale Manager):
This Kohlrabi and Apple Salad by Cookie and Kate is incredible and super simple. Check it out here. It’s yummy.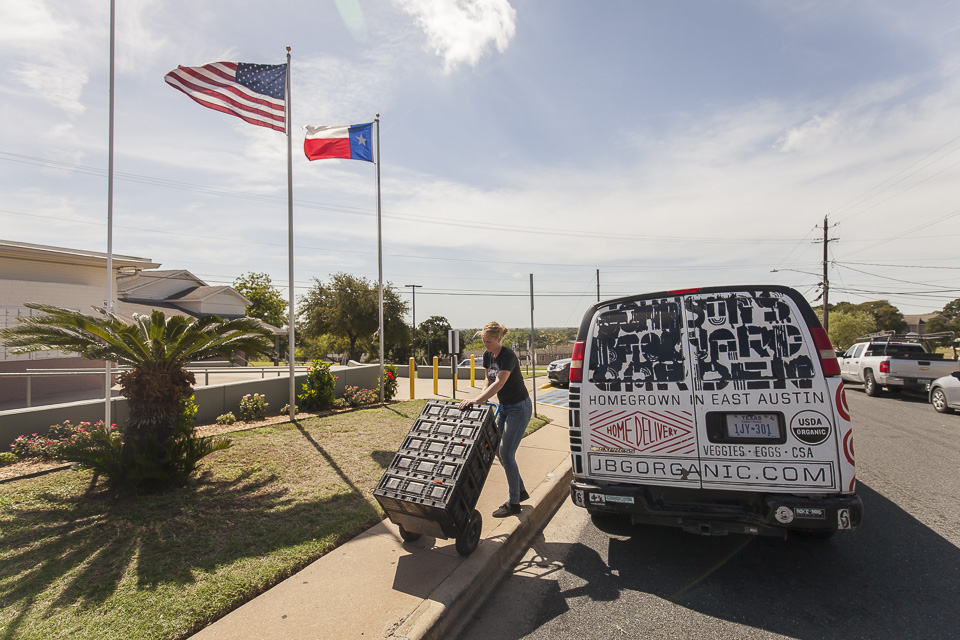 Casey working hard, delivering food donations. Photo by Scott David Gordon.
CASEY (Customer Service Extraordinaire):
My mom is a CSA member in Houston and she sent me a recipe she likes using our fennel and carrots.Carrot-Fennel Salad
**Makes 8 servings
**Prep time: 20 minutes
- 3 tbsp olive oil
- 3 tbsp white wine vinegar
- 2 tsp Dijon mustard
- ½ tsp salt
- ⅛ tsp black pepper
- 1 large fennel bulb or 2 small bulbs, very thinly sliced
- 1 lb carrots, shaved with vegetable peeler
- ½ cup shelled, unsalted pistachios
- ⅓ cup fresh parsley, chopped
Also, here's a bit about simple veggie fermenting:
Take a mix of whatever veggies you have on hand, I used broccoli, cauliflower, cabbage, carrots and garlic.
Add whatever seasoning you want. I did crushed red pepper and black pepper.
Add all the veggies and seasoning to a jar with a tight sealing lid.
Make a brine (enough to cover all the veggies) of a ratio of 2 cups of water to 1.5 Tbsp of sea salt.
Pour the brine into the jar and seal it tightly.
Let it sit at room temperature for 3-5 days. The longer it ferments, the more flavor and softer the veggies will be.
Be sure to de-gas the mason jar by opening it a couple times during the process since gas will build up inside the jar.
ENJOY!
Your commitment provides so much for the farm - upfront costs for seeds, fuel, and labor to grow the best organic vegetables around, improvements to our CSA offerings like customization and flex scheduling, and wiggle room to invest in larger improvements. There are so many more projects we'd love to take on to continue improving, but we can't do it without your support. Here's to a healthy and happy 2018! 'Til next time!
EASY BLACK EYED PEAS & COLLARD GREENS
01/03/18 — Heydon Hatcher
Recipe and Photo by Megan Winfrey
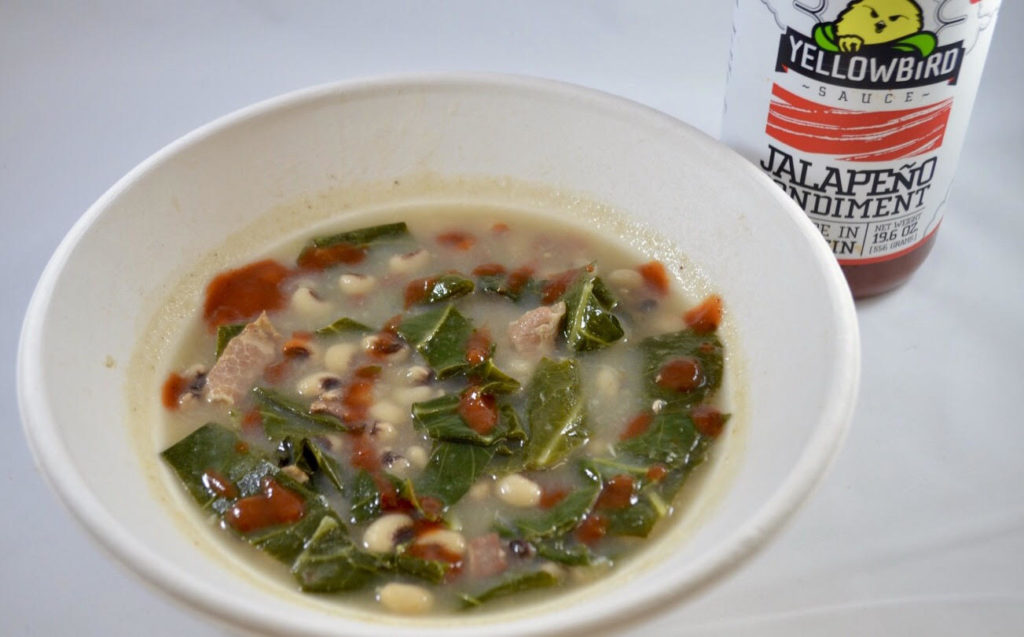
Just one peek at social media on January 1st and everyone's posting the same thing. Big ole bowls of black eyed peas and greens, cornbread and hot sauce waiting in the wings. Legend says that black eyed peas bring luck, greens bring wealth, and pork keeps you moving forward (like a pig does when foraging). I look forward to making this meal on the first day of the year, and enjoying the leftovers all week long. What follows is the easiest peas and greens recipe in the entire world, and it will taste like it took hours to make. By all means, use dried peas and ham hock if possible - but keep this recipe in your back pocket for that inevitable January 1st when you simply 'aint got time for that. Happy 2018!
Easy Black Eyed Peas & Collard Greens![]()
In a medium-large dutch oven, cook the chopped bacon until crispy. Transfer to a paper towel to drain.
Cook the onion, celery, and garlic in the bacon drippings until tender.
Add the broth, peas, salt and pepper and bring to a boil.
Lower the heat to a simmer and add the bacon. Cover and cook for about 45 minutes, until the peas are tender and can be easily smashed with the back of a fork.
Add the chopped collard greens, stir well, adjust seasoning to taste, cover and let simmer for another 10 minutes.
Garnish with the hot sauce of your choice.
Just one peek at social media on January 1st and everyone's posting the same thing. Big ole bowls of black eyed peas and greens, cornbread and hot sauce waiting in the wings. Legend says that black eyed peas bring luck, greens bring wealth, and pork keeps you moving forward (like a pig does when foraging). I look forward to making this meal on the first day of the year, and enjoying the leftovers all week long. What follows is the easiest peas and greens recipe in the entire world, and it will taste like it took hours to make. By all means, use dried peas and ham hock if possible - but keep this recipe in your back pocket for that inevitable January 1st when you simply 'aint got time for that. Happy 2018!
Easy Black Eyed Peas & Collard Greens
- 4 cups frozen black eyed peas
- 5 slices of bacon, chopped
- 1 large onion, chopped
- 1 celery stalk, diced
- 4 cloves garlic, minced
- 6 cups chicken broth
- salt and black pepper to taste
- 1 bunch collard greens, stems removed and rough chopped
In a medium-large dutch oven, cook the chopped bacon until crispy. Transfer to a paper towel to drain.
Cook the onion, celery, and garlic in the bacon drippings until tender.
Add the broth, peas, salt and pepper and bring to a boil.
Lower the heat to a simmer and add the bacon. Cover and cook for about 45 minutes, until the peas are tender and can be easily smashed with the back of a fork.
Add the chopped collard greens, stir well, adjust seasoning to taste, cover and let simmer for another 10 minutes.
Garnish with the hot sauce of your choice.
CSA BOX CONTENTS WEEK OF JAN 1ST
01/02/18 — Scott
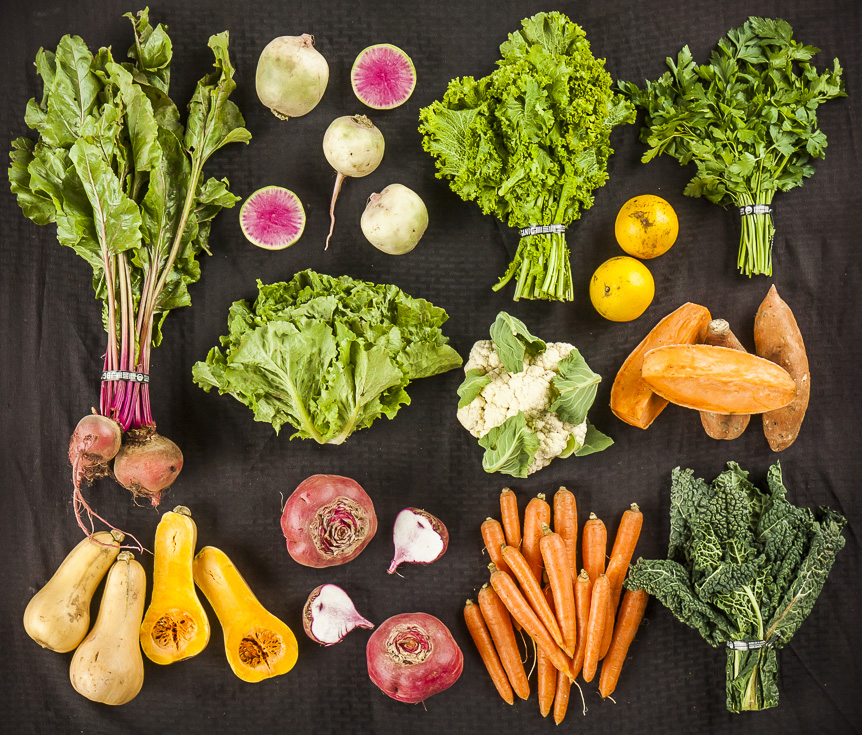 CSA Box Contents Week of Jan 1st
Large Box
Bok Choy
Broccoli
Carrot, Orange
Citrus, Mixed
Garlic, Green
Greens, Arugula
Greens, Chard, Rainbow
Greens, Kale, Curly
Greens, Spinach
Herb, Cilantro
Kohlrabi, Purple
Turnip, Rutabaga
Bok Choy
Broccoli
Carrot, Orange
Citrus, Mixed
Garlic, Green
Greens, Arugula
Greens, Chard, Rainbow
Greens, Kale, Curly
Greens, Spinach
Herb, Cilantro
Kohlrabi, Purple
Turnip, Rutabaga
Medium Box
Beet, Red
Bok Choy
Broccoli
Carrot, Orange
Greens, Collards
Greens, Spinach
Herb, Cilantro
Kohlrabi, Purple
Lettuce, Braising Mix
Turnip, Rutabaga
Beet, Red
Bok Choy
Broccoli
Carrot, Orange
Greens, Collards
Greens, Spinach
Herb, Cilantro
Kohlrabi, Purple
Lettuce, Braising Mix
Turnip, Rutabaga
Small Box
Broccoli
Cabbage
Carrot, Orange
Citrus, Mixed
Garlic, Green
Greens, Collards
Turnip, Rutabaga
Broccoli
Cabbage
Carrot, Orange
Citrus, Mixed
Garlic, Green
Greens, Collards
Turnip, Rutabaga
Individual Box
Beet, Red
Carrot, Orange
Greens, Arugula
Greens, Collards
Radish, Purple Daikon
Beet, Red
Carrot, Orange
Greens, Arugula
Greens, Collards
Radish, Purple Daikon