
 0 ITEMS IN CART
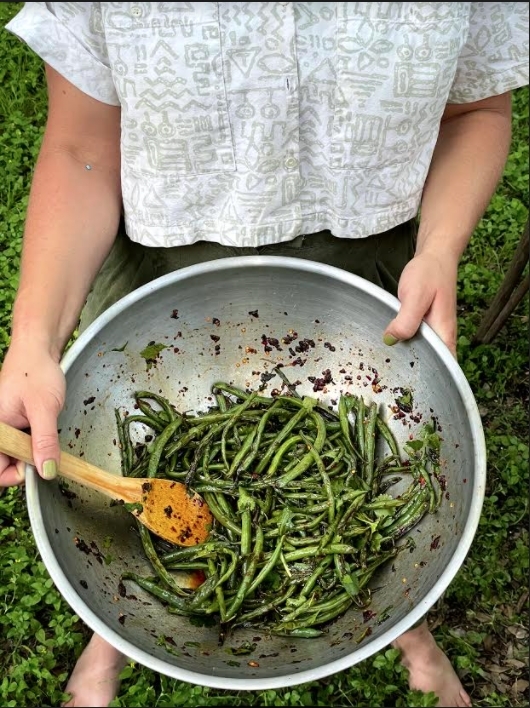
ADA'S BLISTERED GREEN BEANS
06/03/21 — Ada Broussard
 By Heydon
I have always loved this recipe. When I was first getting to know Ada, she popped by with this “thrown-together” (please note: her “thrown-together” usually translates to beautifully impressive and delicious beyond belief) and epically delightful dish. It was perfectly spicy, crispy, fresh - everything was just right. It’s a banger of a side dish, and likely will steal the show at any dinner. I haven’t been able to rid my mind of it since that day years ago, and luckily this weekend she made my dreams come true by recreating it and allowing me to document the process. It’s so exciting and life-giving to be with friends again - cooking, sharing a table, and enjoying each other’s company.
Green beans have a quick season - so, this recipe is an awesome way to enjoy these special, early-summer gems. We know green beans are great stir-fried in a hot wok, but an easier route is to throw them in a broiler as you’ll see below. Ada tells me the not-so-secret, secret ingredient is the Chili Crisp - a Chinese condiment featuring onions, peppercorns, chili, and garlic fried in oil. Chili crisp is wonderful to keep in the fridge - it’s packed with spicy flavor and the most perfect crispy crunchies. Ada's jar came from MT Supermarket in Central North Austin.
Ingredients:
- A bag of JBG green beans
- Peanut oil (or another neutral oil)
- White wine vinegar (or another acid)
- Spicy chili crisp (we used Laoganma Spicy Chili Crisp)
- Salt
- Sugar (or another sweet substitute)
- Cilantro (or another fresh herb you enjoy)
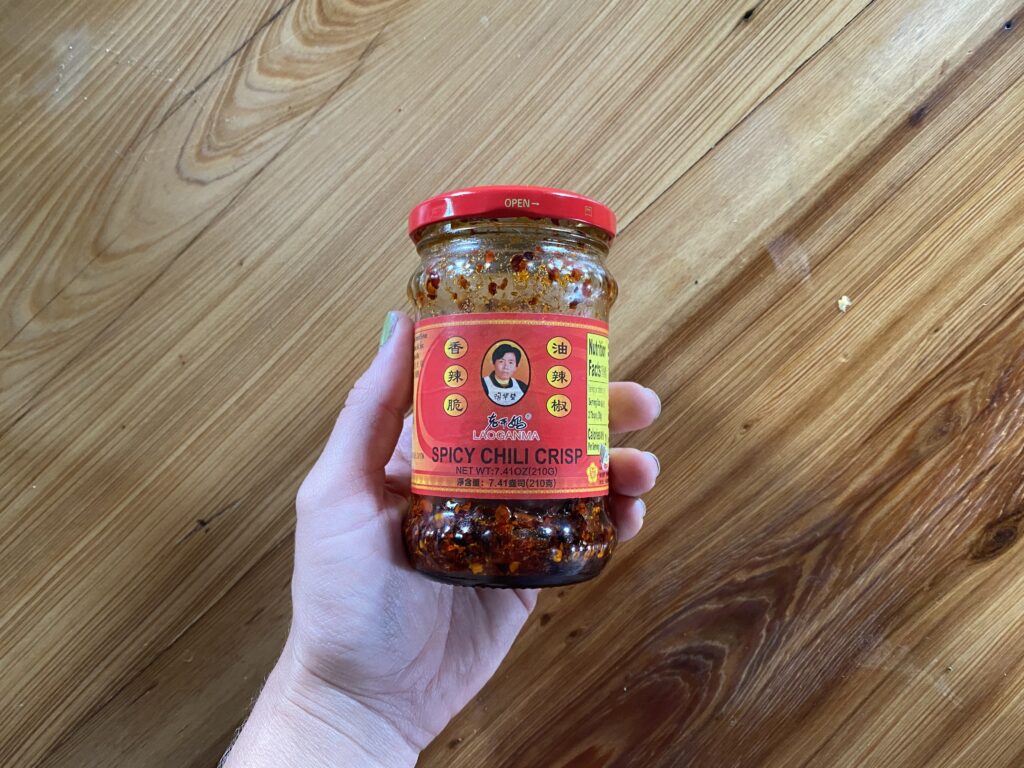 Lao Gan Ma, one of the most popular brands of Chili Crisp out there.
Wash and dry the green beans. Make sure they are all the way dry… that way the oil sticks. Toss them with a neutral oil like peanut oil. Toss them enough to coat the beans and spread them out on a sheet pan. Preheat the broiler and pop them in an oven. The timing will vary on the strength of your oven + broiler. We are aiming for a deliciously blistered green bean - not burnt. Let them get some color.
While they are broiling, put a nice giant generous scoop of chili crisp - might be even more than you think - in a big bowl. Because we want to achieve a sweet & sour green bean, mix some sugar (we used granulated sugar - but you could use honey or brown sugar). If it’s feeling too thick - add a tiny bit of peanut oil or whatever neutral oil you are utilizing to make it more of a dressing. Add some kind of salt to the mix. We used salt because we didn’t have soy, but soy would work wonderfully. Last but not least, add some acid! We used white wine vinegar, but rice vinegar or a bunch of lime juice would be ideal. This is a loose recipe with no set measurements… taste test the mixture. If it’s super spicy and you want it sweeter, add more sugar. Don’t shy away from the acid! Make sure to salt them well. As soon as the green beans are done and while they are still piping hot, put them in your big bowl full of dressing and stir it all together. Sprinkle it with a fresh herb like cilantro and ENJOY!
THE SOPPY TRUTH ABOUT ALL THIS RAIN
06/04/21 — Ada Broussard
 We're feeling very saturated over here.
Hello blog readers and CSA Members!
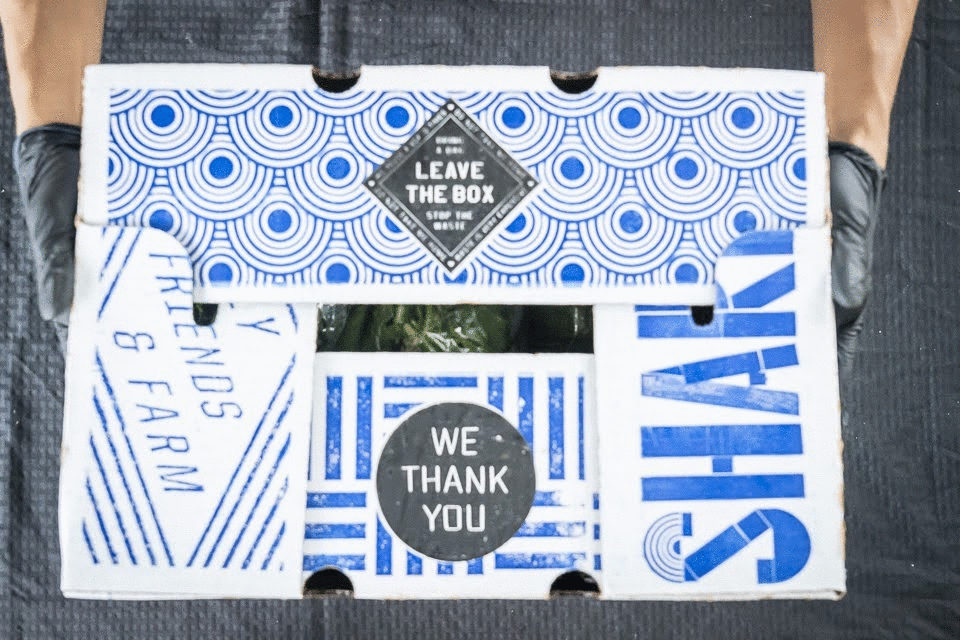
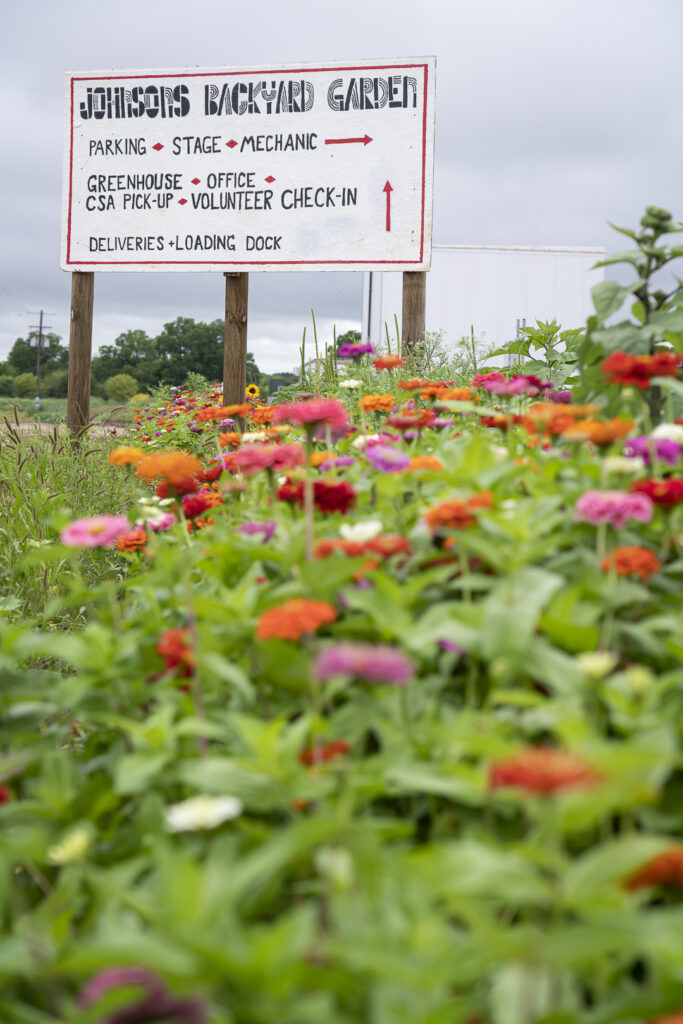
Before we jump in, we have a special note about this Saturday’s farmstand. We have flowers!!! Pick your own bouquet, or snag one at the Garfield Farmstand that we’ve already harvested. CSA Members: As promised, you can pick a bouquet for free! And if you’re not a member, bunches of zinnias or sunflowers are only $5. Also! If you visit our Garfield Farmstand this Saturday, we’re running a special deal: for every $5 you spend, you get 1 free transplant. Transplant deal for this weekend only.
No onto business. This week on the blog, we wanted to take a moment and talk about the recent weather, and how it affects the farm, generally, and the CSA, specifically.
If you’re a CSA Member, you may have noticed some inconsistencies over the past couple of weeks between the box contents listed on our website and the box contents in your actual box. (Members, how has this affected you? Let us know by taking this survey here.) CSA Member or not, you may have also noticed things have been pretty wet as of late. The two instances are intimately connected.
Let us back up and start by explaining how we choose the CSA box contents each week. At the risk of sounding like overly dramatic farmers, we can’t emphasize enough how much consideration we put into this process. The job of planning one week’s box contents truthfully begins about 9 months before the box is ever packed when we decide on what varieties of seeds we’d like to purchase. These decisions are a team-effort and are based on years of historical data, customers’ feedback, the specific advantages and limitations of our croppable land, as well as a healthy sprinkling of farmer intuition. This process gives us the general blueprint of what vegetables we *hope* to grow, during which months. That’s step one.
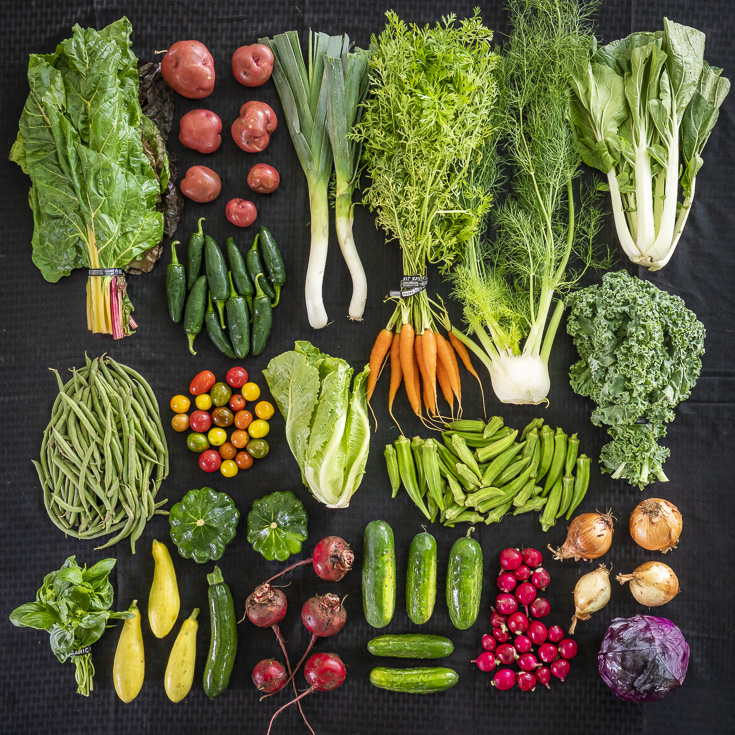
 Choosing CSA box contents is a task we take very seriously. Watermelon and eggplant coming soon to a share near you.
The next major step in CSA box-content planning happens about a month before the box’s pack date. This content mapping is based on which crops are currently growing, their health, and any logistical considerations - is the root harvester broken? Do we have enough labor to tackle a tedious crop like green beans? Are the pests minding their own business?
When it comes time to settle on the final version of a particular week’s box contents, Andrew, our CSA Packing Manager, consults with Tracy, our Barn Manager. The two make a plan, making sure that one week’s contents isn’t too similar to the week before, with a conscious effort to include a combination of crops that feel different from each other and that check different boxes like “a potato! Everyone knows what to do with me!” and “whoa! Look at this alien-like kohlrabi bulb!”. Andrew and Tracy take into consideration the needs of other departments, how things will fit together in a box, and check with A to see if people are craving something specific.
You may be wondering, though, how exactly they know what vegetables to include in the box? It’s not usually straightforward. On one hand, telling you what exactly will be in the boxes is one of the riskiest things we can do at the farm because (honest little secret) so much of it is based on a wish and a prayer. When Tracy visits the farm each week and scouts the fields, he makes note of all the fruit that look like it will be ready for harvest the following week. Unlike a grocery store, we do not have a ready-to-go inventory of endless vegetables. We harvest crops fresh for the CSA, and so much of our “inventory” lives in the field where it’s subject to… everything.
Most of the time, we can look at a row of zucchini at the end of one week, see that it’s covered in flowers, and make an educated guess as to how many pounds of zucchini we can harvest per row. So much of our box planning is based off of projections of how a crop will mature and look at the time we need to harvest it, which is just before it gets put into your box.
As you might imagine, these ‘best-guesses’ are subject to change. These past few weeks, with the incessant rain, the muddy conditions, and the inability to get equipment in the fields… even our most meticulously laid plans seem pointless. The weather has made itself known, and we bend and adapt our plans because this is farming, after all. Isn’t it exciting?!
 Rain boots - sponsor us.
It seems like the rain has been nonstop for the past 4 weeks. We feel saturated. Here are a few of the ways the weather affects our farm:
Vegetables: Dark and gloomy days slow down the ripening and maturation of many of our crops. Vegetables need sun to grow, and consistently cloudy days can really pump the brakes. Most of our summer vegetables need 6-8 hours of sunlight a day in order to initiate the flowering process. Consistent temps of about 80 degrees speeds this process along, too. When the sun doesn’t poke out for days on end, and for only a few hours at a time, the fruiting process is stymied. This is what is happening with several of our crops! The foliage is big and beautiful, but the flowers, few.
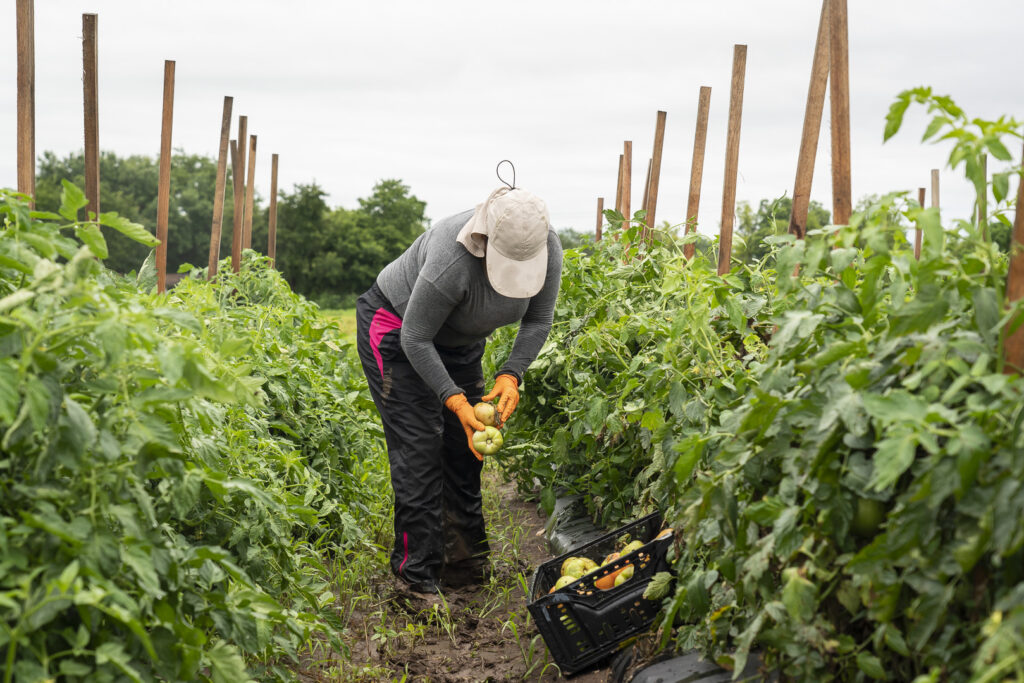
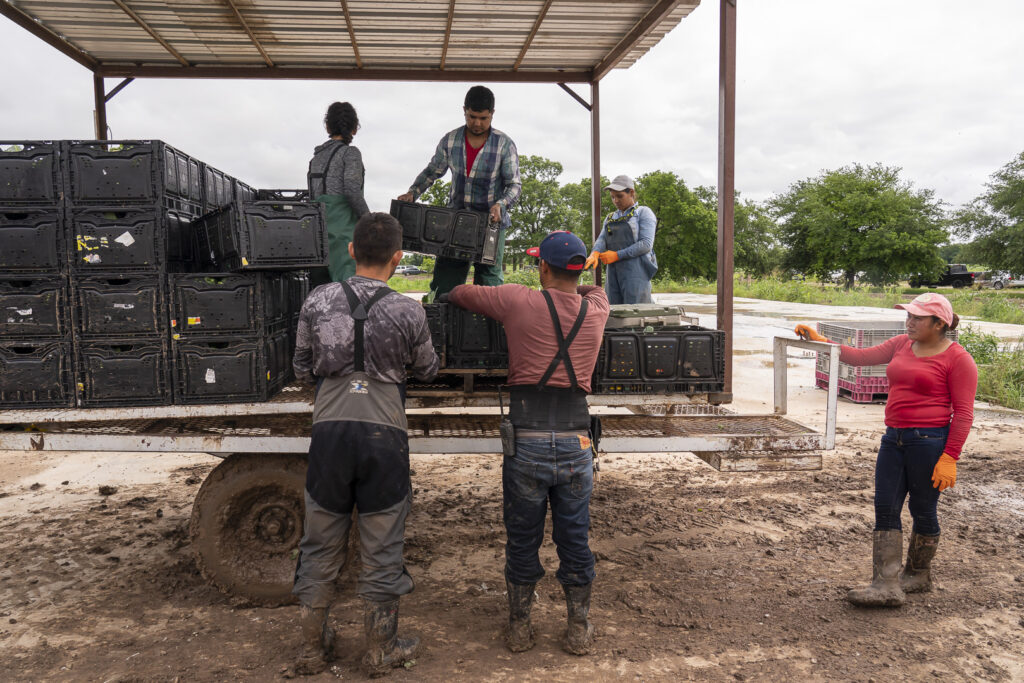
Labor: The farm is muddy, and everything takes longer in the rain and mud. The simple task of walking from the harvest trailer to the end of the row is made more difficult by the ankle-weights of mud tethered to your feet. Now imagine doing that carrying a 45 pound bin of vegetables… If you can’t get the trailer to you, you have to go to the trailer. Earlier this week, strong gusts of wind blew over nearly every one of our tomato cages! Falling rain splashes dirt up onto crops like greens, rendering them a chore to clean. Instead of spraying off light, crumbly dirt from carrots, we’re washing roots that have a thick layer of mud caked on them. Even deliveries take longer, and despite the best crew, and the best time management, some harvests just can’t get done when we planned because everything is taking too long. During days like this, we’re often faced with a tricky dilemma: divert our planting crew to harvest duty and make sure that we fulfill the current veggie demands? Of course, if we choose this route, we are also shooting ourselves in the foot for future availability later this summer. If things don’t get planted, they won’t turn into crops.
 Our farm is divided into grids and there are several permanent roads, like this one. During wet conditions, they endure a lot of impact and it takes a true nija... or a very powerful tractor... to navigate them. Even the best operators can still get stuck.
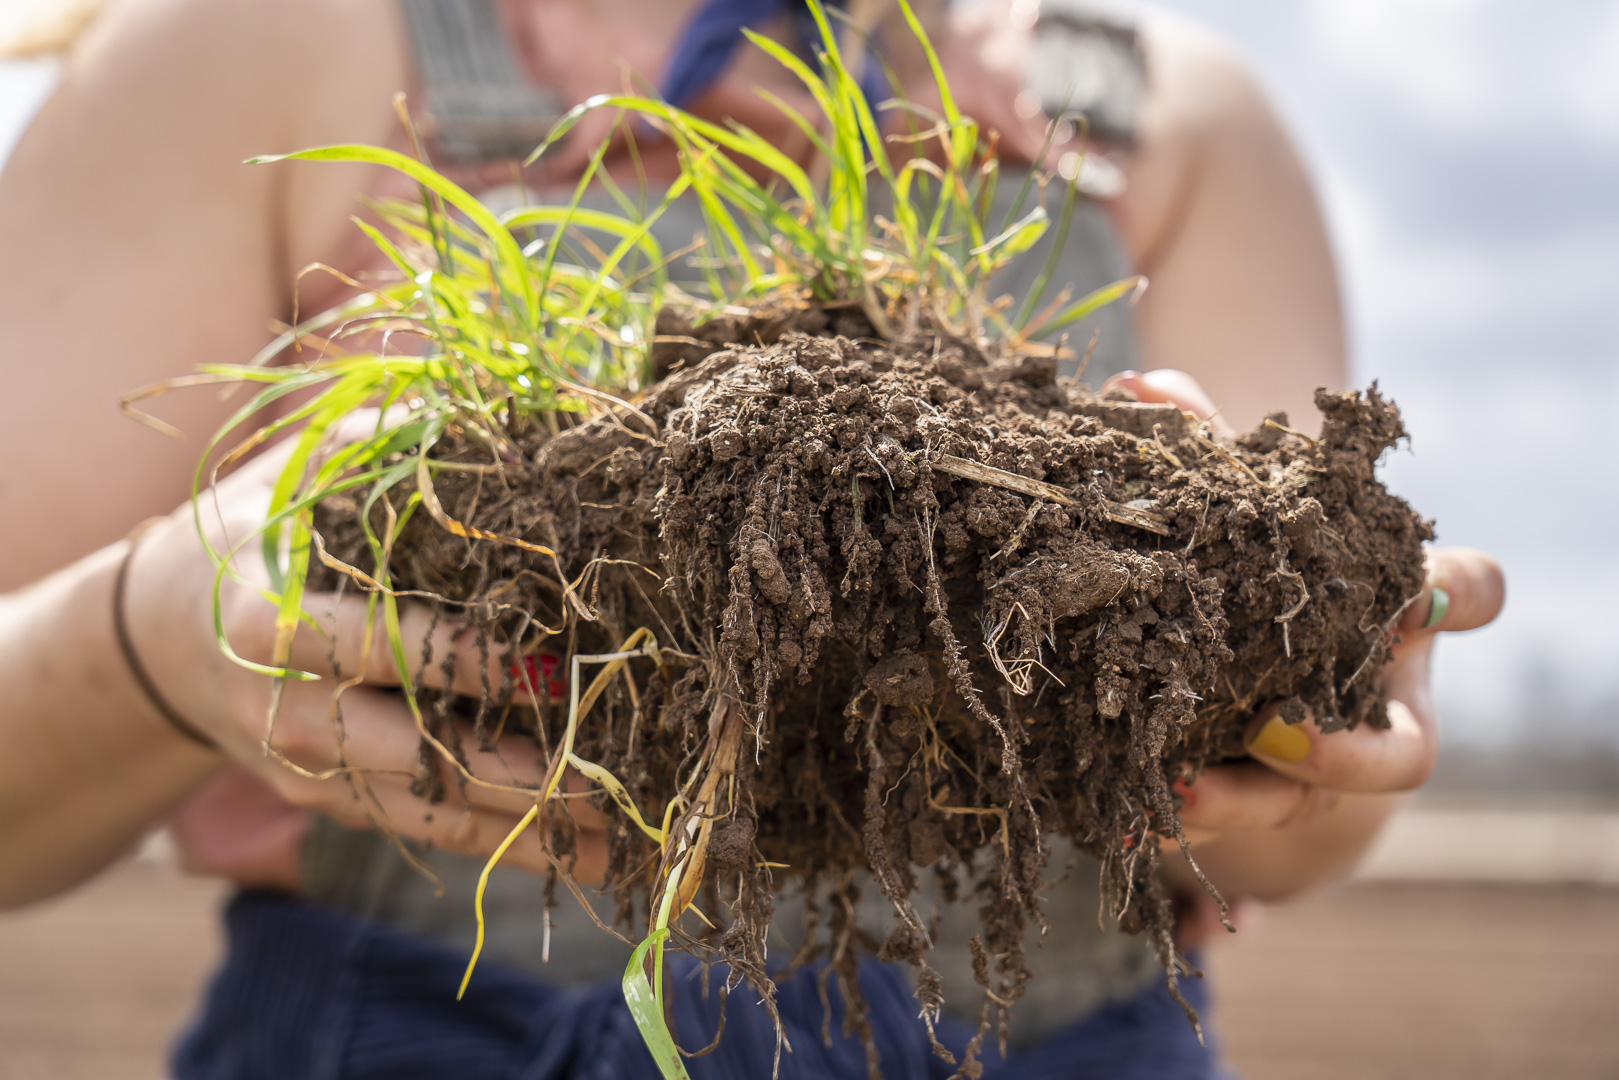
Equipment: When our fields are wet, we cannot work them with tractors. Not only would our tillage equipment not perform under these conditions, but also, when you put heavy machinery on wet soil, you run the risk of compacting the ground, rendering our lovely loose dirt into a dense dilemma. Trucks can sink in an unexpectedly muddy area, and everything has to come to a halt to unstuck the stuck. Because we can’t navigate through the farm with tractors and harvest trailers in the same way that we can under dry conditions, we are incredibly behind on planting schedules, for example. It’s noteworthy that after heavy rain like this, we need at least 3-4 very sunny days to dry things out and make our equipment useful again. In other words, it’s not just the rainy days that slow things down, it’s the wet conditions that follow too.
 The Landini loaded with mud. In conditions like this, we pressure wash the tractors at the end of every day.
 The mud can feel inescapable.
Pests: In soppy conditions like this when we have trouble getting into the fields, some crops rot on the vine before we can pick them. We’re looking at you, zucchini. This is a breeding ground for pests, who are happy with the miserable conditions and do their best to procreate amid our problems. As soon as the sun peeks out and new fruit is ready, unfortunately a new generation of pests will also be ready to picnic away.
Sharing your projected box contents is important to us. We know that having a general idea of your CSA contents is useful to plan meals and grocery shop. Most of the time, we’re able to hit that mark, fairly accurately. Right now? In the Central Texas monsoon season? We’re doing our best. Please know that when we decide to put something in your CSA share other than what we said we would, it is a difficult decision, impacted by many circumstances. And while we know many of you are understanding of our predicament, we do look forward to sunny and predictable days when we can deliver on exactly what we say we will. That’s how it’s supposed to be, and you’re right to expect that from us… most of the time. The other times? Just remember that we are a farm, and the plants we’re trying to grow are sitting out there in a field… vulnerable to weather events.
Cheers to sunnier days ahead. Thanks for your patience. Tomatoes are coming!
Love, Your appreciative farmers
P.s. CSA Members (and lapsed members) - here is a link to the survey we’re asking you to take. We’ll raffle off some merch to all members who take the survey! Thanks for your help!
 All the soppy mud aside, there are flowers!!!!
PHOTOS FROM THE FARM: 6.4.21
06/04/21 — Ada Broussard
 Scott sure knows how to take a box photo. Though photos like this of a farm's harvest are now pretty common... Scott really pioneered this style of photo for JBG some 11 or 12 years ago.
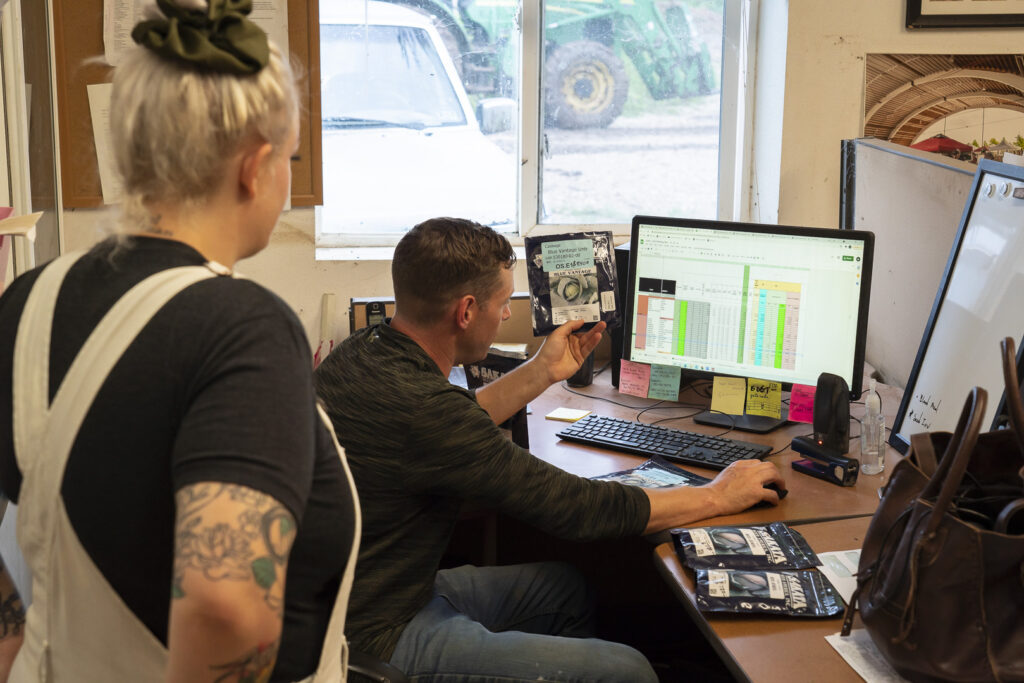 Jack giving some training to Jamie Lee, showing her 1 of our billion spreadsheets that make the farm go, go, go. Photo by Scott David Gordon.
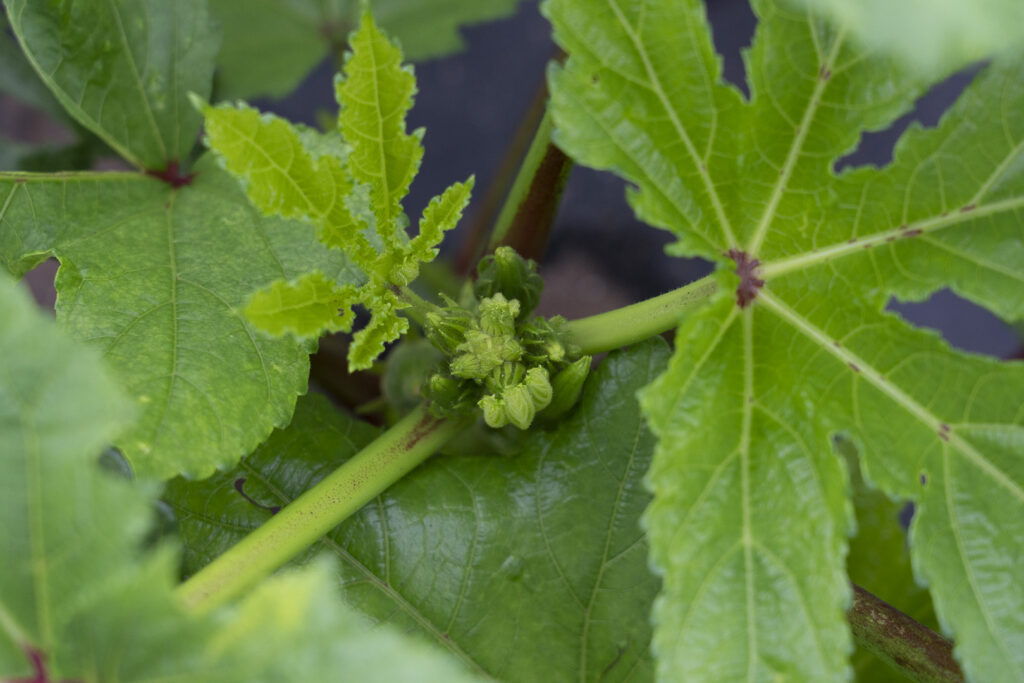 Burgeoning okra, from above. Photo by Scott David Gordon.
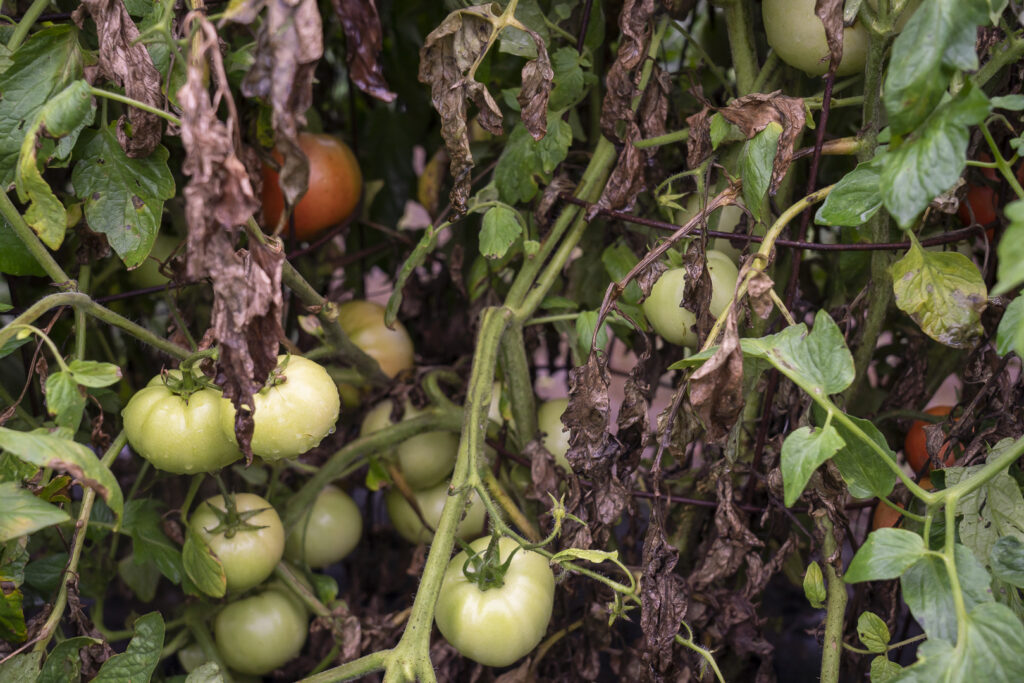 Rain kissed green tomatoes, with a few blushing reds hidden deep. Photo by Scott David Gordon.
 Now isn't that a sight. We're waiting on warmer temps and sunnier days to turn all of these green tomatoes RED! Photo by Scott David Gordon.
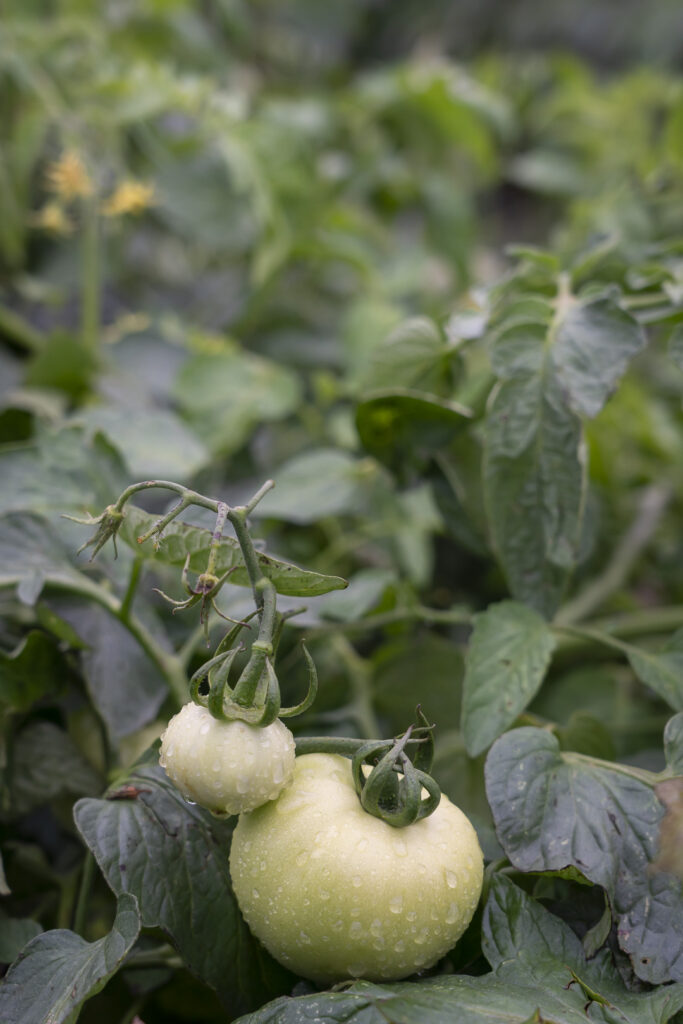
 Fried green tomatoes, anyone? Photo by Scott David Gordon.
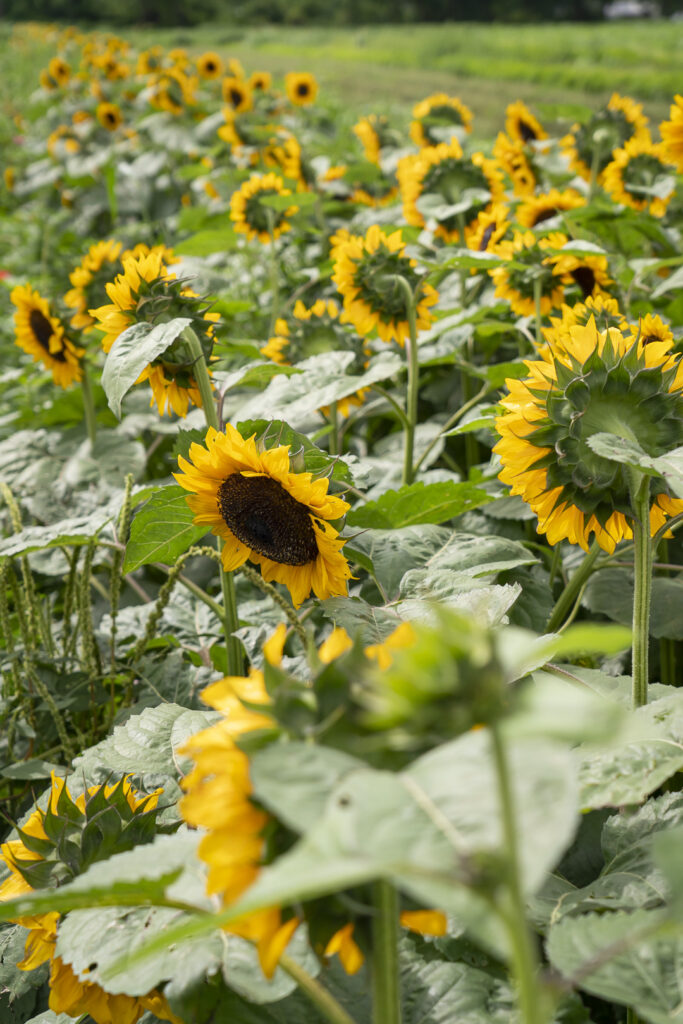
 Behold, the flowers! We planted zinnas and sunflowers along our entrance road. It's unclear who will delight in them more: customers, or our staff who have a cheery welcome to work everyday. Photo by Scott David Gordon.
 Zinnias are in bloom! Sunflowers are beginning their debut! Come to the Farmstand and help us pick these! Photo by Scott David Gordon.
 This is a color pallet we can get behind. Bright and vibrant, just like the summer ahead. Photo by Scott David Gordon.
 The first blooms are always the prettiest. Photo by Scott David Gordon.
 Pollinators, rejoice! Photo by Scott David Gordon.
 Sunflowers, but furry. Photo by Scott David Gordon.
 A black hole of a sunflower. Photo by Scott David Gordon.
 A mesmerizing shot, just before boom. Photo by Scott David Gordon.
 Oh, hello! Photo by Scott David Gordon.
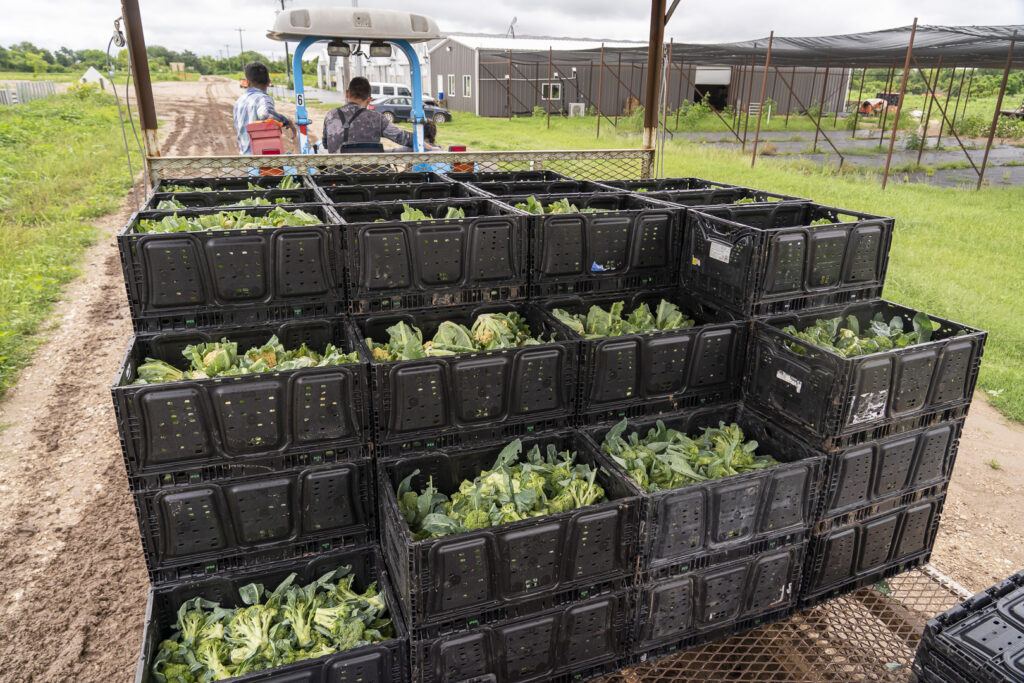 We promise we grow more than flowers... broccoli and cauliflower, too. Photo by Scott David Gordon.
 The theme of the week? Mud. Photo by Scott David Gordon.
 Spring cabbage looking beautiful. Photo by Scott David Gordon.
CSA BOX CONTENTS WEEK OF JUNE 7TH
06/04/21 — Farm
 CSA Box Contents Week of Jun 7th
Large:
Potato
Carrot
Cucumber
Sweet Pepper
Tomato
Harvest Highlight
Cabbage
Leek
Onion
Beet
Herb
Farmer's Choice Green
CSA BOX CONTENTS WEEK OF JUNE 7TH
06/04/21 — Farm
CSA Box Contents Week of Jun 7th
Individual: Potato, Carrot, Cucumber, Sweet Pepper, Tomato
Small: Potato, White Japanese Turnip, Cucumber, Sweet Pepper, Tomato, Onion, Leeks
Medium: Potato, Cucumber, Sweet Pepper, Tomato, Harvest Highlight, Beet, Herb, Radish, Farmer's Choic Green, White Japanese Turnip
Large: Potato, Carrot, Cucumber, Sweet Pepper, Tomato, Harvest Highlight, Cabbage, Leek, Onion, Beet, Herb, Farmer's Choice Green
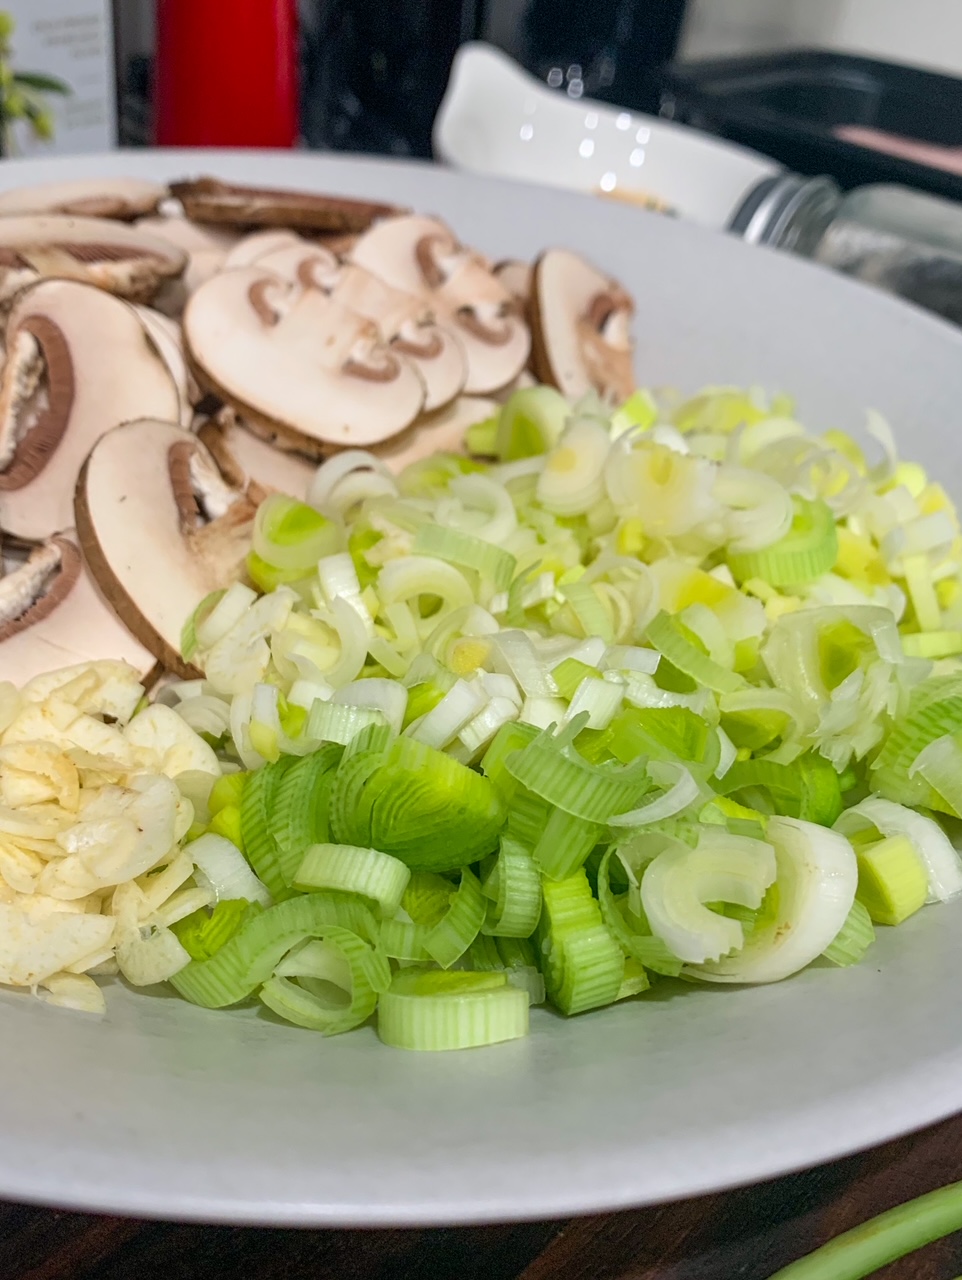
CREAMY LEEK AND MUSHROOM PASTA
06/10/21 — Ada Broussard
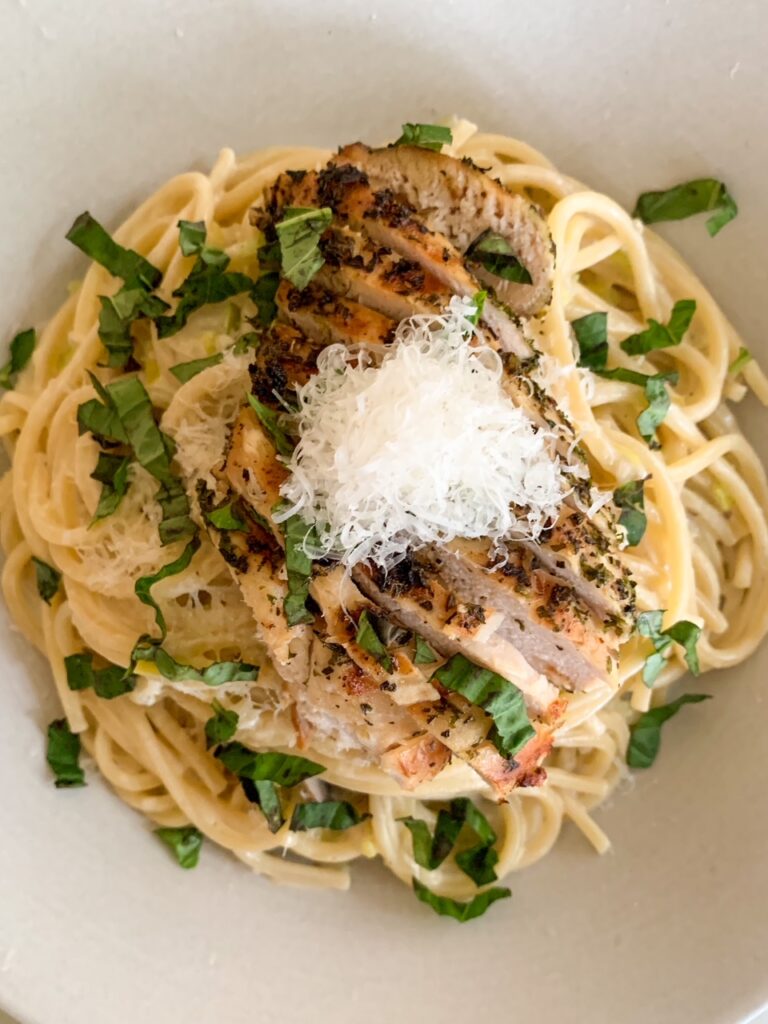 Photo and recipe by The Migoni Kitchen.
Author: The Migoni Kitchen Servings: 2
Leeks are one of our favorite JBG veggies - they are super versatile. We love a good potato leek soup, but also use these in quiches or frittatas, eat the simply grilled or sauteed, or diced up into a pasta dish like this one!
We typically like to have a quick weeknight pasta dish in our weekly rotation and this fits in perfectly. You can always customize it to your liking. Feel free to omit the chicken if you prefer a vegetarian option and increase the amount of mushrooms. You can really use any pasta you like. Top it off with your preferred fresh herbs - we got some basil in our box this week so we opted for that. Easy tasty dinner!
Ingredients:
- 3 tbsp EVOO
- 2 Leeks - Thinly sliced
- 2 cloves Garlic - Thinly sliced
- 2 cups Baby bella or button mushrooms - sliced
- 1 cup Heavy Cream
- ½ tsp White Pepper
- 8 oz. Spaghetti
- 2 Chicken Breasts
- 1 tbsp dried parsley
- 1 tsp dried basil
- ½ tsp dried oregano
- ½ tsp garlic powder
- ½ tsp black pepper
- 1.5 tbsp kosher salt
- Fresh basil or parsley
- Parmesan Cheese
Instructions:
- In a small bowl, combine the dried basil, dried oregano, garlic powder, black pepper, and 1 tbsp of kosher salt.
- Rub the chicken breast with 1 tbsp of EVOO then coat the chicken breast generously with herb mix.
- Grill the chicken breast until fully cooked then place in the oven to keep warm.
- Heat a large pot of salted water.
- While you wait for the water to boil, in a large pan heat the remaining 2 tablespoons of EVOO.
- Add the garlic and leeks and cook for 1 minute, then add the mushrooms and continue cooking for another 5 minutes - stir frequently.
- Add the cream, white pepper, and ½ tbsp kosher salt to cooked vegetables. Reduce heat and allow sauce to simmer and reduce until you finish cooking the pasta.
- While the sauce is simmering, cook the pasta 2 minutes less than the package recommendation so that the pasta is still a bit crunchy.
- Remove the cooked pasta and 1 cup of pasta water and add it to the sauce. Increase heat and stir vigorously until the sauce thickens and evenly coats the pasta (about 4-5 minutes).
- Plate pasta in a large bowl, topped with the sliced chicken, parmesan, and fresh herbs.
5 HELPFUL TIPS TO MAKE THE POST OF YOUR CSA BOX
06/11/21 — Ada Broussard
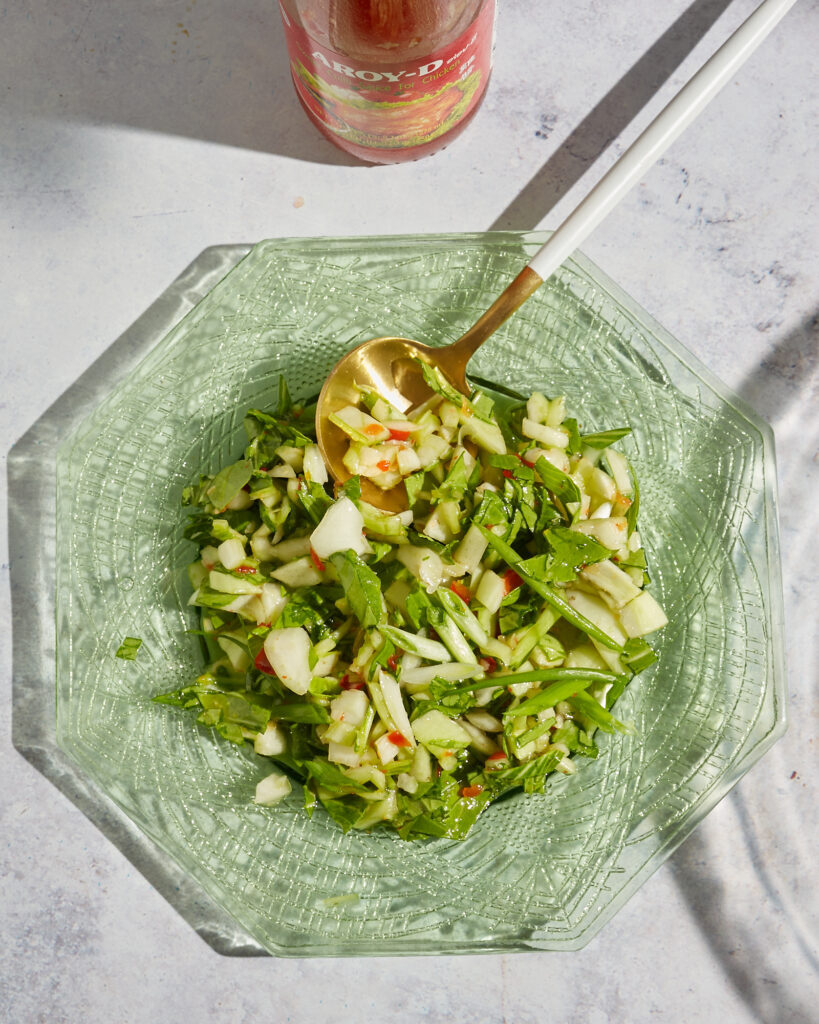 This bok choy salad by recipe developer Mackenzie s perfect as is. When the bok choy disappears from your box,, substitute it all together for cucumber or raw zucchini, and you have a more summery-version. When in doubt, make a raw salad with your CSA veggies. Recipe and photo by Mackenzie Smith Kelley.
If you are not used to getting produce delivered regularly it can feel a little overwhelming at first. It’s nothing like your TP subscription with Amazon. That stuff can pile up in your garage no problem. But the beautiful produce from your JBG Organic CSA membership is — gasp — perishable!
Panic sets in. What do I do with all these veggies? How do I store them? What will I cook with them?
Never fear. Follow me as I “unbox” my veggies and you will find tips to help you make the most of your CSA share.
1. Arm Yourself With Information
When I get my box, it’s like getting a new jigsaw puzzle. I open it right away and start sorting all the pieces. Depending on your puzzle personality you may start sorting by color, or straight edges. You start to build knowing you can look at the photo on the box if you get stuck.
Well, JBG has taken care to build a really helpful website. Visit their veggie guide page to get advice on how to store and prepare each vegetable. In fact, you can just keep this page open in your browser as you go through your box and look up what to do with each item as needed. Just like the cover of that puzzle box.
2. Take Inventory and Write Down Some Ideas
First, I take everything out and take inventory. Because I know the box is coming, I make sure not to overdo it at the supermarket in the days leading up to the delivery. It’s easy to plan for this if you are a CSA box-stalker like me, because you can find what is coming in your share with their handy seasonal chart, and the guide which shows you the box week by week.
Ok. Here we go, let’s open the box.
Ooohhh!!!! — clappy hands emoji — I am super excited to see baby bok choi! I grab a few of these bright orange carrots, run to the sink, and wash them. I munch on the super sweet carrots while I write down a list of ideas of what to make with my new toys… I mean, veggies.
Making a list of ideas on note paper that you can stick on your fridge with a magnet is a great first step. It not only helps you use up your veggies, but it also helps you menu plan your week ahead.
Take inventory. Which veggies do you know well? Which ones stump you? Protip: Simply google the vegetable that stumps you in addition to any other ingredients in your fridge that need using up. This is an easy way to get some recipe inspiration. For this box, for example, you might search "squash, peppers, eggs". Only google knows what recipe you might cook!
3. Let The Veggies Lead the Way
Let’s see what’s inside. Parsley and cilantro right away screams chimichurri to me. I could put chimichurri on anything. My recipe is similar to this one from JBG, with the addition of a teaspoon (or four) of finely minced capers. Also, I hand-chop. I like the texture better. Leafy herbs are super delicate so I know I want to wash those, trim the very bottom of the stems and put them in a jar of water. Mañana we chimichurri.
Red and green lettuce came in a bag that I toss in the fridge without looking. We eat lettuce every day. It’ll be gone before I know it. I could pickle the radishes but I love to slice and use those as confetti. So I just wash them. (And I remember to toss the green basket-y thing they came in to return with my box. Gotta reuse that!)
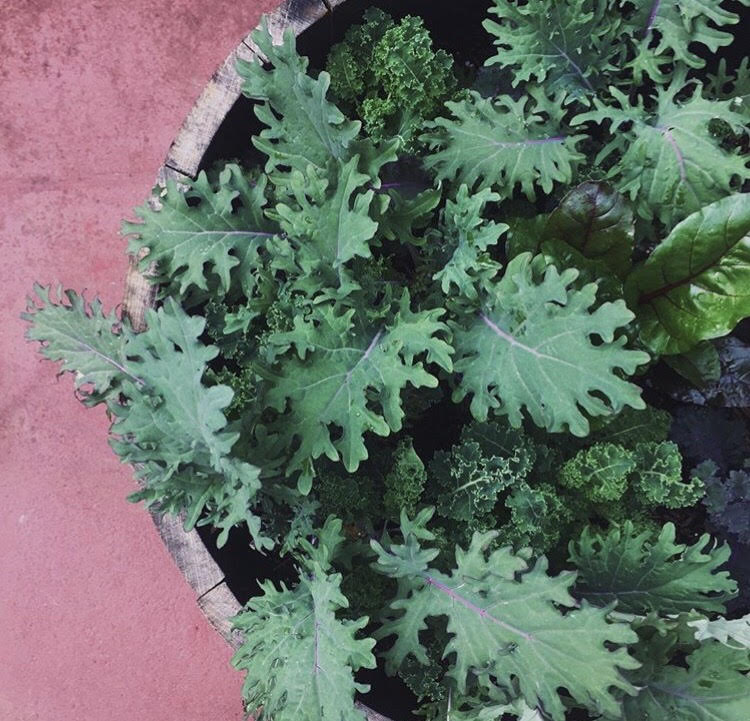
Sometimes leafy greens like kale and chard look like they need some TLC. Don’t worry, they’ve been traveling in a box in a truck. It’s like when you wake up at 4 am to catch a 6 am flight. By the time you land you need a little sprucing up too. A few minutes in a bowl with icy water and they perk right up.
The kale is pleading with me to make some “Caldo Gallego.” I tear it off the stems, put it in a zip bag that I flatten, and toss it in the freezer. No blanching required. Sometimes I freeze the stems to use in pesto, but today I’m feeling generous and toss them to my chickens. I could freeze the chard, but I think I am going to stew them into Acelgas Guisadas.
4. Don’t Beet Yourself Up
If you’ve been around for any length of time, you know there’s going to be some beets in that box, am I right? Those used to drive me crazy, but now unless I already have a specific plan for them, I just scrub them, toss them in my rice/slow cooker with enough water to cover by 1 inch, and set it for 2 hours (the shortest time on my machine). But it doesn’t take that long, especially if they are not very big, or you don’t have that many. Start checking them at 20 minutes. You get the same result using a saucepan and water on your stove. No fancy required.
When they are tender I let them cool, peel them and store them in a container in the fridge. Now that they are cooked I know I can grab, chop and toss into a dish whenever I feel like it. The JBG website has lots of ideas of what to make with beets in your CSA share.
I know what you’re thinking, “Oh, but beets are so delicious when roasted, or steamed or…” Yes, there are so many “better” ways to prepare them. But I find that if I overthink it I just don’t use them.
 Chef and CSA Member Taylor Chambers knows a thing or two about steaming beets. We love his no-frills advice for making use of your beets that he shared in a spotlight so many years ago. Click the photo to read the full story.
5. Cook Something TODAY!
Don’t wait to use the items in your share box. Pick something and use it today.
When I was through sorting my veggies, it was time to start dinner. We had some leftover homemade shrimp fried rice in the fridge, so I prepped some carrots, along with the baby bok choi, and threw together a quick veggie stir fry to serve with the rice. Topped it with my ‘radish confetti’. About 15 minutes later... “Dinner is ready!” A fresh, healthy meal made with local organic produce. It’s that simple. And I love it.
How do YOU make the most of your CSA share? I would love to know. Want the recipe for Caldo Gallego? Let me know in the comments below.
 Ivette's acelgas guisadas - a breakfast for dinner situation that makes easy use of a multitude of CSA veggies..
CSA BOX CONTENTS WEEK OF JUNE 14TH
06/11/21 — Farm
 CSA Box Contents Week of Jun 14th
Large:
Hot Pepper
Onion
Radish
Cabbage
Tomato
Okra
Cucumber
Green Beans
Eggplant
Carrot
Fennel
Potato
CSA BOX CONTENTS WEEK OF JUNE 14TH
06/11/21 — Farm
CSA Box Contents Week of Jun 14th
Individual: Sweet Pepper, Onion, Tomato, Cucumber, Potato, Jalapeño
Small: Sweet Pepper, Onion, Tomato, Cucumber, Eggplant, Carrot, Potato, Jalapeño
Medium: Hot Pepper, Onion, Tomato, Okra, Cucumber, Eggplant, Leeks, Green Beans, Herb
Large: Hot Pepper, Onion, Radish, Cabbage, Tomato, Okra, Cucumber, Green Beans, Eggplant, Carrot, Fennel, Potato
POTATO CRUST QUICHE
06/18/21 — Ada Broussard

Recipe and photos by Megan Russell.
Organically grown red potatoes with their delicate skins and silky flesh are such a treat this time of year. Whether mashed, roasted, scalloped, souped, chipped, or pied, they're a perfect vessel for so many flavors and textures. I can't get enough! I especially love this recipe because it feels healthier than a traditional quiche crust, and we all know that potatoes and breakfast go together like a bushel and a peck.
- 1 lb. red potatoes, skin on2 tbs.
- olive oil
- salt and pepper to taste
- 1/4 cup grated parmesan cheese
- 6 eggs
- 1 cup milk
- Whatever mix-ins you like,
- a handful each-halved cherry tomatoes
- chopped green onions
- chopped bacon or ham
- shredded cheese or feta
- roasted veggies
- dollops of pesto or chimichurri
Heat oven to 400. Use a mandolin to slice the potatoes into rounds. I used the third thinnest setting. You don't want them too thin. In a bowl mix the sliced potatoes, oil, parmesan, and s&p, separating the sliced potatoes as you mix so the cheese is well incorporated. Best done with your hands. Arrange the potatoes along the bottom and sides of a deep pie dish, overlapping as you go. Bake the crust for about 15-20 minutes until the potatoes are cooked but not yet browned. Remove from the oven and lower the heat to 350. Whisk the eggs and milk in a bowl, then stir in all of your mix-ins and seasonings. Pour over the potato crust and plop in dollops of pesto at the end, just before baking. Bake for 30 minutes or until the eggs are set and the potatoes have browned. Slice and serve with your favorite hot sauce or plain greek yogurt.

HECTOR'S HERBVENTURE: PART 4
06/21/21 — Ada Broussard
Hello! You may have noticed that this blog is coming out a few days late. We are rebounding from some website woes, but we're back in action! Today, we're here to round out and wrap up the story of Hector's Herbventure - or his first-ever experience growing a balcony herb garden. For many, the prospect of growing your own food, or herbs, is intimidating. Hector, perhaps, used to fall into this camp. But this year? He grew a bouquet of culinary herbs that all got their start at the JBG Transplant Sale. In case you missed the beginnings of this story, here is Part 1,and Part 2, and Part 3. Keep reading for the herbaceous crescendo: Part 4.
PRECAUTIONS
By Hector.
My next challenge involves finding out what herbs can cohabitate with which one inside my new planters. Like a dreaded school cafeteria game of where you can sit, this would be my next lesson. Per previous inquiries with friends and family, I learnt basil can be tricky and grow big roots, so it would need their own space. Mint was similar to that. Rosemary can grow and expand at a ridiculous pace, so a corner spot might be better. Who knew herbs could be so dramatic?
I read an article that gave me a lot of hope. Similar climate herbs can work together. I started reading more about it and found that I would be able to succeed if I divided my garden based on this.
I decided to put what someone labeled as Mediterranean herbs together, as the upkeep wouldn't be so hard. My 6 herbs on planter 1 would be thyme, parsley, rosemary, cilantro, oregano, and savory. The next planter would have (for now) basil, sage and epazote. The latter was obtained from Garden Seventeen (https://gardenseventeen.com/), a greenhouse near my home.
I must admit some of my initial transplants didn’t make it. The chives had trouble adapting and waiting, so these might have grown another season. My first cilantro survived the first weekend but because I didn’t plant it, it started faltering and was unable to keep it alive.
I managed to put all my new herb babies in their new homes now, when night temperatures don’t go below 55F. I dug the first spot with my hands while recalling how my mom put a few popcorn kernels in the ground. I wanted to grow my own popcorn and she was more than happy to help. I called her the previous Monday top talk about my herb garden. I shared how worried I was about keeping these alive and screwing up.
“Las plantas son muy luchonas. Ya verás como salen adelante,” she said. Plants are fighters. You’ll see how they thrive. I repeated this phrase in my head while moving each one of the herbs. Now, time to let them thrive.
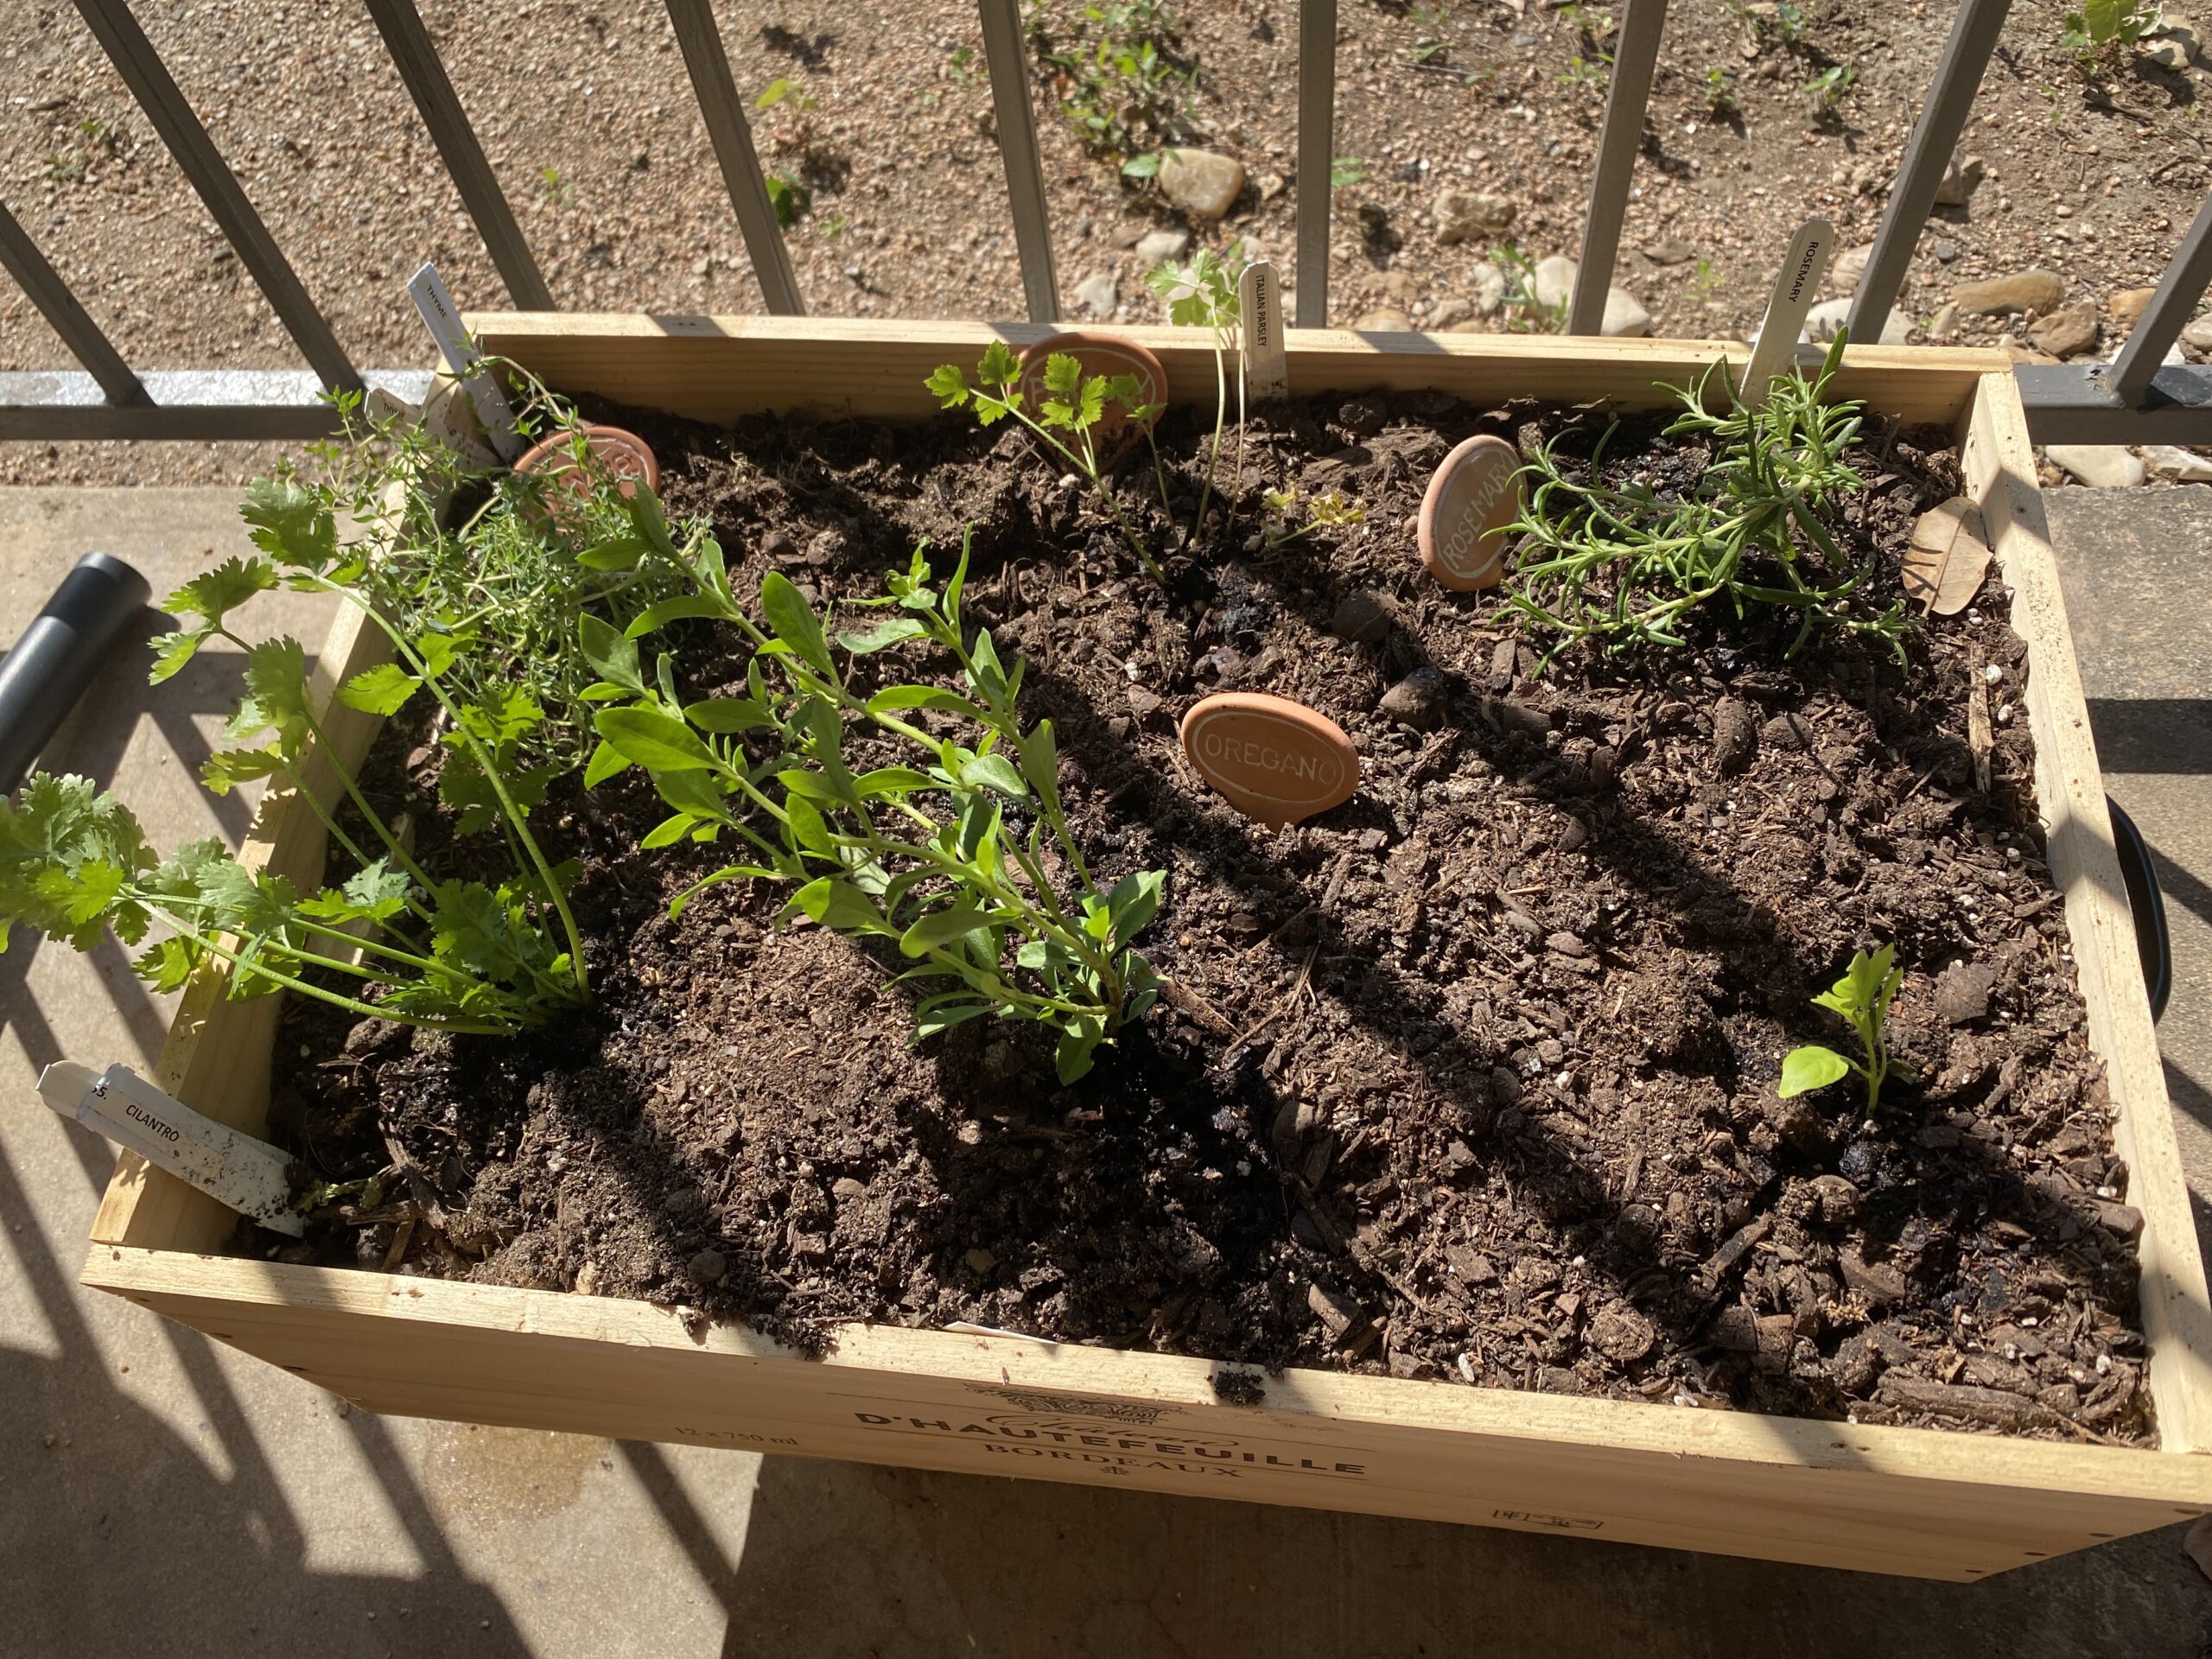
It is now June 2021. I am not a miracle worker but the herbs survived. You can check these out in the photos. I started wanting more herbs while cooking and it has happened. My first basil leaves graced a very simple yet tasty bruschetta.
PUNCHY ZUCCHINI FRITTERS
06/24/21 — Ada Broussard
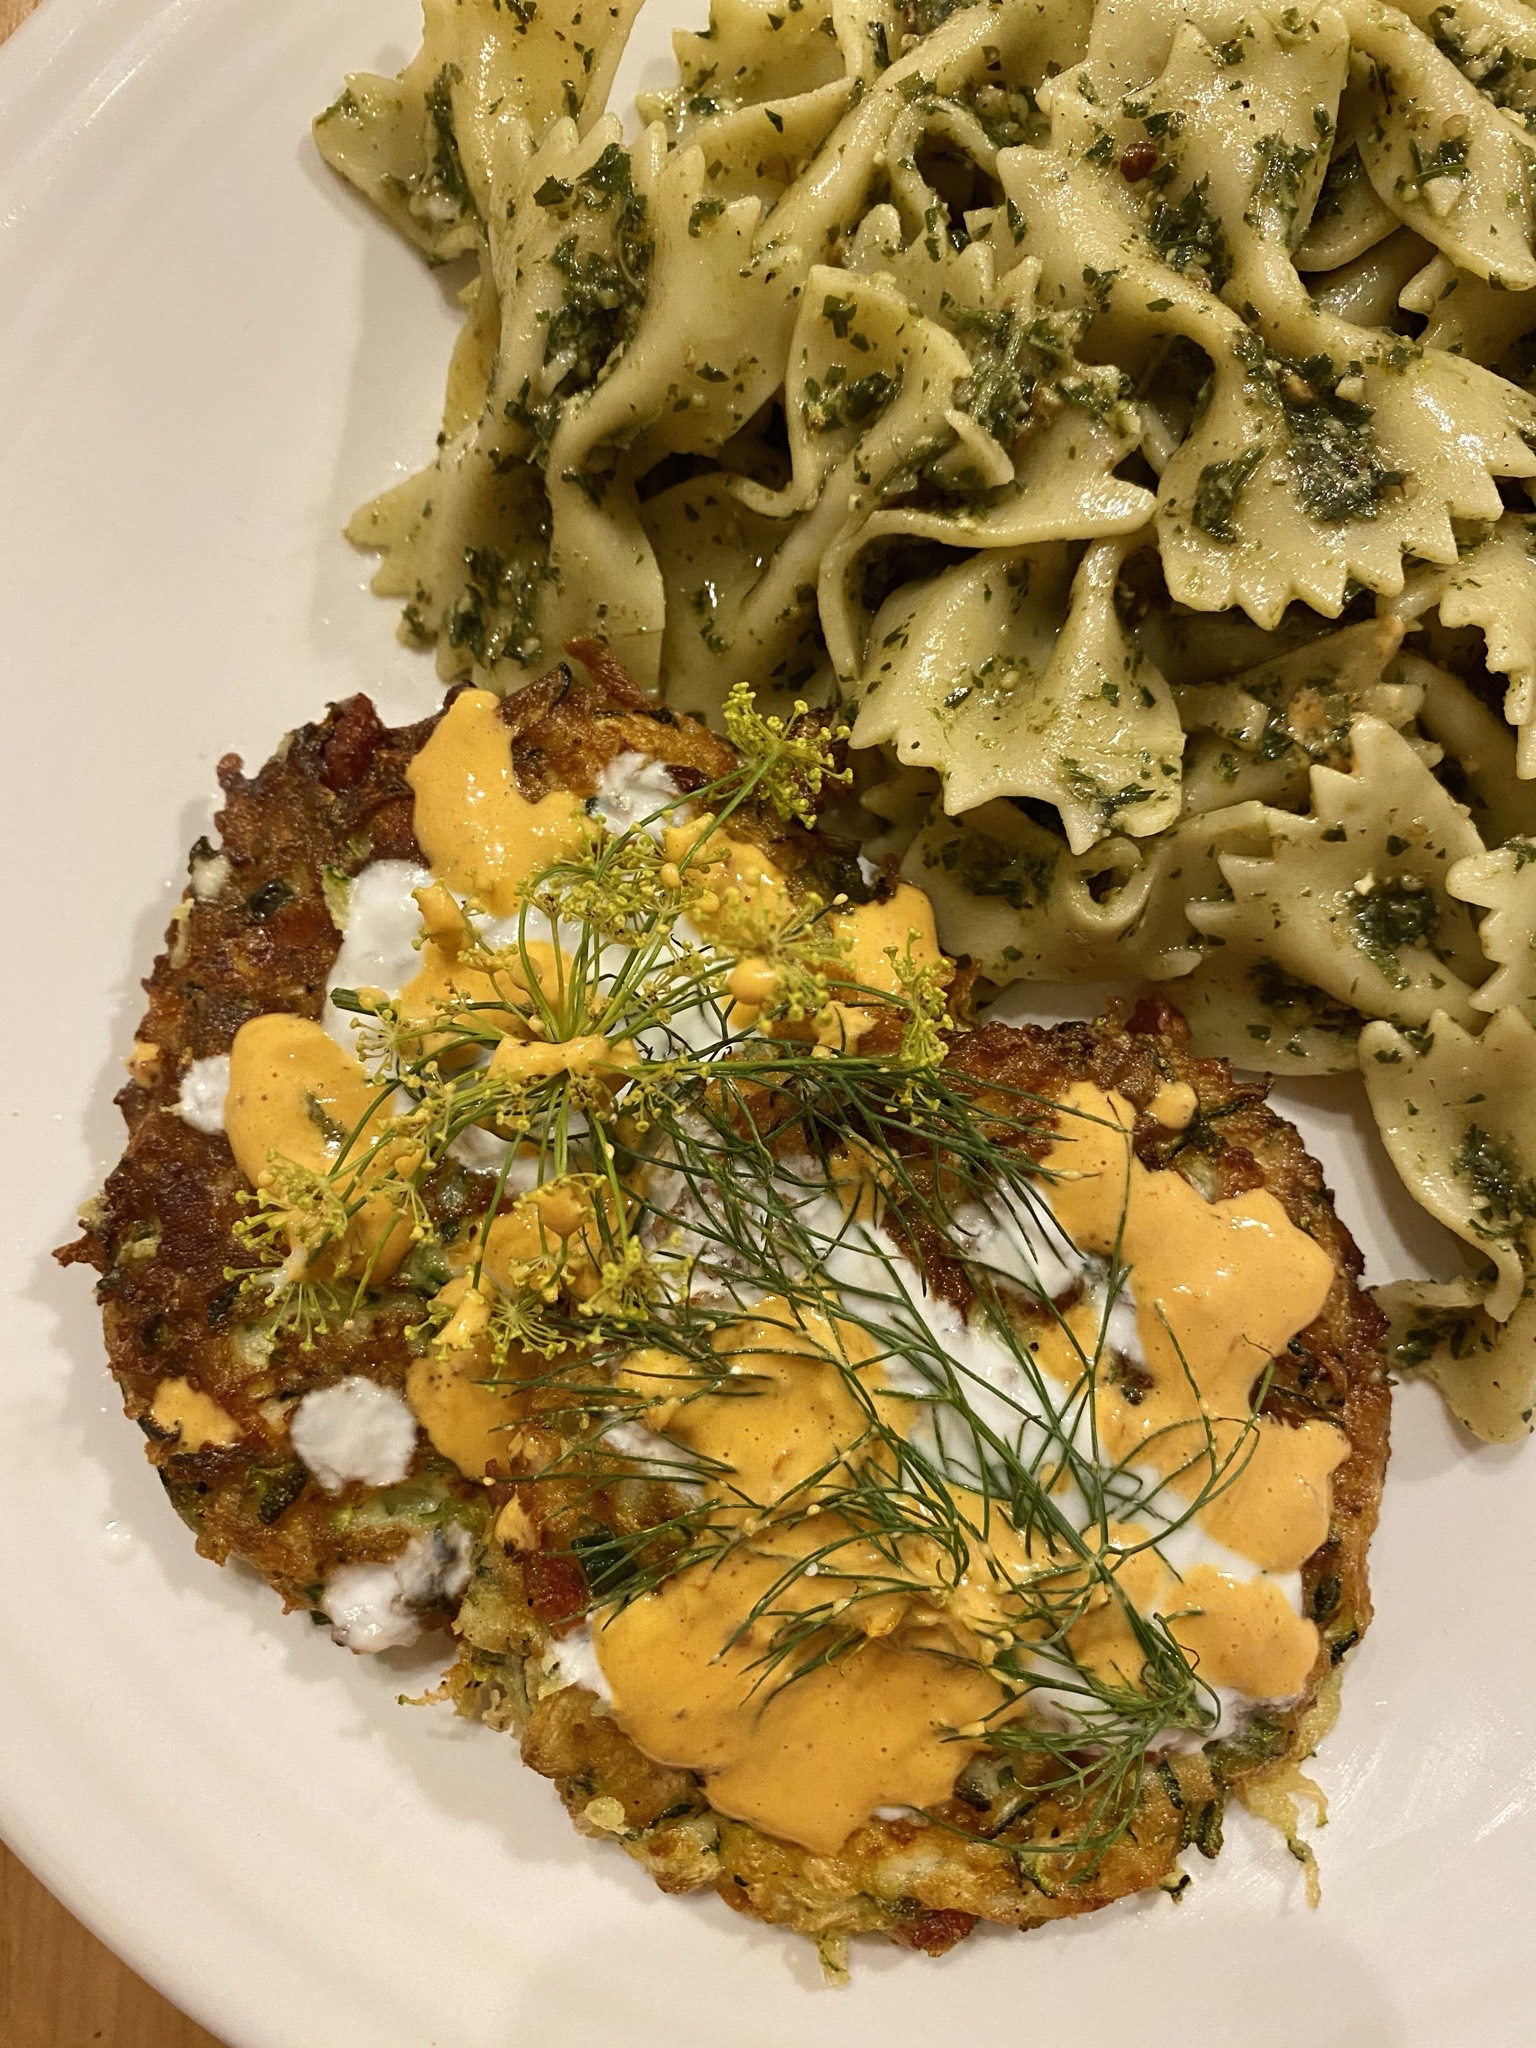
Fritters, as fun to say as they are to eat, are a great way to get a healthy serving of veggies into those picky eaters' bellies. JBG zucchini and jalapeños, 2 sauces, and dill flowers from my herb garden came together to make these punchy and flavorful fritters served with bow-ties dressed in carrot top pesto to make a filling and delicious meal. I can't wait to make these again and play around with different cheese/herb/sauce combinations!
Ingredients:
1 large zucchini
1/2 cup feta crumbles
1 jalapeño diced (with or without seeds)
1 green onion chopped (whites and greens)
1 egg
2 tbs. flour
salt to taste
dill flower to garnish
Bulgarian yogurt & chipotle mayo to garnish
Olive oil
Directions:
Grate the zucchini onto a clean dish cloth, then wring out as much liquid as humanly possible. In a bowl, mix everything but the garnishes. Heat several good glugs of olive oil in a pan on medium high. Once the oil is hot, make round patties out of your mix and carefully place in the skillet. Cook about 4 minutes, or until golden crispy on each side, then drain on a paper towel. This recipe makes 4 fritters but could easily be doubled or tripled. Garnish with the sauces and dill flowers. Side of pesto pasta optional, but highly recommended.
10 WAYS TO BEAT THE HEAT
06/25/21 — Ada Broussard
Tips + Recipes provided by Anne Miller L.Ac., an Austin native who has cooked her fair-share of JBG produce, but is now based out of San Francisco where she runs The Garden .
The heat is on. As we acclimate to our new reality, those mid-day rays can feel oppressive, and it can be hard to cool yourself down. Thankfully, this week, we have an arsenal of tips, foods, and recipes aimed to beat this blistering Texas summer.

10 Ways to Beat the Texas Heat
- When cooking at home, change the way you cook to focus more on fermenting, sprouting, steaming, simmering, and marinating meals instead of frying, grilling or baking. Or eat food cold!
- This might seem counterintuitive, but don’t eat too many frozen foods. It is harmful to the digestive system (extreme cold meeting extreme heat can cause issues). Enjoy a frozen treat here and there, but keep it to a minimum. Think about keeping things chilled instead of frozen, and even skipping ice in your water.
- Add 1 drop of peppermint oil to your water bottle.
- Stop using black pepper and switch it out with white pepper. White pepper is more neutral for the body. Black pepper heats the body, and can make you feel warmer in the heat.
- Add more foods with blue, green, and purple colors. It’s simple, cooling colors cool the body. Reach for a green salsa at the grocery store instead of a red salsa!
- Introduce more raw foods, salads, smoothies, and juices - they are all cooling and refreshing.
- Avoid red meat, smoking, excessive alcohol, too much coffee, fried and greasy foods, and excessive dairy. These are all inflammatory foods. Smoking is literally the act of adding smoke + fire to the body.
- Wear a cap or a cool bandana around your neck. Put one drop of peppermint oil into a bucket of water, douse bandanas in it, put them into the freezer overnight, and wear around your neck when you go outside for long periods of time.
- Avoid running midday and hot yoga. Running during yin time (yin time = early morning and late night) is best. Also get good sleep. Good sleep will cool and rejuvenate the body, and also aid in the healing process.
- Use the cooling yoga breath. Inhale through teeth or rolled (like a taco) tongue for a count of 5, and exhale with a relaxed jaw. Do this for 10 breaths up to 4 times a day. It cools your insides down
- Bonus tip: go swimming!

Anne's Top Cooling Recipes:
Healthy Homestyle Okra and Tomatoes
- 2 tbs olive oil
- 1 small onion, chopped
- 2 garlic cloves, minced
- 5 large plum tomatoes, diced (or 28 oz can of fire roasted organic tomatoes)
- 1lb fresh okra
- 2 tsp gumbo file
- 1 bay leaf
- Salt, white pepper
- 1 cup short grain brown rice, 2 cups water
Make your brown rice first. 1 cup of washed and drained brown rice, to 2 cups of water. Bring to a boil and set on low for 40 min.
Heat olive oil in a large skillet or dutch oven on medium heat. Add the onion and saute for 5 min. Add the garlic, and saute until fragrant. Add okra and salt, and cook for about 3 min, or until soft. Stir in the tomatoes and gumbo file seasoning with the bay leaf, and cook for 5 min. Add salt and white pepper to taste.

Lemongrass Shrimp Skewers with Coconut Rice
Marinade: 1 stalk of diced lemongrass, diced 1 inch ginger, 1 clove garlic diced, sesame oil, rice vinegar, gluten free tamari (soy sauce), melted coconut oil or olive oil. Marinate the shrimp in the fridge for minimum 1 hr (can do this step overnight).
Shrimp skewers: Grill, or heat on a skillet until cooked through, chill the shrimp in the fridge.
Lay the chilled shrimp on top of a bed of fresh arugula or salad greens. Toss with a little olive oil, salt, and white pepper. Garnish with thinly sliced watermelon radish, cucumber, and shredded carrot.
Lemongrass-coconut rice: Soak 1 cup white rice, rinse and drain. Use half coconut milk and half water that equals 1 ½ cups, tie the lemongrass into knots. Lay them on top. Cook rice for 20 min. Remove lemongrass knots before serving.
Farm Fresh Pesto Pasta
- 3 zucchinis (or a spaghetti squash)
- 1/2 bunch amaranth greens, 1/2 bunch basil, 1/2 bunch parsley
- 1/2 cup of pine nuts (or another nut)
- 1/4 cup lemon juice
- 1/2 cup - 1 cup olive oil
- 1 small garlic clove
- 1/4 tsp of salt
Spiralize zucchini into noodles, or use vegetable peeler to peel it into ribbons.
Pesto: amaranth greens, parsley, basil, lemon juice, olive oil, small garlic clove, salt, and pine nuts, reserving a few nuts for a final garnish. Add all those ingredients into a food processor, and process until smooth. Add more oil, lemon juice, or salt to taste.
Mix the zucchini with the pesto, and top with fresh cut tomatoes, salt, and white pepper, and a few chopped nuts that you added in your pesto.
Chilled Hibiscus Herbal Lemonade
- 1 Tbs loose Hibiscus tea
- 1 Tbs loose Tulsi tea
- 1 Tbs Goji berries
- 1 Tbs Spearmint leaves
- 3/4 cup fresh squeezed lemon juice (to add at the end) water
Check the bulk section at your local grocery store for these ingredients. Add enough boiling water to your tea to steep for 1 hr. Or, place herbs in a large jar or covered pitcher of water, and leave out in the hot sun for 2-3hrs for sun tea (a fun project for kids!). Work with the seasons to your benefit! Strain, and reserve the herbs to make a 2nd batch, if you wish. Once cooled off a bit, add ¾ cup fresh squeezed lemon juice.
Store herbal lemonade in the fridge for up to a week. Enjoy chilled with sparkling water, or add a little honey and enjoy hot in the morning.
Cool as a Cucumber Green Juice
- Sweet potato greens
- Romaine lettuce
- Cucumber
- Spinach (chard or kale would work here, also)
- Celery
- Mint
- Lemon
Can be made either in a juicer or your blender. Drink at room temperature. Can save extra for up to one week in a sealed jar or container in the fridge.

A huge thanks to Anne Miller! Thanks again for taking the time to talk to us.
CSA BOX CONTENTS WEEK OF JUNE 28TH
06/29/21 — Farm

Large:
Harvest Highlight
Sweet Pepper
Eggplant
Tomato x2
Farmer's Choice Herb
Beet
Watermelon Radish
Potato
Leek
Onion
CSA BOX CONTENTS WEEK OF JUNE 28TH
06/29/21 — Farm
Individual: Harvest Highlight, Watermelon Radish, Tomato, Okra, Eggplant
Small: Harvest Highlight, Hot Pepper, Eggplant, Carrot, Farmer's Choice Herb, Potato, Leek, Beet
Medium: Harvest Highlight, Sweet Pepper, Eggplant, Carrot, Tomato x2, Farmer's Choice Herb, Beet, Potato, Okra
Large: Harvest Highlight, Sweet Pepper, Eggplant, Tomato x2, Farmer's Choice Herb, Beet. Watermelon Radish, Potato, Leek, Onion
NOW HIRING: HEAD GROWER AT JBG ORGANIC
06/29/21 — Farm
JBG Organic is the largest certified Organic vegetable farm in Texas. Since 2004 we have been growing a large variety of mixed vegetable crops for CSA, restaurants, farmers' markets, and wholesalers. We are looking for an experienced grower to join our team and to manage all scouting, spraying and cultivation on our 184 acre Organic farm, just outside of Austin TX. The ideal candidate should have experience operating farm machinery and a working knowledge of vegetable production.
Job Description:
The Head Grower at JBG Organic reports directly to the Farm Manager. They are responsible for regularly coordinating with the Irrigation Manager and the Farm Manager, but this position is generally autonomous with flexibility to work non-standard hours, as necessary, to perform condition-dependent functions at optimal times. The Head Grower is responsible for regularly scouting the farm for pests and crafting a spray and management plan with the Farm Manager. They are responsible for monitoring weed germination on the entire farm and scheduling timely cultivation in response. The ideal candidate must be comfortable operating farm machinery and work well independently.
Responsibilities:
- Irrigation – Coordinate irrigation of fields with Farm Irrigator and perform maintenance and repairs on irrigation and pump systems.
- Pest control - Scout farm for detrimental insects and animals, devise and implement pest control plan with the Farm Manager. This includes spraying fields with appropriate organic approved products, burning heavily infested areas, and trapping and/or fencing out animals.
- Cultivation - Control weeds by means of mechanical cultivation using hillside cultivator, basket weeder, and/or other necessary tools and implements.
- Maintain detailed records of pest control sprayings.
- Coordinate with Farm Administrator to purchase spray materials.
- Coordinate with Maintenance Manager to perform needed repairs to tools and equipment, and acquire parts.
- Communicate to Farm Manager problems/areas of concern(ie. severe pest or weed infestations) and collaborate to devise action plan.
Required Qualifications:
- Able to lift 50+lbs consistently through the day.
- Able to work outside in different weather conditions. (Cold, Heat, Rain, etc)
- Experience driving tractors and operating machinery.
- Knowledge of plumbing and irrigation systems.
Qualifications, preferred:
- Basic welding
- Knowledge of horticulture and pest/disease prevention and control.
- Mechanical and automotive repair
- Bilingual (Spanish and English)
- 3+ years experience in agriculture and/or horticulture, with knowledge of relevant vehicles, machines, implements, and tools necessary to fulfill stated responsibilities.
Schedule: Full Time, 40+hrs/wk. Position requires the flexibility to work non-standard hours, as necessary, to perform condition-dependent functions at optimal times.
Pay: $20+/ hr dependent on experience.
Directions for Applying: Please send an email to jobs@jbgorganic.com with the following format. Following specific directions is the first way to impress us!
- Subject Line should read “[Job Title]: [First Initial]_[Last Name]” … For example, “Head Grower": J_Smith”
- Email body should be short & sweet - help us notice you! Ensure that it contains your contact information.
- Attach three documents to your email, ensuring that their file names are clear: 1) Cover Letter 2) Resume 3) List containing contact information of two professional references
Thank you for your interest in JBG Organic! You will be contacted for further information if we find that you might be a good fit for this position.
The responsibilities & duties listed above are intended to communicate general priorities of this position, but should not be understood as an exhaustive list of all work requirements to be completed at JBG Organic. Farms require flexibility! We are committed to training, developing, and promoting from within the company based on performance.
JBG Organic provides equal employment opportunities (EEO) to all employees and applicants for employment without regard to race, color, religion, gender, sex, national origin, age, disability, genetics, marital status, or sexual orientation.
SURROUNDED BY TACOS
06/30/21 — Ada Broussard
This week's post was kindly submitted by JBG CSA Member Samantha Cato. Follow Samantha on Instagram to learn more about her Functional Nutritional Therapy practice. And now onto the recipe....

A wise person once said – “Surround yourself with tacos, not negativity”.
Yep, I can do that.
Truthfully, I think any day is a good day to have tacos! They're so easy to throw together, flavorful, and customizable! Even the pickiest of eaters are happy with a taco in hand. They’re a fan favorite – hands down.
The best tacos I’ve ever had used nutrient-dense, whole foods that were in season. Although they can easily be the star of the show, I’m not just talking veggies here. I am also referring to quality-sourced proteins like grass-fed meat, pasture-raised poultry + eggs, and wild-caught seafood.
Aka – real food | whole foods. There’s something to be said about eating real food, am I right? Real food makes the dish!
Benefits of Eating Real Food
- More nutrient-dense
- Provides lasting energy
- Satisfies hunger and cravings
- Aids the body’s functions, working with and not against the body
- It’s properly absorbed and used throughout the body because it recognizes the nutrients (unlike processed foods)
- It’s free of chemicals, toxins, and preservatives (aka man-made food)
- It’s sustainable + nourishing to your body and the earth
After becoming a functional nutritional therapy practitioner, I was in search of having easier access to more whole foods and learning about the importance of eating in season + supporting local farmers and growers (think leaving less of a carbon footprint). I decided a CSA box was a great way to go and would be fun to try out. Enter – JBG. I love our JBG box for many reasons, but the biggest one being we are supplied with seasonal produce.
Eating with the seasons means you’re eating food at its peak ripeness, which means they’re more nutrient-dense. In essence, your food is fresher + more flavorful.
Our bodies need different nutrients, which can be sourced from a variety of whole foods, to function at an optimal level. So, the greater the variety of local veggies and quality meats you have in your diet, the better! I also love that taking part in a CSA marries taking care of your family and taking care of the earth. Through a CSA, you know how your food is grown: you’re supporting local businesses, regenerative farming, and sustainable efforts. Bonus – by becoming a JBG member, you’re joining an amazing community and cultivating a relationship with a local TX farm.
That’s worth it, is it not?
Ok ok, onto the tacos…
I love this breakfast taco recipe because it utilizes seasonal produce + is jammed packed with nutrients that are supportive to your body. Breakfast tacos are such a versatile meal because you can make them with whatever veggies you have on hand and still have a killer recipe.
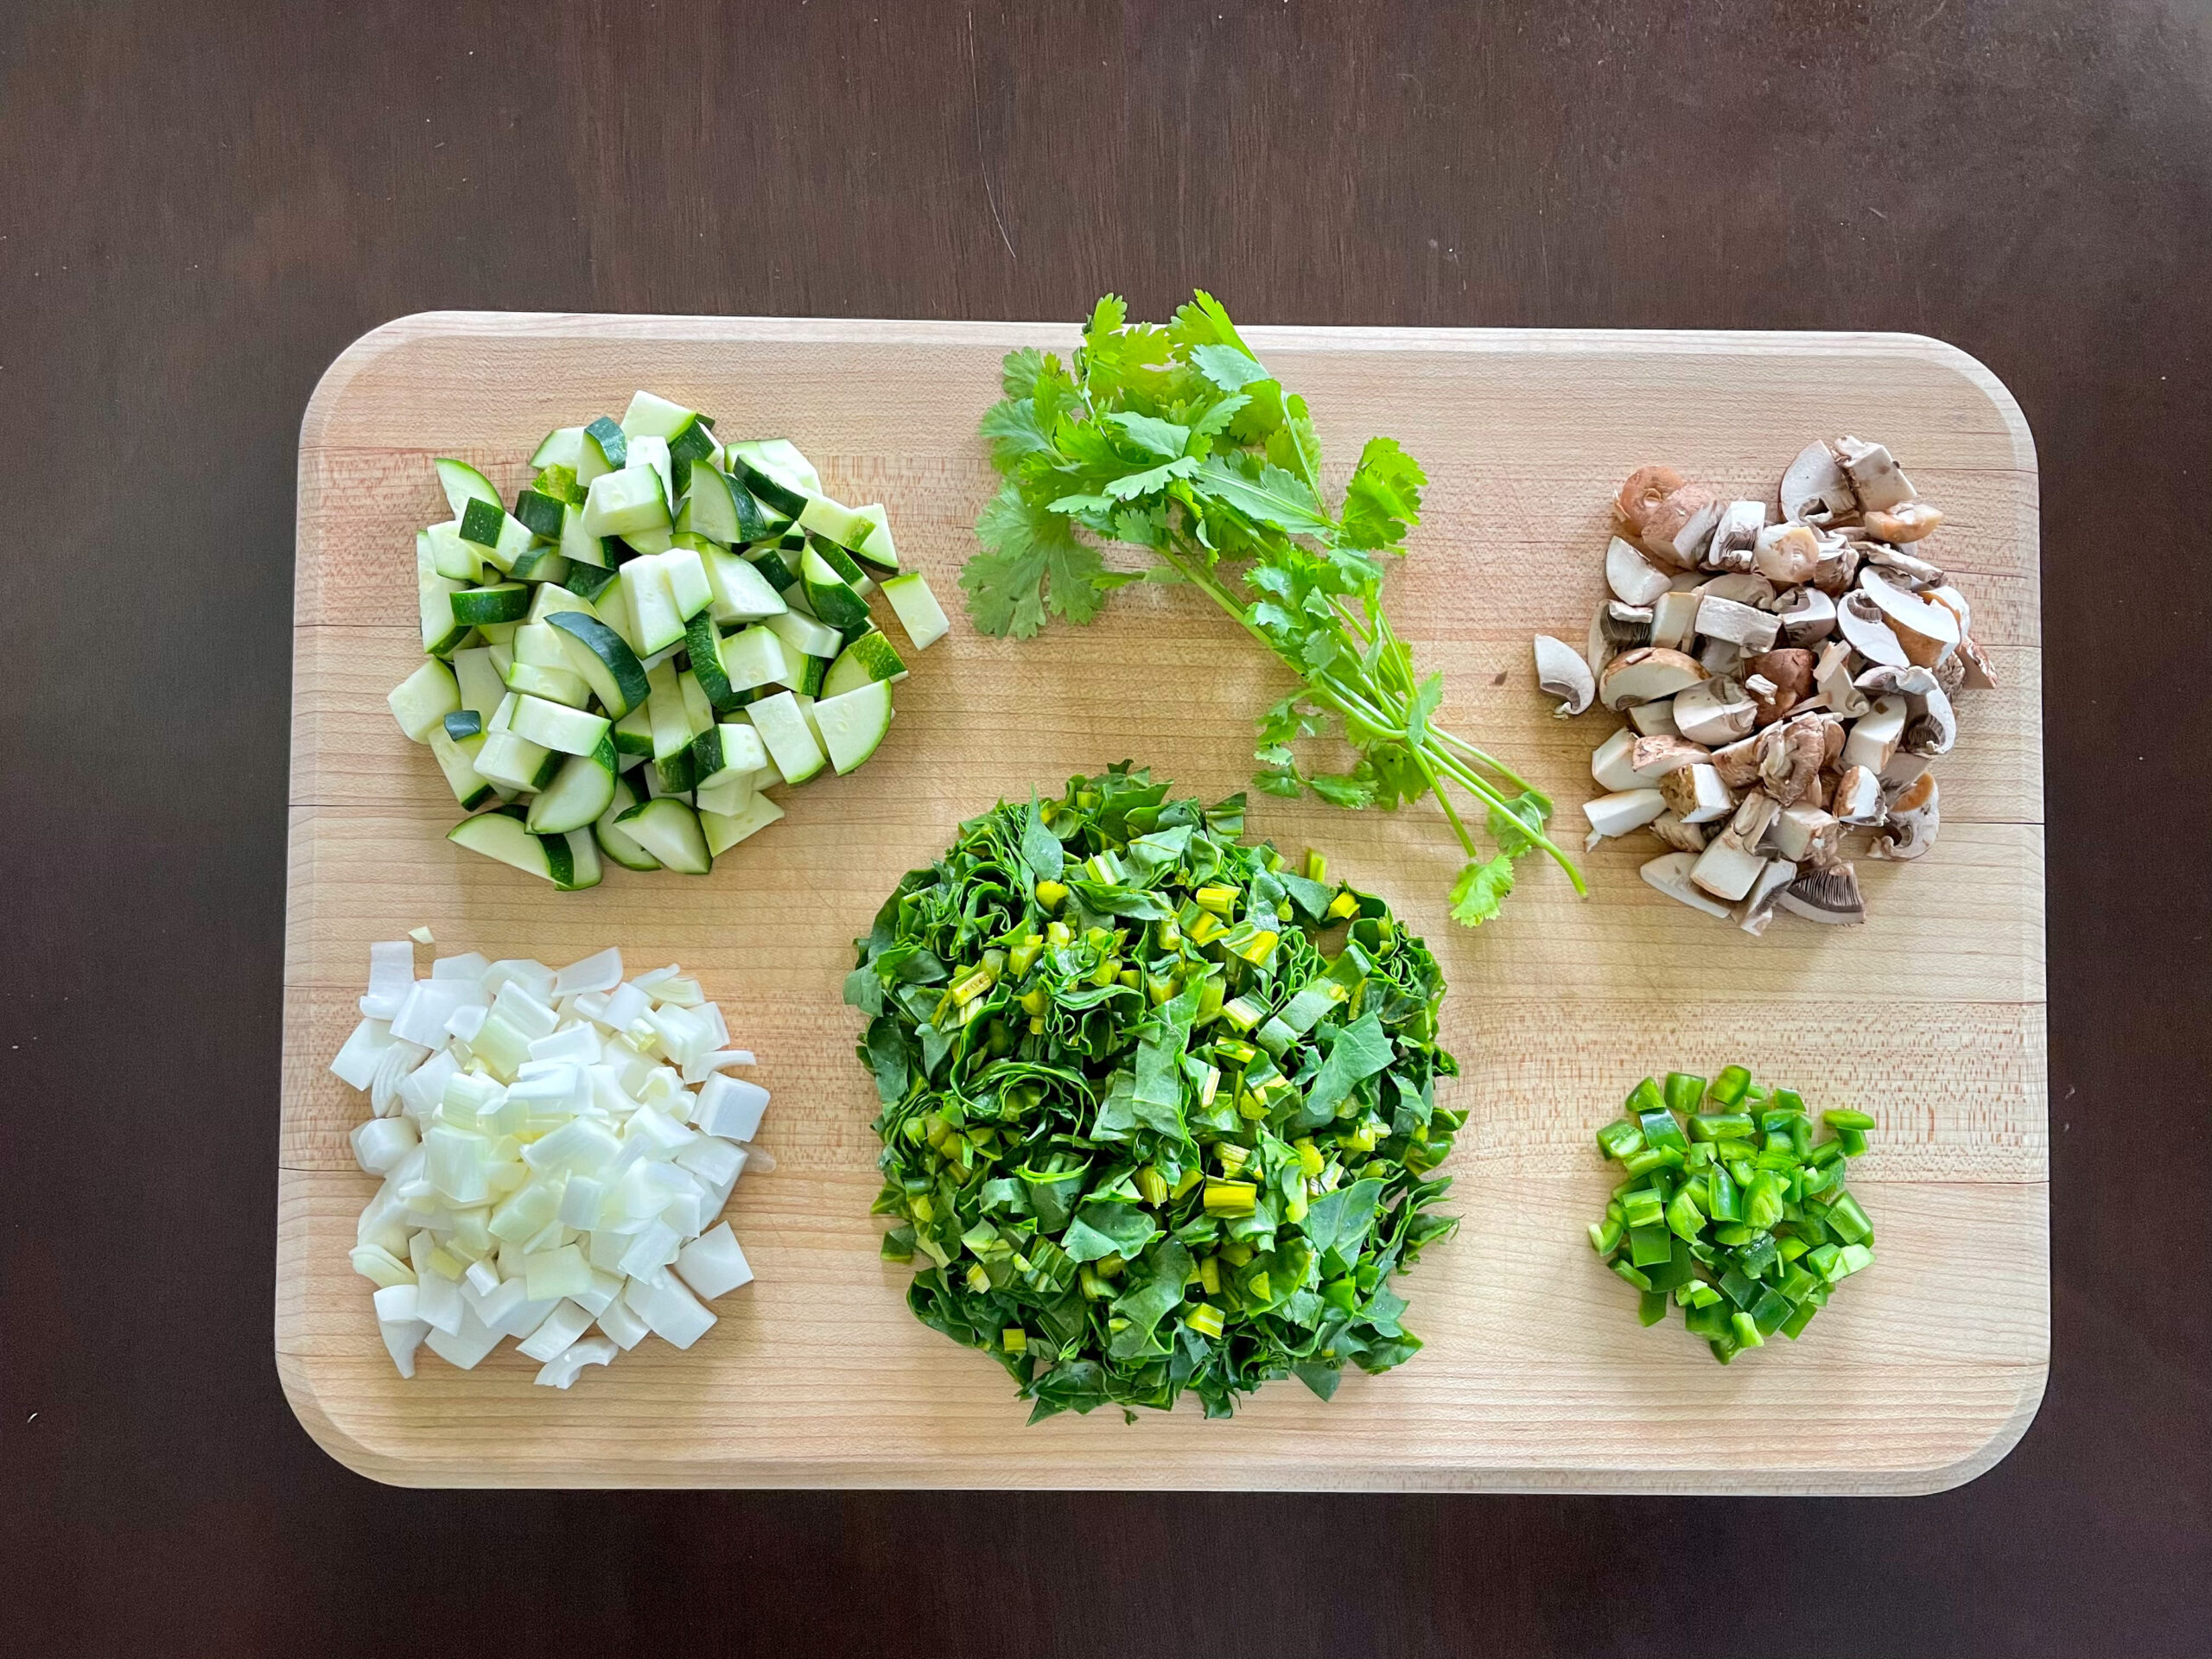
The veggies we used were JBG’s zucchini, onion, beet greens, and cilantro because that’s what came in our box. Sometimes, when we’re feeling crazy, we saute nitrite/nitrate-free bacon before adding in the veggies for a more savory flavor + added crunch.
Nutrient Breakdown
- Pasture-raised eggs – rich in protein, fat, choline, and selenium. Excellent source of riboflavin (B2), vitamin B12, phosphorus, as well as vitamin A (if pasture-raised).
- Zucchini – a hydrating veggie, zucchinis are rich in vitamin C, potassium, antioxidants, manganese, beta carotene, and B vitamins.
- Onion – rich in quercetin (a bio-flavonoid and antioxidant).
- Beet greens – as a dark, leafy green, beet greens are rich in calcium, iron, manganese, and magnesium.
- Cilantro – rich in vitamin A, K1, and manganese.
This recipe is on repeat in our home and has become a Sunday breakfast ritual. It’s balanced and doesn't lack substance or flavor. The tacos can be served in whatever tortilla you prefer or you can serve them over a bed of greens, sprouted rice, or cauliflower rice. Serve by itself or with sauteed or roasted sweet potatoes or regular potatoes, fresh fruit, or fresh greens. Feel free to get creative!
One thing you must do with this recipe – eat them while the eggs are warm. Don't make your taco shells cringe with cold eggs. Unless that's your thing. I'll stick to hot eggs. Enjoy, my friends!
Breakfast Tacos Recipe
Ingredients
- 1 tbsp grass-fed butter or ghee
- 8 pasture-raised eggs
- 2- 4 cups of seasonal veggies (I lean towards having more veggies).
- This time, I used:
- 2 small zucchinis – chopped into quarters
- 2 small onions – diced
- Beet greens from one bunch of beets, including the stems – chopped
- 1-2 tbsp cilantro – chopped
- Seasonings of choice
- I used Primal Palate taco seasoning, pepper, and a pinch of sea salt. I’ve also kept it simple with sea salt, pepper, garlic, and cumin.
- Toppings – more cilantro, avocado, and hot sauce (I rotate between Yellowbird’s hot sauces, Frank's, and Cholula).
Instructions
- Heat your tortillas until warmed through in a cast iron or another non-toxic skillet (about 10- 15 seconds). I love heating Siete's cassava tortillas in a little ghee. Place in a tortilla warmer or on a plate and cover to keep in the heat.
- In the same skillet, saute chopped JBG veggies in 1 tbsp butter or ghee over medium-low heat.
Note – saute chopped bacon in the skillet first if using. Once cooked, set aside bacon on a plate and use leftover bacon grease to saute veggies.
- Crack 6- 8 pasture-raised eggs in a bowl and whisk together with seasonings. Pour into the skillet.
- Scramble the eggs with the veggies until they aren't soggy (no one likes soggy eggs) and cooked to your liking. Serve while warm with toppings of choice.
- Eat with style, letting the taco filling fall apart all over the plate if you're anything like me.

The world is your oyster when it comes to making this recipe. Add more spice to it if you want more of a kick or keep it classy. There’s no wrong way to do it. Well, unless you let your eggs get cold ;) Have fun experimenting with “new to you” veggies and other whole foods and see what you can create. When you build a deeper connection with your food, from how it’s grown to what you cook up in the kitchen, the better your food will taste and the more satisfying your meals will be!
That, my friends, is the power of getting back in touch with your roots and embracing properly prepared, local + in season, nutrient-dense whole foods