
 0 ITEMS IN CART
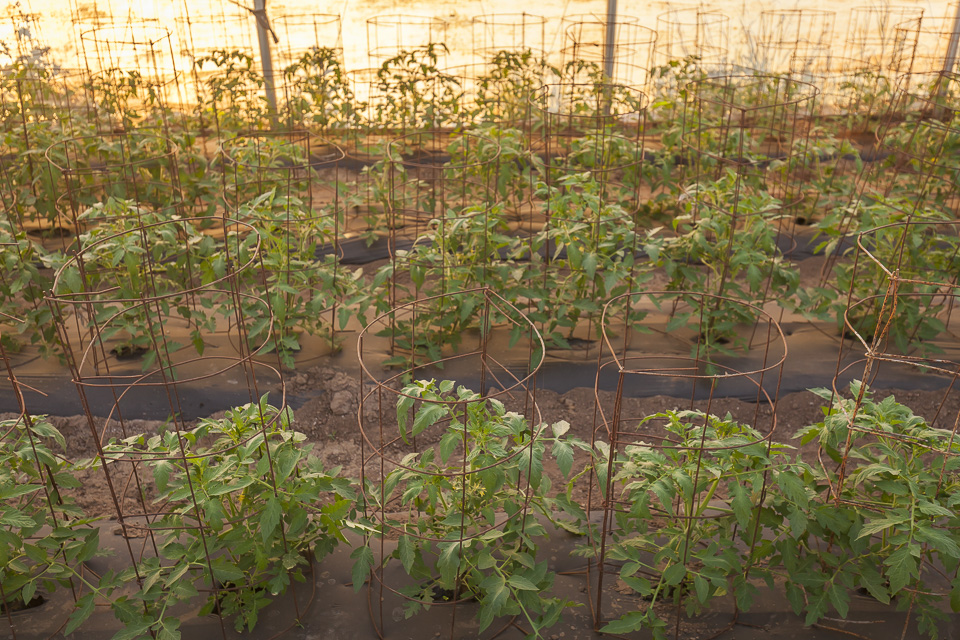
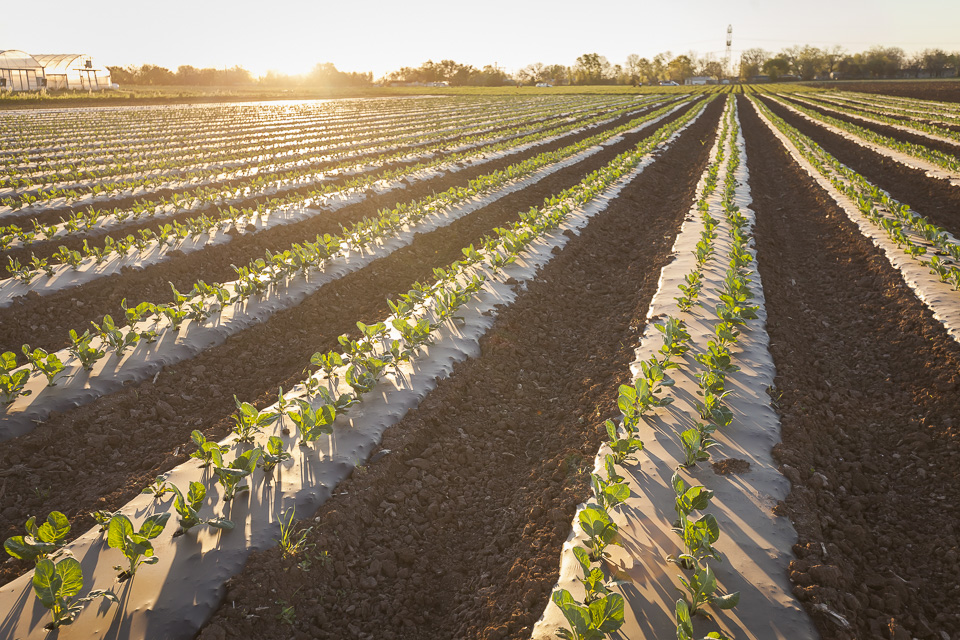
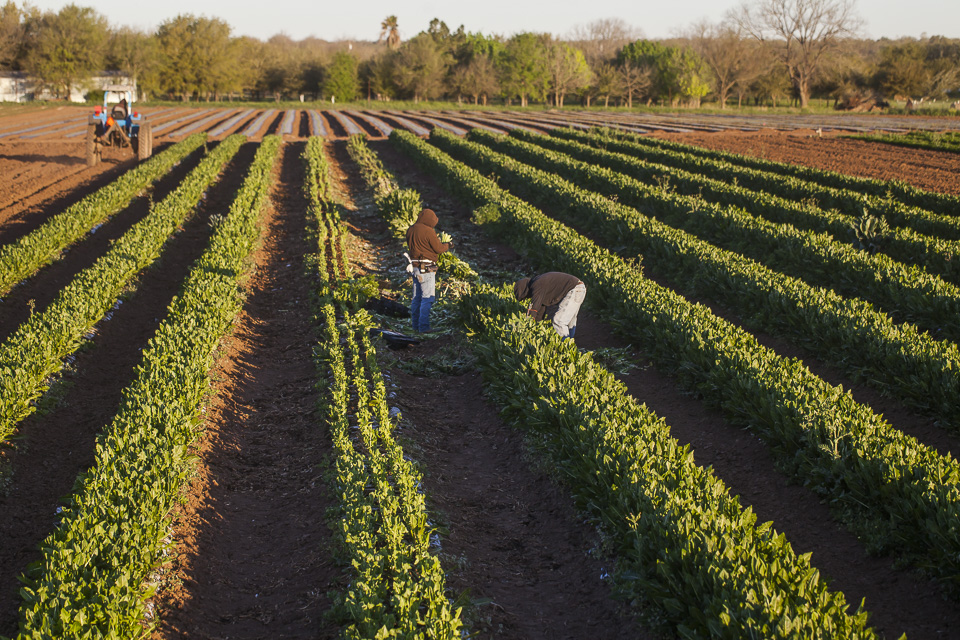
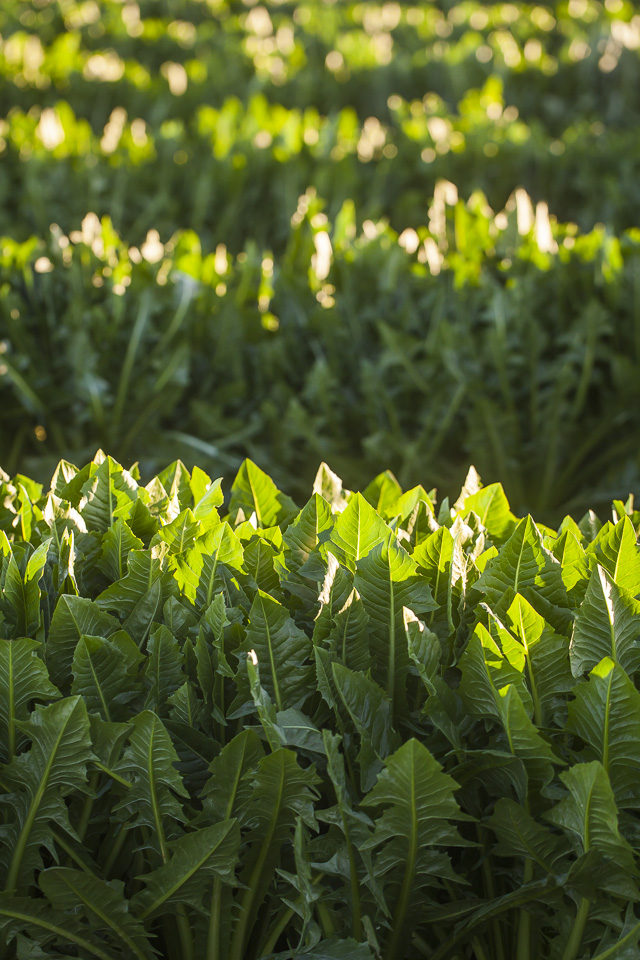
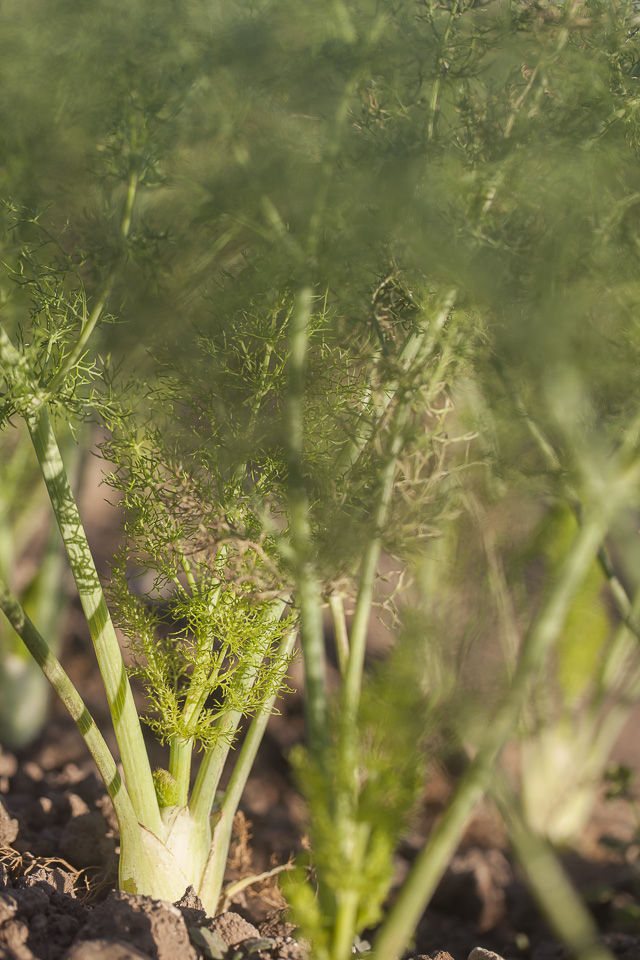
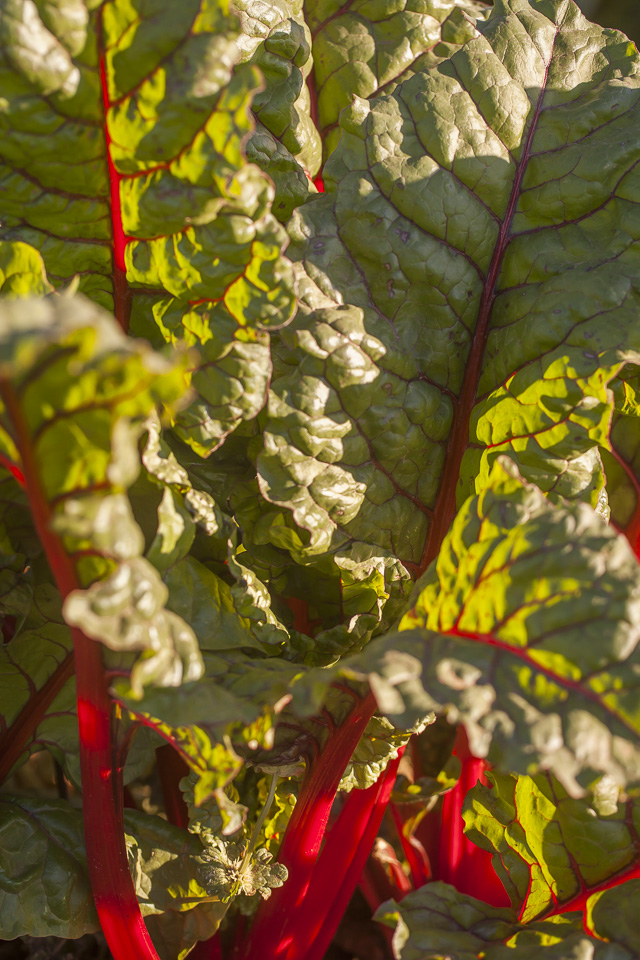
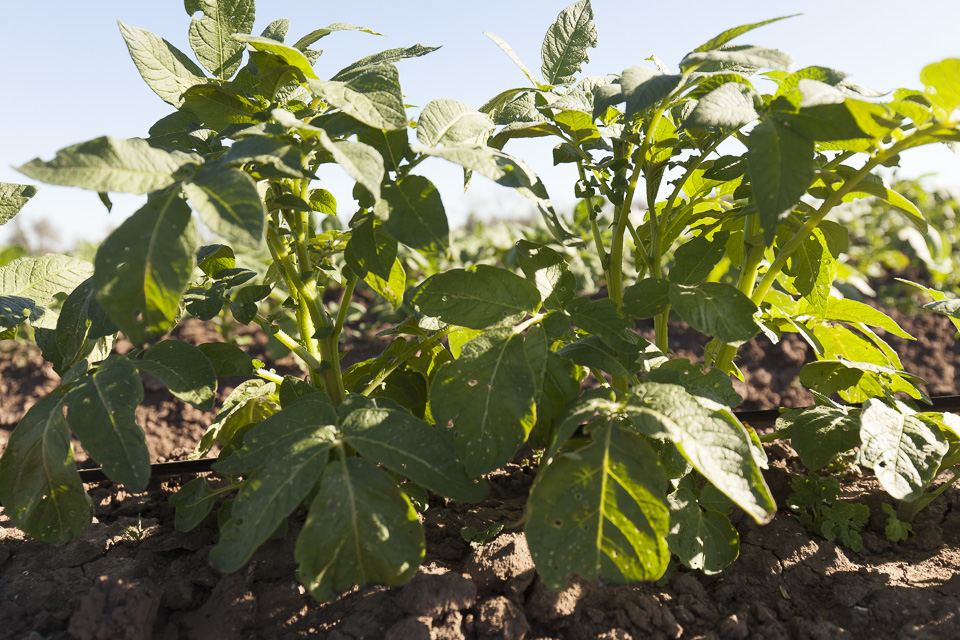
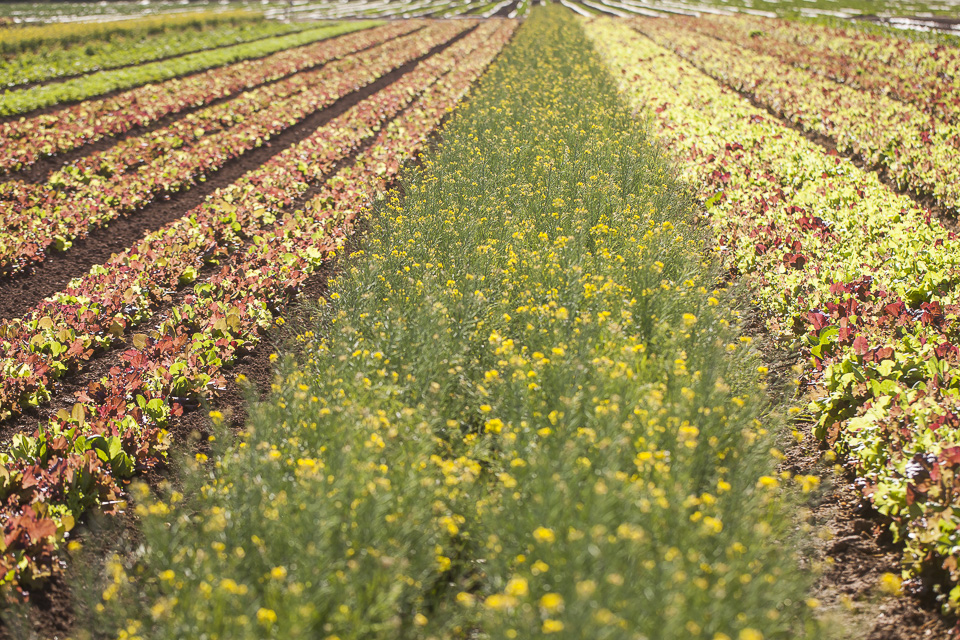
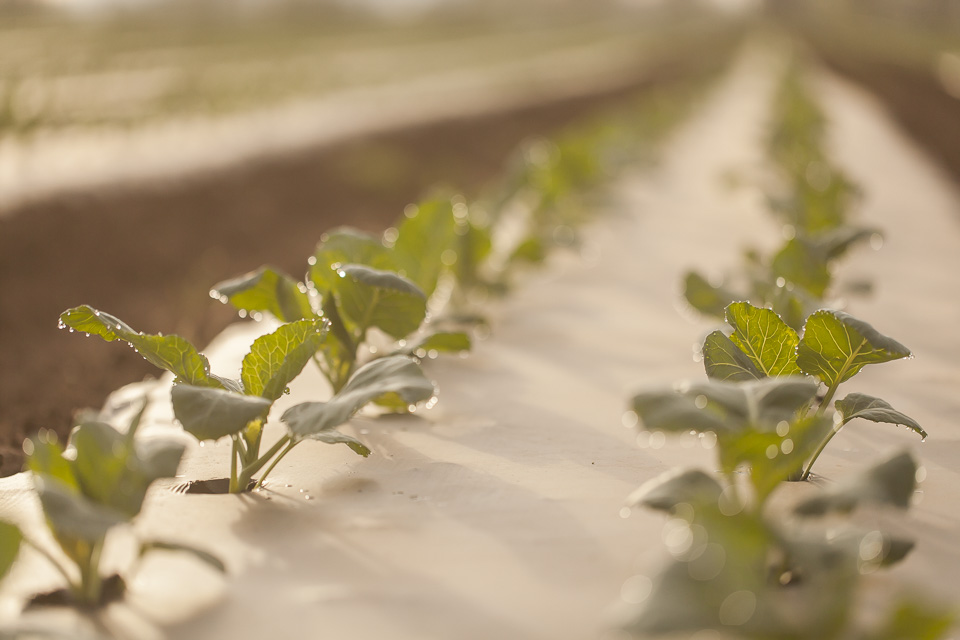
WEEK 12 IN PHOTOS
03/23/18 — Scott
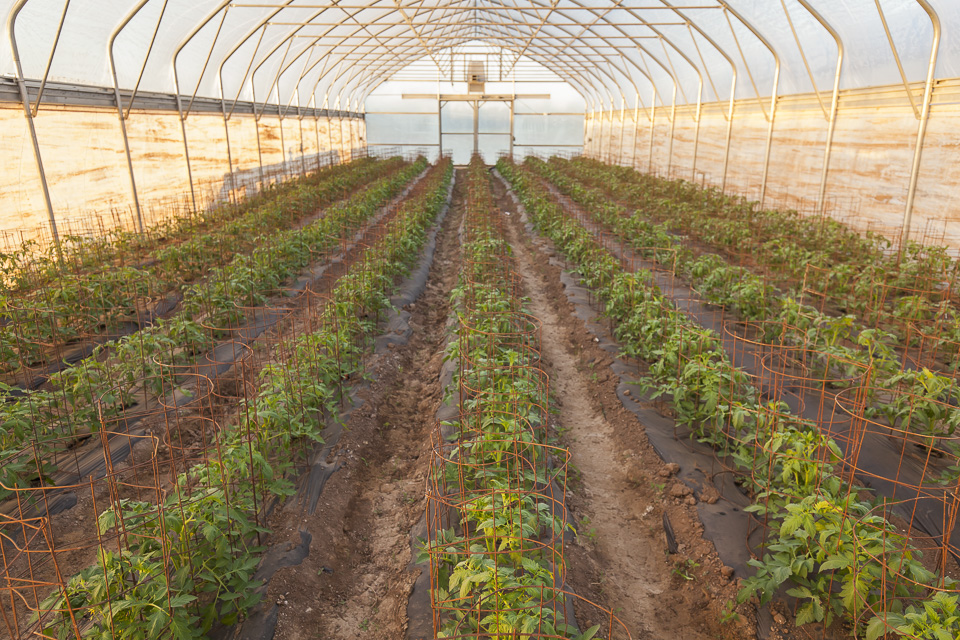
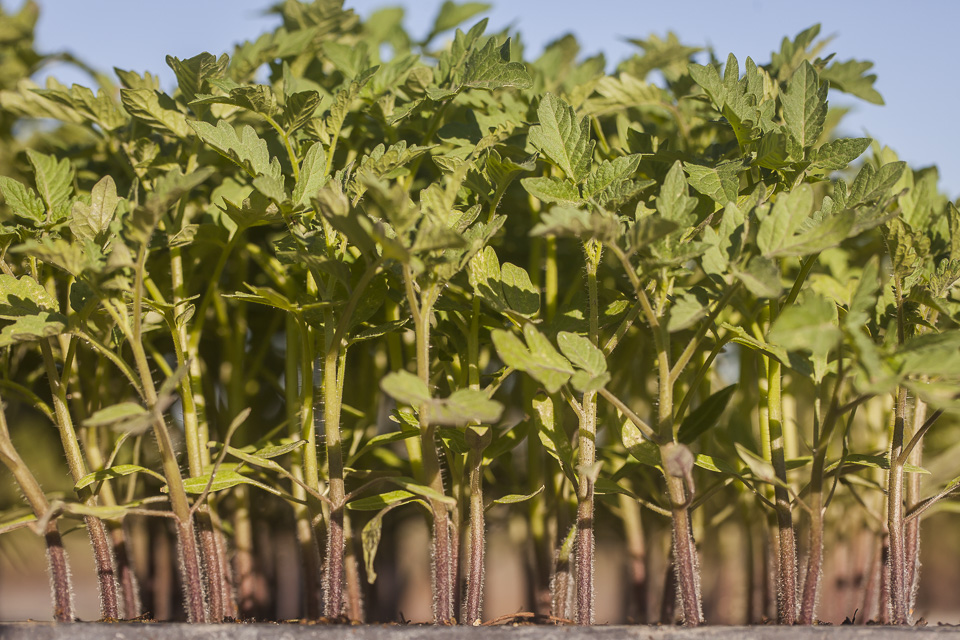
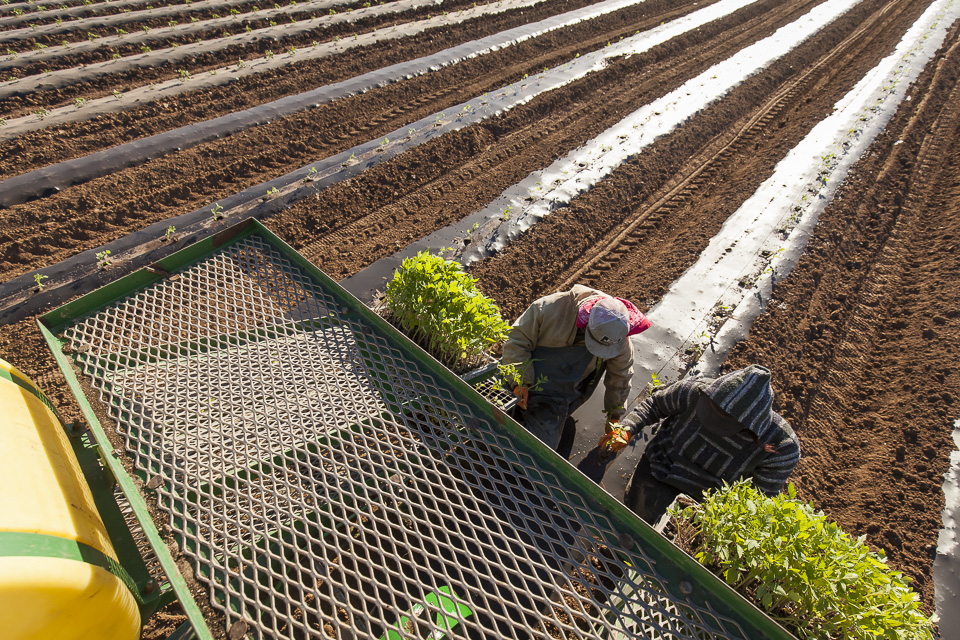
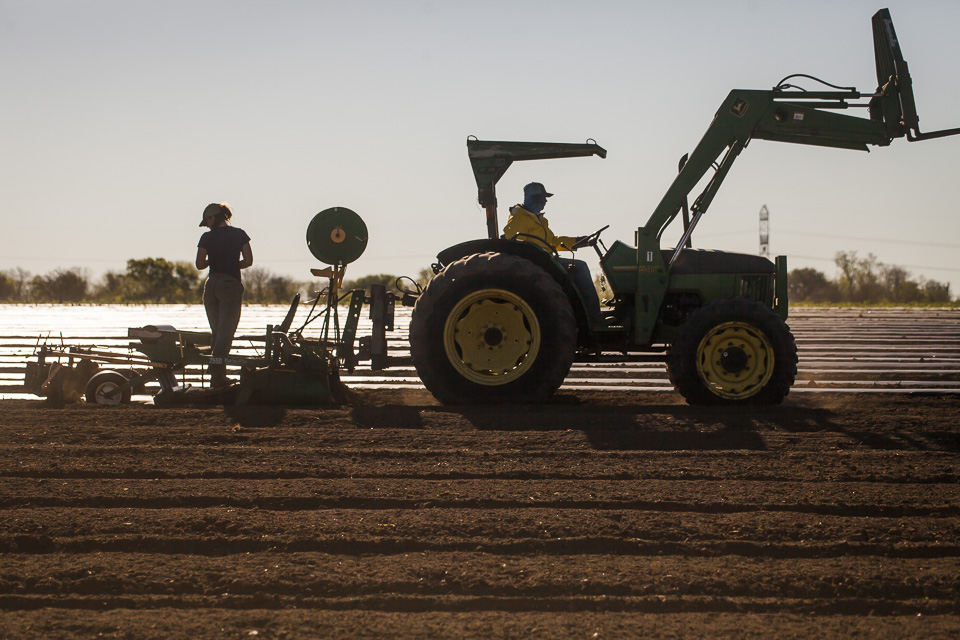
The farm is in full spring mode! We are planting our first round of melons and zucchinis, and our second round of tomatoes and peppers. Those hot-weather-lovin' crops are getting into the ground! We are starting to think about the tomato season, drinking a lot more water, and slathering on that sunscreen. Exciting new crops like leeks and spring onions are rolling in strong, too!
We are gearing up for the Spring Picnic and Garden Gallop 5K next Saturday, 3/31. The last of the transplants are headed to markets this weekend, so head on over to your favorite weekend market to grab some! We also donated a boatload of transplants to SFC's Resource Giveaway Day this week. An awesome biannual event that benefits school and community gardens all around town.


ROASTED CARROTS WITH MISO-BROWN BUTTER
03/22/18 — Heydon Hatcher
Recipe and Image by Nadia Tamby
This sauce/ glaze is easy to make and stores for months in the fridge, so make extra to add to any roasted vegetables you like! I suggest doubling the miso and butter and storing it in a clean jar in the fridge. It is rich and savory – so a little goes a long way. I love the way the sweet carrots pair with the salty buttery sauce. Roast your carrots the way you like. For this dish I roast them more than I normally would so that the carrots are soft and creamy under a wrinkled crispy skin, but if you prefer your carrots more crunchy, then less time in the oven works as well.
Ingredients:![]()
Instructions:
Set your oven to 425F and line a large baking sheet with foil (this helps with clean up). Slice the tops off the carrots and slice them in half lengthwise. Don’t even bother peeling JBG carrots – the skin is so thin, it’s barely worth the effort (or the waste!). Arrange the carrots in a single layer cut-side up on the baking sheet, drizzle with salt, pepper, and olive oil and bake for about 25-30 minutes.
While your carrots are in the oven, make the sauce:
In a small saucepan (preferably light colored so you can monitor the color of the butter), add the butter and cook on medium heat until the butter appears brown (not too dark) and smells amazing. Immediately remove from the heat. In a small glass jar or bowl, add the miso paste and using a fork, mix the browned butter in. If the milk solids in your brown butter appear burned or too dark, simply strain them out before stirring it into the miso paste.
Serve your carrots on a platter and drizzle the miso-brown butter on top. Sprinkle the green onions on top and serve. This dish will be fine hot or at room temperature. Keep in mind that the butter will solidify when it’s cold, so it will still taste great but might not be as visually appealing.
This sauce/ glaze is easy to make and stores for months in the fridge, so make extra to add to any roasted vegetables you like! I suggest doubling the miso and butter and storing it in a clean jar in the fridge. It is rich and savory – so a little goes a long way. I love the way the sweet carrots pair with the salty buttery sauce. Roast your carrots the way you like. For this dish I roast them more than I normally would so that the carrots are soft and creamy under a wrinkled crispy skin, but if you prefer your carrots more crunchy, then less time in the oven works as well.
Ingredients:
- 2 lbs carrots
- 3 tablespoons miso paste (I use Miso Master Traditional Red Miso)
- 4 tablespoons butter
- Salt and pepper, to taste
- 1-2 thinly sliced scallions
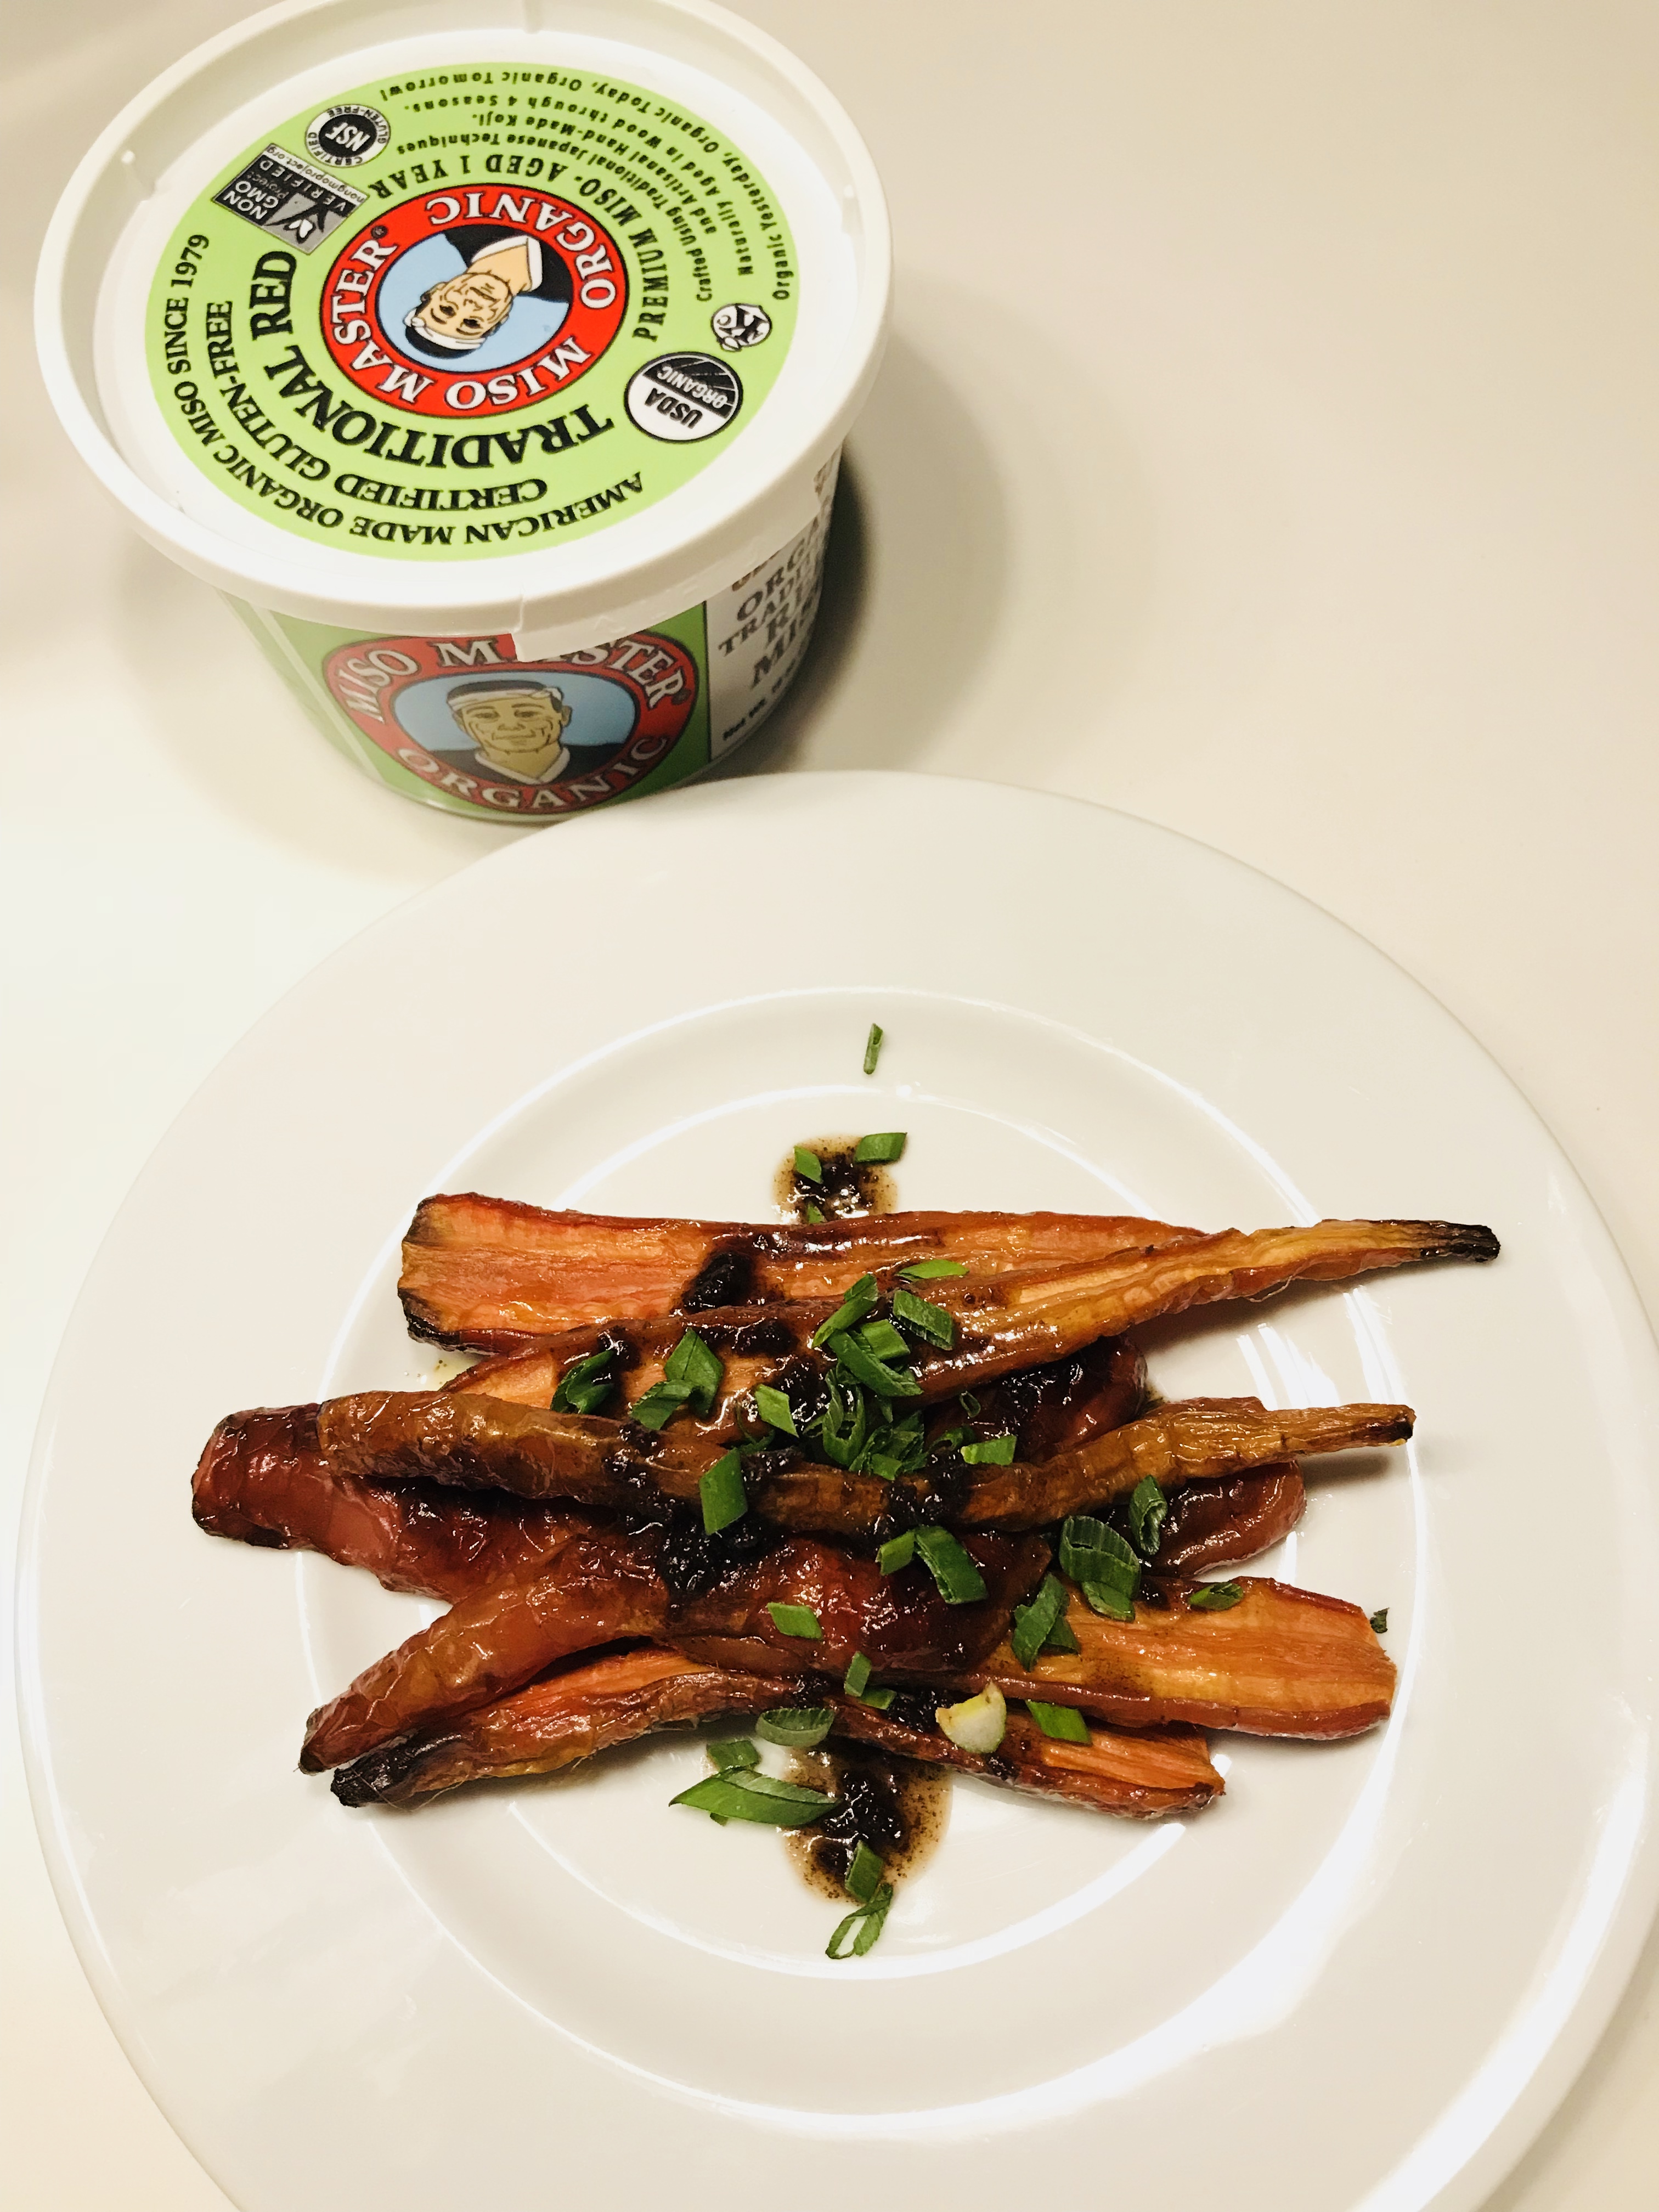
Instructions:
Set your oven to 425F and line a large baking sheet with foil (this helps with clean up). Slice the tops off the carrots and slice them in half lengthwise. Don’t even bother peeling JBG carrots – the skin is so thin, it’s barely worth the effort (or the waste!). Arrange the carrots in a single layer cut-side up on the baking sheet, drizzle with salt, pepper, and olive oil and bake for about 25-30 minutes.
While your carrots are in the oven, make the sauce:
In a small saucepan (preferably light colored so you can monitor the color of the butter), add the butter and cook on medium heat until the butter appears brown (not too dark) and smells amazing. Immediately remove from the heat. In a small glass jar or bowl, add the miso paste and using a fork, mix the browned butter in. If the milk solids in your brown butter appear burned or too dark, simply strain them out before stirring it into the miso paste.
Serve your carrots on a platter and drizzle the miso-brown butter on top. Sprinkle the green onions on top and serve. This dish will be fine hot or at room temperature. Keep in mind that the butter will solidify when it’s cold, so it will still taste great but might not be as visually appealing.
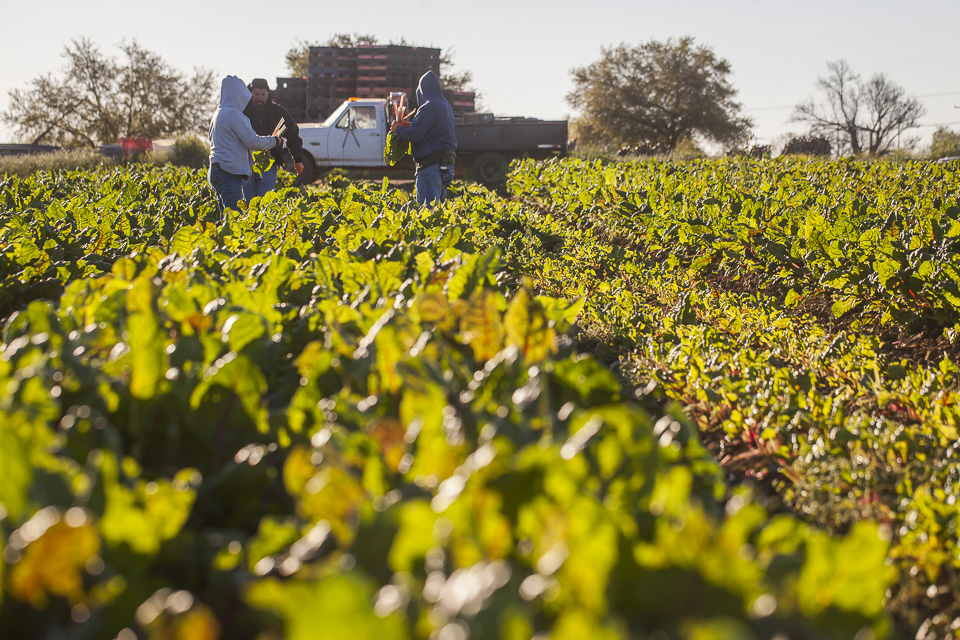
CSA BOX CONTENTS WEEK OF MAR 19TH
03/20/18 — Scott
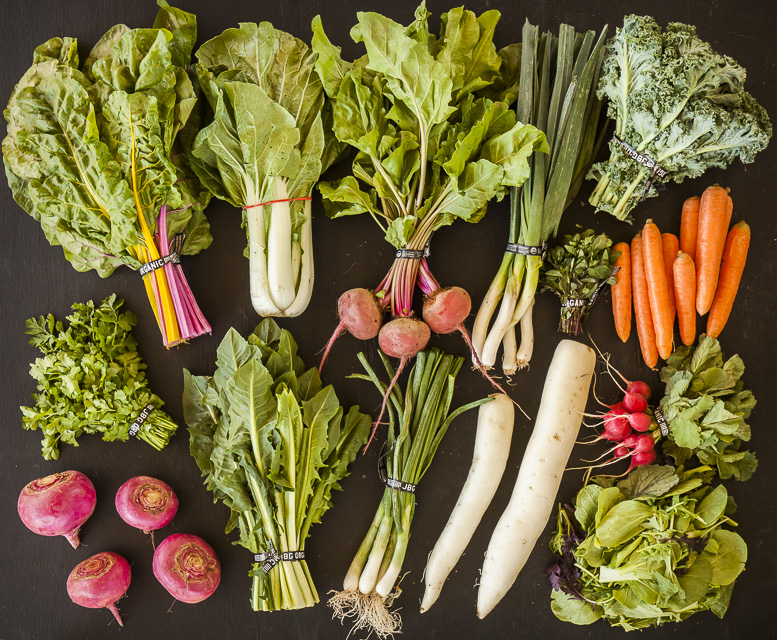 CSA Box Contents Week of Mar 19th
Large Box
Beet, Golden
Bok Choy, Baby
Carrot, Red
Greens, Chard, Rainbow
Greens, Kale, Curly
Greens, Mizuna
Herb, Cilantro
Leek
Lettuce, Romaine
Onion, Spring Yellow
Radish, French Breakfast
Turnip, White Japanese
Beet, Golden
Bok Choy, Baby
Carrot, Red
Greens, Chard, Rainbow
Greens, Kale, Curly
Greens, Mizuna
Herb, Cilantro
Leek
Lettuce, Romaine
Onion, Spring Yellow
Radish, French Breakfast
Turnip, White Japanese
Medium Box
Beet, Golden
Bok Choy
Carrot, Orange
Greens, Chard, Rainbow
Greens, Spinach
Herb, Cilantro
Lettuce, Romaine
Onion, Spring Yellow
Radish, French Breakfast
Turnip, White Japanese
Beet, Golden
Bok Choy
Carrot, Orange
Greens, Chard, Rainbow
Greens, Spinach
Herb, Cilantro
Lettuce, Romaine
Onion, Spring Yellow
Radish, French Breakfast
Turnip, White Japanese
Small Box
Beet, Red
Carrot, Orange
Greens, Chard, Rainbow
Leek
Lettuce, Romaine
Radish, Red
Turnip, Scarlett
Beet, Red
Carrot, Orange
Greens, Chard, Rainbow
Leek
Lettuce, Romaine
Radish, Red
Turnip, Scarlett
Individual Box
Beet, Red
Carrot, Orange
Greens, Dandelion
Greens, Spinach
Radish, Red
Beet, Red
Carrot, Orange
Greens, Dandelion
Greens, Spinach
Radish, Red
STUMPED BY STORAGE? HOW TO MAKE THE MOST OF YOUR CSA THIS YEAR!
03/16/18 — Heydon Hatcher
Joining the CSA can be an immensely rewarding experience. It gets folks in touch with the seasons, their region, and directly contributes to the wellbeing of the local community. Despite all the wonderful pros, it can be quite a daunting task to take on unfamiliar fruits and veggies when you unveil your weekly haul. It forces you to try new cooking techniques, attempt new recipes, and get to know the seasonality and personalities of so many veggies. On top of that, storage of these veggies can be a giant challenge on its own. Do I keep the tomatoes in the fridge? Do the collards need to be covered? How long do certain things stay fresh? Smart storage is an integral skill in order to ensure the longevity of our farm-fresh veggies for all those adventurous recipes you have planned for the week.
![]() Ada readying her herbs for the fridge. Photo by Scott David Gordon.
Ada readying her herbs for the fridge. Photo by Scott David Gordon.
Some veggies prefer room temperature, while others prefer dark, cool cabinets. Some are sensitive to light and ethylene (a maturing agent that some veggies emit), while others need to have their stems emerged in water in the fridge. In the list below, we dive into all the nuances of veggie care. Take a peek!![]() Bag options. Photo by Scott David Gordon.
Bag options. Photo by Scott David Gordon.
![]() Ada's frozen goods to prolong seasons and circumvent waste. Photo by Scott David Gordon.
Ada's frozen goods to prolong seasons and circumvent waste. Photo by Scott David Gordon.
![]() Ada's compost pile. Photo by Scott David Gordon.
Ada's compost pile. Photo by Scott David Gordon.
Broccoli + Cauliflower - Get these yummy crops into a baggy or container in the refrigerator’s crisper drawer, and they should be good for a week.
Bulk Roots (rutabagas, radishes, turnips, beets without greens attached) - If greens are attached, remove and then store in the refrigerator in a bag or container of some sort to keep the moisture in. Beets can last up to 3 weeks, radishes can last up to 2 weeks, and lastly, turnips and rutabagas can last up to 2 weeks. The greens of beets and turnips should be enjoyed within 3 days of being trimmed, and stored in a container or bag after being cleaned and dried.
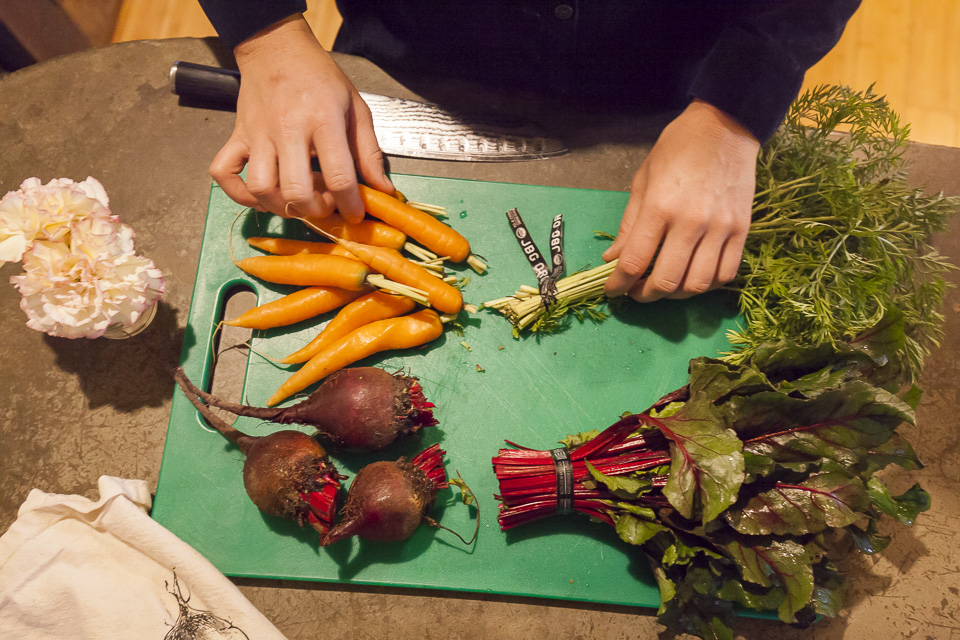
Carrots - Cut off the greens if they come bunched (Make pesto with the greens!) and put in a container or bag in the crisper drawer, and these tasty snack veggies will last about 2 to 3 weeks.
![]() Carrots and beets getting greens chopped off. Photo by Scott David Gordon.
Carrots and beets getting greens chopped off. Photo by Scott David Gordon.
Cucumbers - This summertime sweetheart should be stored at room temperature, if it is stored anywhere below 50 degrees, it sustains “chilling injuries,” like pitting and accelerated decay. Keep them away from tomatoes, melons, and bananas, which emit ethylene (a maturing agent) since cucumbers are highly sensitive to it.
Eggplant - Similar to the cucumber, this nightshade stores well on the countertop. If your kitchen runs hotter than typical room temperature, it would be beneficial to store this veggie in a dark cupboard. It should keep for 2 to 5 days. Be sure to keep away from high ethylene producing vegetables! Eggplants are sensitive like the aforementioned cucumbers to this chemical.
Cabbage - This should be stored in a bag or container, in the crisper drawer. In these conditions, these crispy greens will last about 2 weeks.
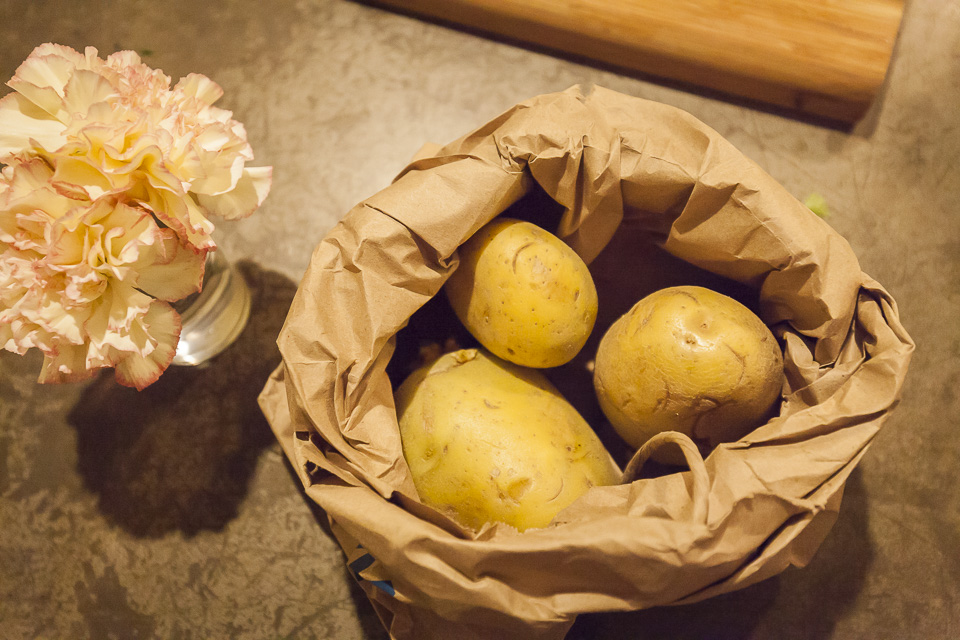
Potatoes - Put these in a paper bag in a dark pantry, and they can last a month! Be sure air can circulate around them.
![]() Potatoes in a sack. Photo by Scott David Gordon.
Potatoes in a sack. Photo by Scott David Gordon.
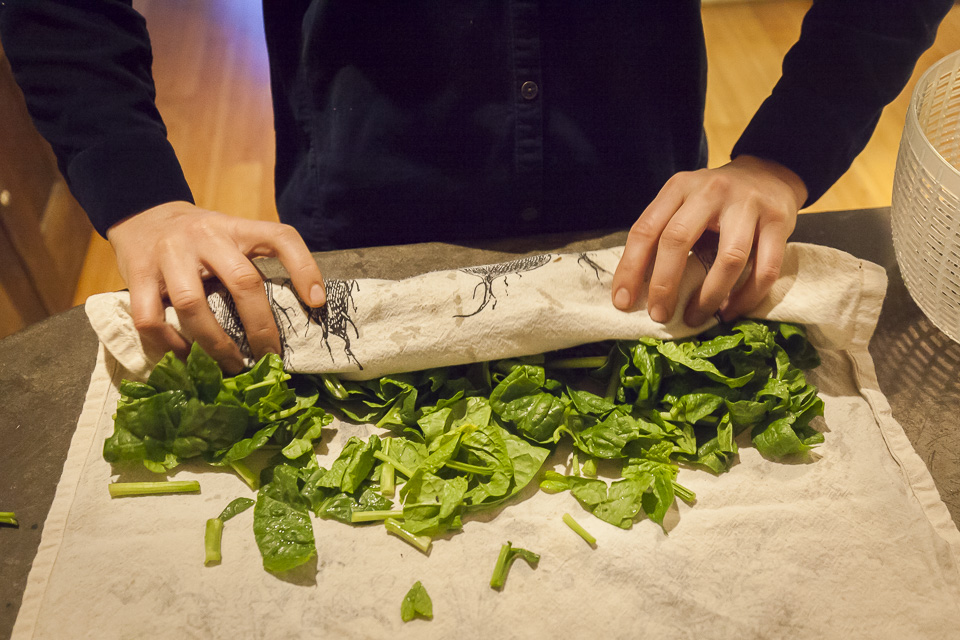
Salad Greens (arugula, spinach, romaine, loose-leaf lettuce) - If these come in a little dirty, don't be alarmed. For easiest meal prep, you can wash these when you get them; however, make sure that they're completely dried before you put them in the fridge! Any water left on these leafy greens will turn them into slime. There are two great ways to ensure dryness. First off, a salad spinner - for the fall and winter seasons, this kitchen tool is well worth it and a huge time-saver. You can always use the bowl for other functions, too! If a salad spinner isn’t your speed, another good way to dry greens is by laying them out on a tea towel and wrapping them in the towel until they are good and dry. For especially muddy greens (sometimes our low-growing spinach comes in pretty muddy), you can dunk these in a bowl of water. Pro ecological tip: reuse water to water a houseplant! These should remain fresh for about 10 days.
![]() Salad spinner. Photo by Scott David Gordon.
Salad spinner. Photo by Scott David Gordon.
![]() Drying out greens via tea towel. Photo by Scott David Gordon.
Drying out greens via tea towel. Photo by Scott David Gordon.
Side note: if your greens show up looking wilted, refresh them and bring them back to life! This is easily done by soaking them in water, storing them in the fridge with a bag over them or lightly covered with plastic. Store them in the fridge like this until they look better. Then take them out, let the bottoms dry out, and store in a bag or container.
Kohlrabi - Cut the leaves off the bulb (you can eat the greens! Clean and use within three days), scrub the bulb, and place in a container or bag in the crisper drawer. These should keep for about a week.
Leeks - Trim the dark ends, and keep the roots intact. Place in a container or bag, get them in the refrigerator, and they should last about a week.
Melons - To ripen melons, keep in a paper bag on your kitchen counter. Once it starts to smell slightly sweet and give around the stem when pressed, put into the fridge. Once they are ripe, eat these fruits ASAP! You can keep them in the fridge for up to 5 days. Once cut, keep exposed flesh covered in plastic. Cut melons should keep for up to 3 days.
Watermelon - Keep these summertime darlings in the fridge. This melon, once off the vine, will ripen no further. Storing these melons in the cold also make them that much more refreshing once you cut them open. Uncut, watermelons stay fresh for 2 to 3 weeks. Once cut, cover the exposed fleshy side in plastic and keep in the fridge. It will remain fresh for up to three days.
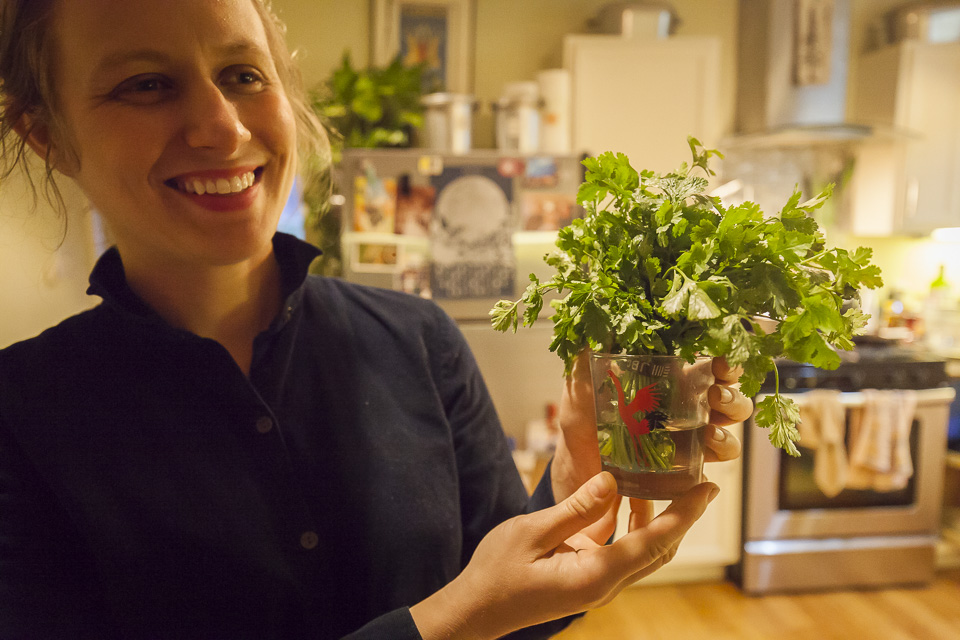
Herbs (parsley, cilantro) - Treat these like bunched greens. If they need refreshing, you can trim the stems and place in a cup of water. Once sufficiently refreshed, store these in a lightly sealed bag in the crisper drawer. They should store for about a week.
![]() Herbs getting a good soak. Photo by Scott David Gordon.
Herbs getting a good soak. Photo by Scott David Gordon.
Okra - Store in a bag or container or wrap in a paper towel and place in a perforated bag, then place the fresh okra in the fridge (make sure that the okra is dry after washing before storing them in the fridge, can lead to slimy mold if not dry). This veggie should last about 3 days in these conditions.
Onions - Place in a dark pantry, and these hardy bulbs should last about 1 to 2 months! Make sure that air can circulate around them. If you cut into one of these, you should store in the fridge and use the rest within 3 to 4 days for maximum freshness.
Peppers - Get into a container or bag of some sort and into the fridge, and they should last about 5 days!
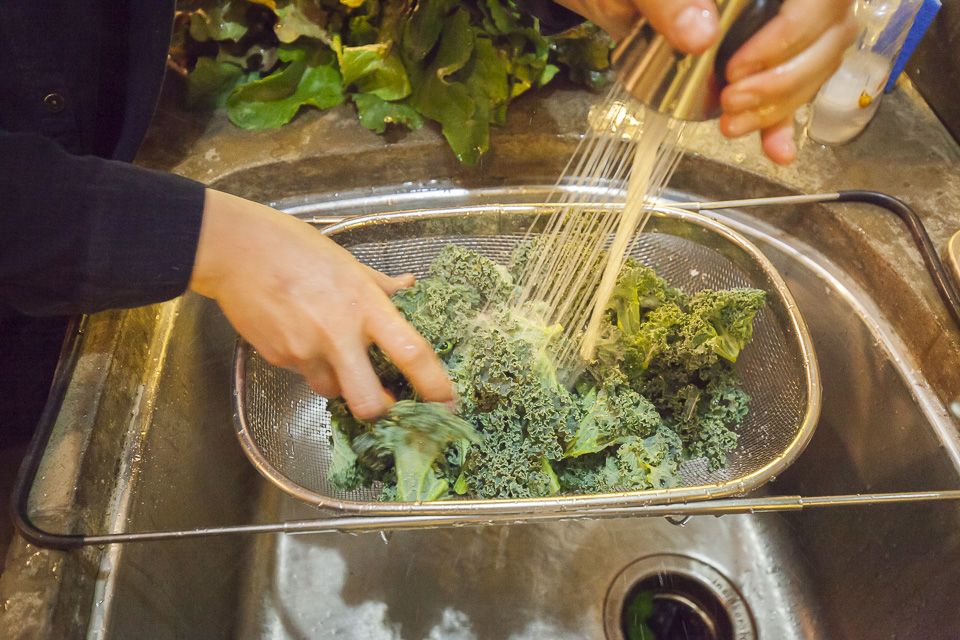
Bunched Greens (chard, beet greens, kale, collards, mustard greens) - These greens need to be trimmed at the bottom, washed, dried thoroughly before being bagged and/or placed in a container and into the crisper drawer. They should remain fresh for about a week.
![]() Chopping chard. Photo by Scott David Gordon.
Chopping chard. Photo by Scott David Gordon.
![]() Kale bath. Photo by Scott David Gordon.
Kale bath. Photo by Scott David Gordon.
Side note: If your bunched greens are looking sad when you get them, you can easily refresh them! Follow tips listed in "Salad Greens" for the 411 on that procedure.
Summer Squash - Place in a plastic bag or closed container like a tupperware and keep in the fridge. This summertime crop will last about 5 days in these conditions.
Sweet Potatoes - In a paper bag in a dark pantry, these 'taters will last about 2 weeks.
Tomatoes - These divas prefer storage on the countertop. If you have a well-vented container, tomatoes love to live in those. For quicker ripening, put in a paper bag so ethylene can build up (this is the chemical that causes ripening and acts as a maturing agent). These will store for 3-5 days.
Winter Squash (butternut, acorn) - These gourds love to be unwrapped in a dark, cool pantry. In these conditions, they will store for about a month.
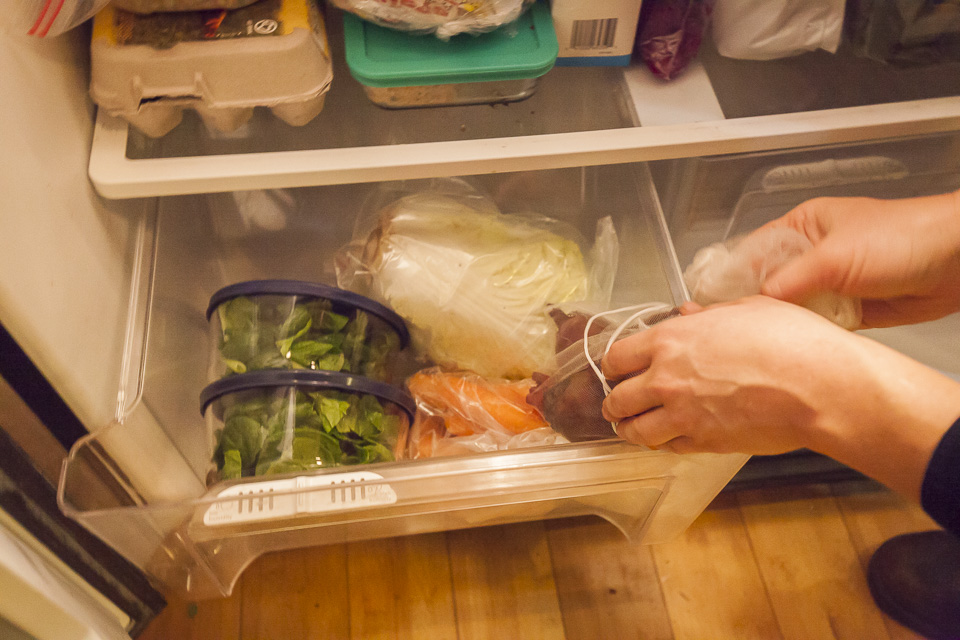
![]() Veggies ready for the week in the crisper drawer. Photo by Scott David Gordon.
Veggies ready for the week in the crisper drawer. Photo by Scott David Gordon.
We hope this helps in your weekly CSA adventures! 'Til next time.
 Ada readying her herbs for the fridge. Photo by Scott David Gordon.
Some veggies prefer room temperature, while others prefer dark, cool cabinets. Some are sensitive to light and ethylene (a maturing agent that some veggies emit), while others need to have their stems emerged in water in the fridge. In the list below, we dive into all the nuances of veggie care. Take a peek!
Quick Pointers to Ponder
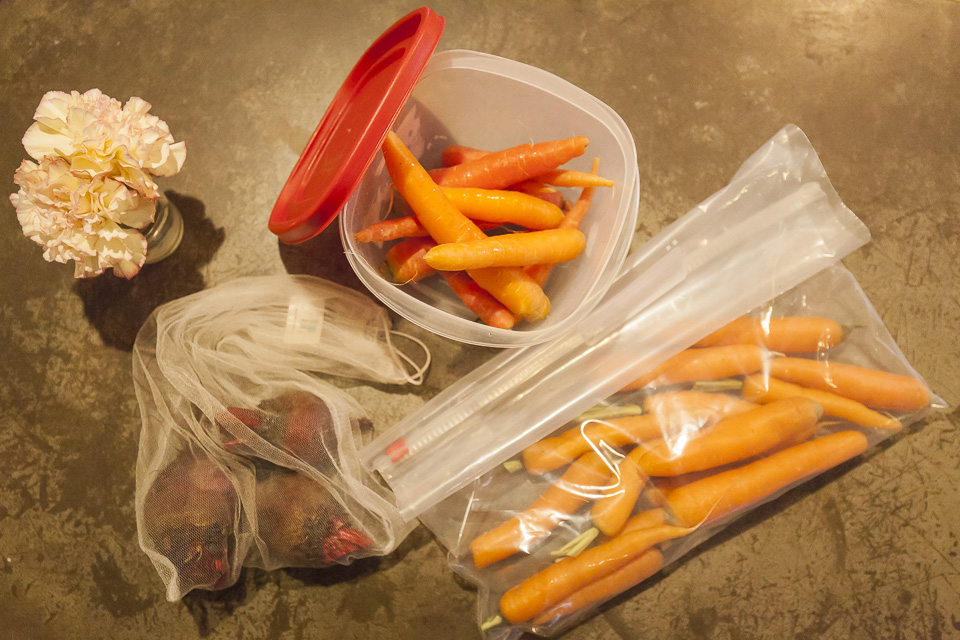
- When storing produce, any time that plants are left uncovered, they are going to lose moisture, and wilt. Putting them in a bag is a great way to retain humidity, and this pertains to a lot of different crops. It's important to separate the greens from the roots as the greens will continue to extract water from roots. Think: carrots/beets - the roots will stay firmer once the greens have been removed.
- One vital aspect of storage is temperature. Vegetables prefer different temperatures to grow in, and the same goes for storage. In the below list we mention: the refrigerator, the crisper drawer, dark cabinets, and the countertop. Refrigerators are obviously great options for storage, with the fridge crisper drawers being even better options with specific settings that control humidity levels, etc.
- In the list below, we mention “place them into a bag or a container” quite often. This deserves a little more elaboration, a container can mean a sealable glass or plastic tupperware, and a bag can mean a plastic bag, recycled produce bags from the grocery store, ziplocks, or even fancy mesh produce bags (shown in the picture below). *** Though the plastic bags might seem wasteful, please note that you can reuse them until they fall apart and the zippers break. New kale goes into the old kale bag… if you use a paper towel to wrap veggies, you can reuse it to wipe up a spill, so on and so forth.
 Bag options. Photo by Scott David Gordon.
- Another pro-tip is to have long-term storage on the mind, and freeze produce! Too many beets and tomatoes? Longer term storage is a good way to extend the season. Blanching veggies and freezing them works well for a lot of different vegetables. For a bit more involved approach, you can also preserve and can! Quick pickling is also a great way to use excess veggies and is definitely easier than it sounds.
 Ada's frozen goods to prolong seasons and circumvent waste. Photo by Scott David Gordon.
- By adventuring outside the plate with new recipes, you can expand your palate, and also learn new delicious, staple recipes for years to come. Need a good resource for veggie-specific recipes? Check out our Pinterest board here!
- With just a little weekly prep, you can really change the way you cook during the week. Wash and cut your greens when you get your box, and you are more likely to use them in the week ahead.
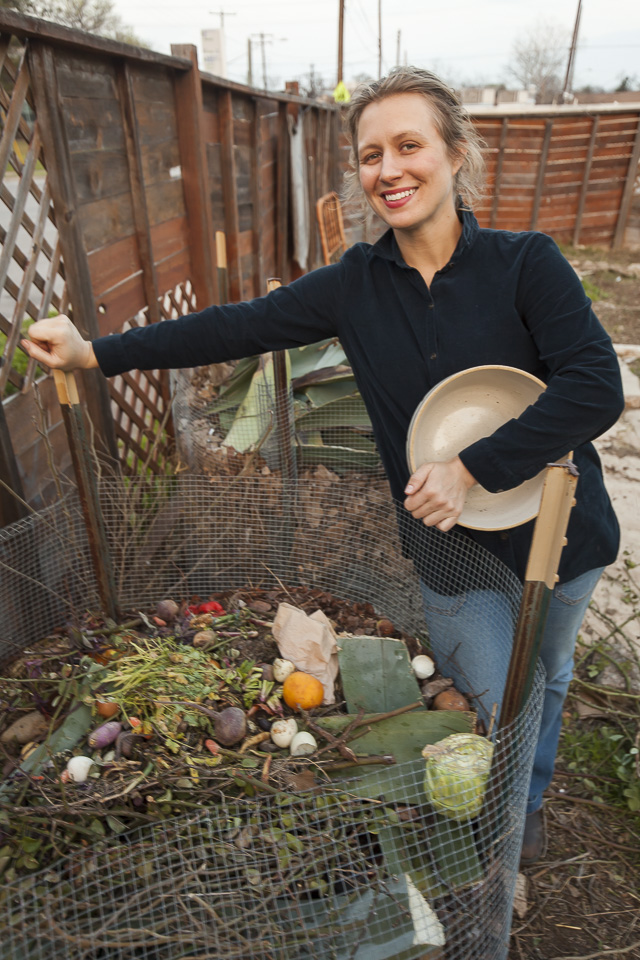
- Feel like you are wasting tons of veggies week after week? One way to skip out on wasting veggies is to trade out those veggies you aren’t so keen on with ones you know you will use when you pick up your CSA at the market, or by using our customization feature online! If all else fails and you don’t get around to using all your veggies, COMPOST! Then, you’ll really know that your veggie waste is going to good use.
 Ada's compost pile. Photo by Scott David Gordon.
Storage Tips by Veggie
Basil - Tender and leafy herb. Place bunch in a cup of water and lightly cover entire bunch with a plastic bag. When you get your bunch, trim the bottom of the stems for best results. These do best on a countertop. Usually lasts around 5-7 days.Broccoli + Cauliflower - Get these yummy crops into a baggy or container in the refrigerator’s crisper drawer, and they should be good for a week.
Bulk Roots (rutabagas, radishes, turnips, beets without greens attached) - If greens are attached, remove and then store in the refrigerator in a bag or container of some sort to keep the moisture in. Beets can last up to 3 weeks, radishes can last up to 2 weeks, and lastly, turnips and rutabagas can last up to 2 weeks. The greens of beets and turnips should be enjoyed within 3 days of being trimmed, and stored in a container or bag after being cleaned and dried.
Carrots - Cut off the greens if they come bunched (Make pesto with the greens!) and put in a container or bag in the crisper drawer, and these tasty snack veggies will last about 2 to 3 weeks.
 Carrots and beets getting greens chopped off. Photo by Scott David Gordon.
Cucumbers - This summertime sweetheart should be stored at room temperature, if it is stored anywhere below 50 degrees, it sustains “chilling injuries,” like pitting and accelerated decay. Keep them away from tomatoes, melons, and bananas, which emit ethylene (a maturing agent) since cucumbers are highly sensitive to it.
Eggplant - Similar to the cucumber, this nightshade stores well on the countertop. If your kitchen runs hotter than typical room temperature, it would be beneficial to store this veggie in a dark cupboard. It should keep for 2 to 5 days. Be sure to keep away from high ethylene producing vegetables! Eggplants are sensitive like the aforementioned cucumbers to this chemical.
Cabbage - This should be stored in a bag or container, in the crisper drawer. In these conditions, these crispy greens will last about 2 weeks.
Potatoes - Put these in a paper bag in a dark pantry, and they can last a month! Be sure air can circulate around them.
 Potatoes in a sack. Photo by Scott David Gordon.
Salad Greens (arugula, spinach, romaine, loose-leaf lettuce) - If these come in a little dirty, don't be alarmed. For easiest meal prep, you can wash these when you get them; however, make sure that they're completely dried before you put them in the fridge! Any water left on these leafy greens will turn them into slime. There are two great ways to ensure dryness. First off, a salad spinner - for the fall and winter seasons, this kitchen tool is well worth it and a huge time-saver. You can always use the bowl for other functions, too! If a salad spinner isn’t your speed, another good way to dry greens is by laying them out on a tea towel and wrapping them in the towel until they are good and dry. For especially muddy greens (sometimes our low-growing spinach comes in pretty muddy), you can dunk these in a bowl of water. Pro ecological tip: reuse water to water a houseplant! These should remain fresh for about 10 days.
 Salad spinner. Photo by Scott David Gordon.
 Drying out greens via tea towel. Photo by Scott David Gordon.
Side note: if your greens show up looking wilted, refresh them and bring them back to life! This is easily done by soaking them in water, storing them in the fridge with a bag over them or lightly covered with plastic. Store them in the fridge like this until they look better. Then take them out, let the bottoms dry out, and store in a bag or container.
Kohlrabi - Cut the leaves off the bulb (you can eat the greens! Clean and use within three days), scrub the bulb, and place in a container or bag in the crisper drawer. These should keep for about a week.
Leeks - Trim the dark ends, and keep the roots intact. Place in a container or bag, get them in the refrigerator, and they should last about a week.
Melons - To ripen melons, keep in a paper bag on your kitchen counter. Once it starts to smell slightly sweet and give around the stem when pressed, put into the fridge. Once they are ripe, eat these fruits ASAP! You can keep them in the fridge for up to 5 days. Once cut, keep exposed flesh covered in plastic. Cut melons should keep for up to 3 days.
Watermelon - Keep these summertime darlings in the fridge. This melon, once off the vine, will ripen no further. Storing these melons in the cold also make them that much more refreshing once you cut them open. Uncut, watermelons stay fresh for 2 to 3 weeks. Once cut, cover the exposed fleshy side in plastic and keep in the fridge. It will remain fresh for up to three days.
Herbs (parsley, cilantro) - Treat these like bunched greens. If they need refreshing, you can trim the stems and place in a cup of water. Once sufficiently refreshed, store these in a lightly sealed bag in the crisper drawer. They should store for about a week.
 Herbs getting a good soak. Photo by Scott David Gordon.
Okra - Store in a bag or container or wrap in a paper towel and place in a perforated bag, then place the fresh okra in the fridge (make sure that the okra is dry after washing before storing them in the fridge, can lead to slimy mold if not dry). This veggie should last about 3 days in these conditions.
Onions - Place in a dark pantry, and these hardy bulbs should last about 1 to 2 months! Make sure that air can circulate around them. If you cut into one of these, you should store in the fridge and use the rest within 3 to 4 days for maximum freshness.
Peppers - Get into a container or bag of some sort and into the fridge, and they should last about 5 days!
Bunched Greens (chard, beet greens, kale, collards, mustard greens) - These greens need to be trimmed at the bottom, washed, dried thoroughly before being bagged and/or placed in a container and into the crisper drawer. They should remain fresh for about a week.
 Chopping chard. Photo by Scott David Gordon.
 Kale bath. Photo by Scott David Gordon.
Side note: If your bunched greens are looking sad when you get them, you can easily refresh them! Follow tips listed in "Salad Greens" for the 411 on that procedure.
Summer Squash - Place in a plastic bag or closed container like a tupperware and keep in the fridge. This summertime crop will last about 5 days in these conditions.
Sweet Potatoes - In a paper bag in a dark pantry, these 'taters will last about 2 weeks.
Tomatoes - These divas prefer storage on the countertop. If you have a well-vented container, tomatoes love to live in those. For quicker ripening, put in a paper bag so ethylene can build up (this is the chemical that causes ripening and acts as a maturing agent). These will store for 3-5 days.
Winter Squash (butternut, acorn) - These gourds love to be unwrapped in a dark, cool pantry. In these conditions, they will store for about a month.
 Veggies ready for the week in the crisper drawer. Photo by Scott David Gordon.
We hope this helps in your weekly CSA adventures! 'Til next time.
WEEK 11 IN PHOTOS
03/16/18 — Heydon Hatcher
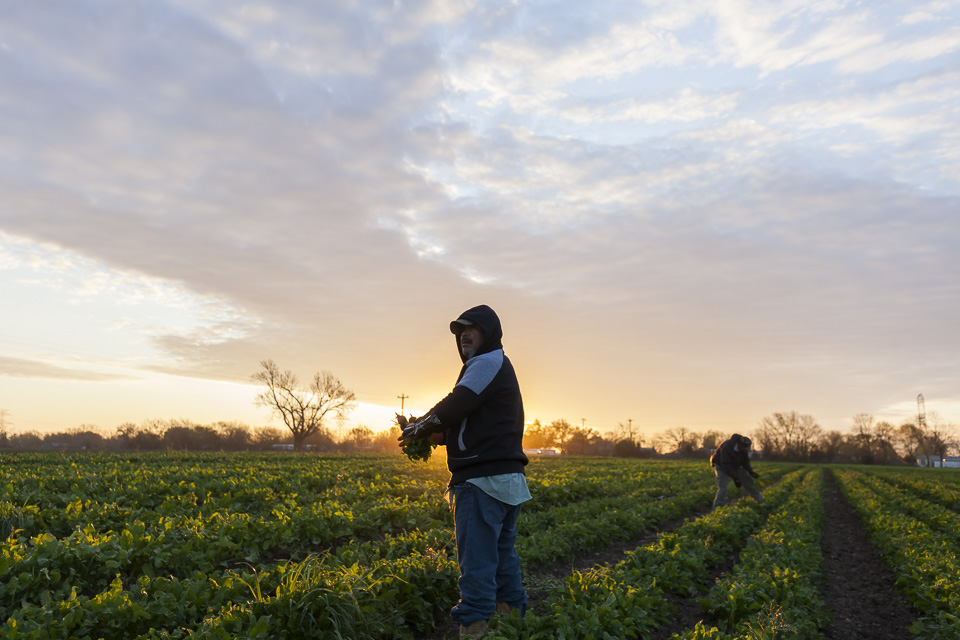 Harvesting at sunrise. Photo by Scott David Gordon.
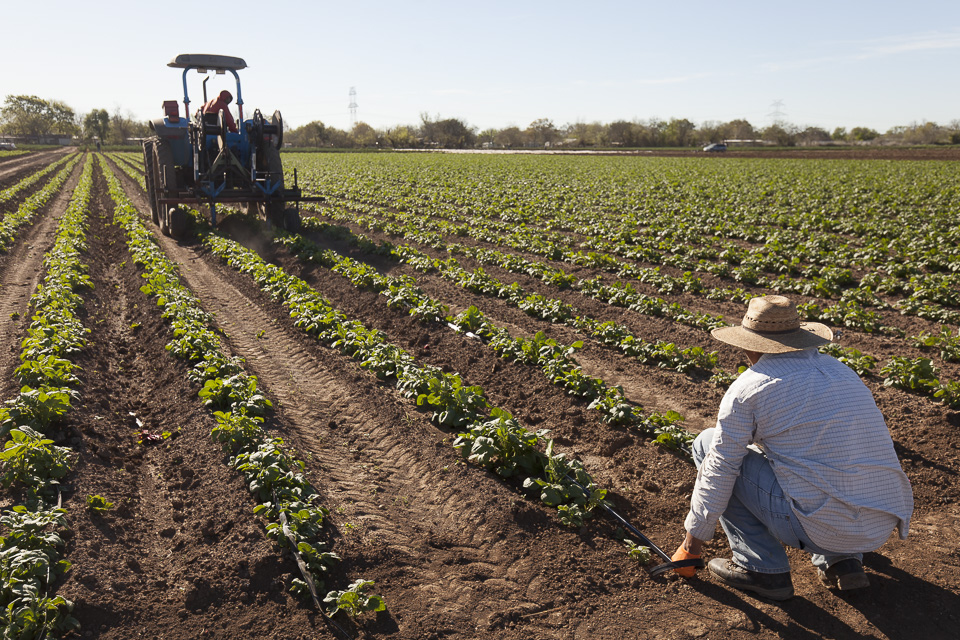
We've officially passed the frost date, so we are "off to the races" as our Farm Manager, Becky says. We are getting those warm-weather, tender crops like tomatoes, peppers, and eggplants into the ground, and finishing up on the last succession of cool weather plantings (think: lettuce and broccoli). Thanks for making the three weekends of the 2018 Transplant Sale such a success. We hope your backyard gardens are shaping up nicely.
Ever wanted to volunteer at the farm? We are in dire need of volunteers during this bustling spring season. In exchange for volunteering, folks are thanked with a Medium CSA share. Pretty cool, eh? It's an awesome way to get to know the farm, your farmers, and also get some free veggies. Just RSVP before coming at jbgorganic.com/volunteer or give the farm office a ring at 512-386-5273.
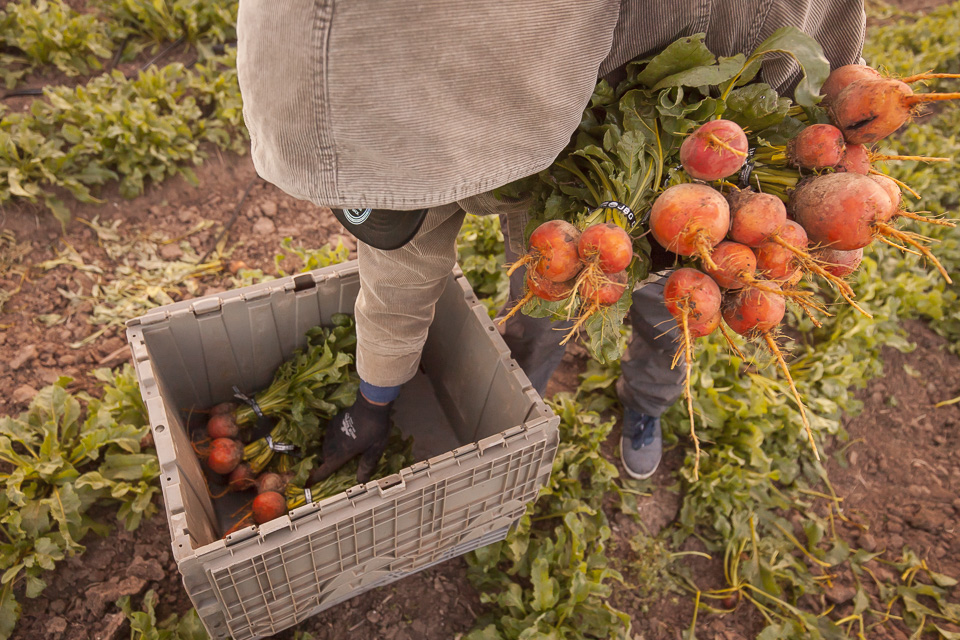 Beets. Photo by Scott David Gordon.
 Beautiful farm skies. Photo by Scott David Gordon.
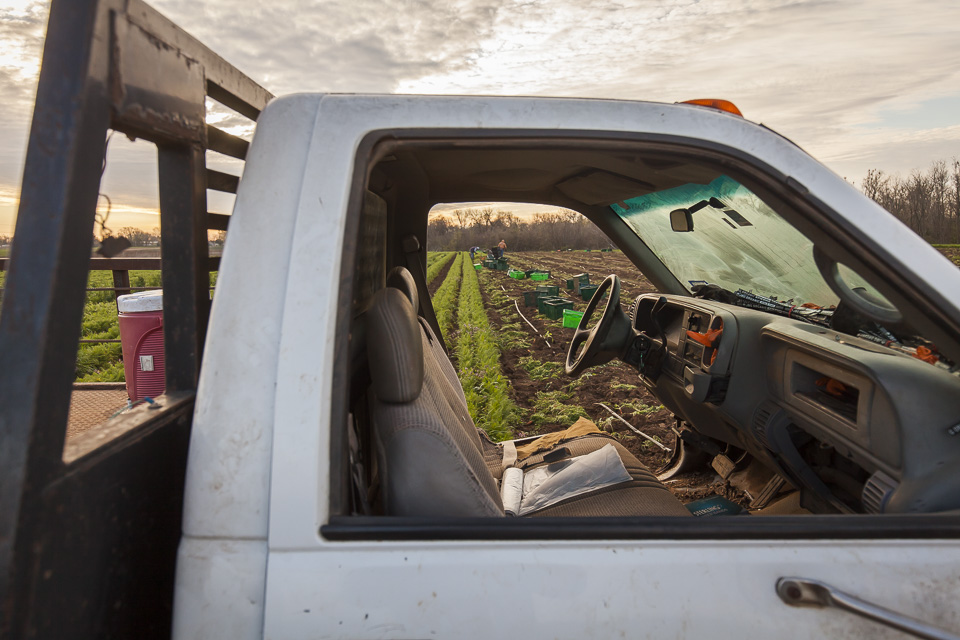 Views from the farm vehicle. Photo by Scott David Gordon.
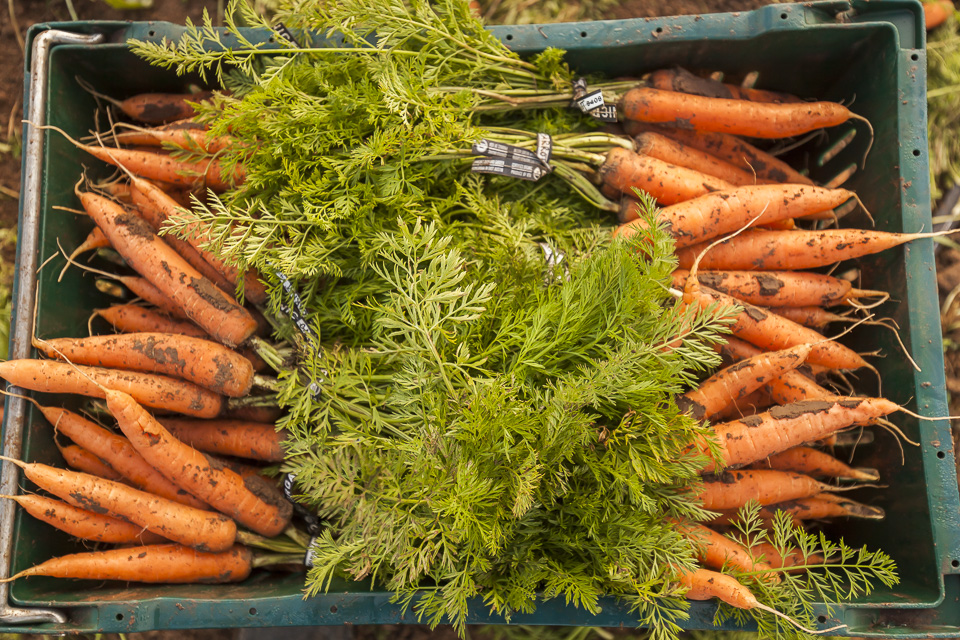 Carrot bounty. Photo by Scott David Gordon.
 After a watering. Photo by Scott David Gordon.
 Growing! Photo by Scott David Gordon.
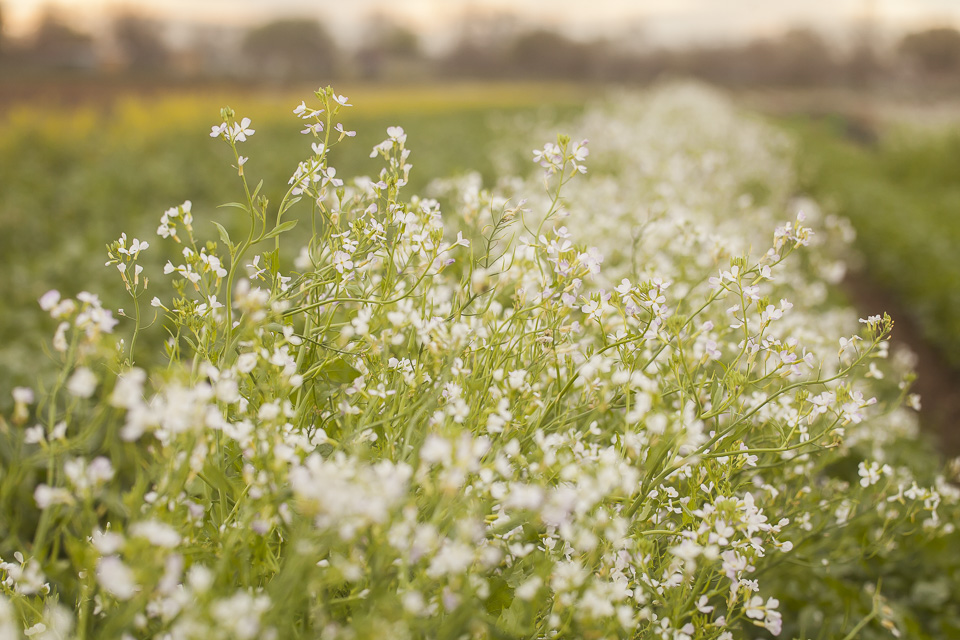 Photo by Scott David Gordon.
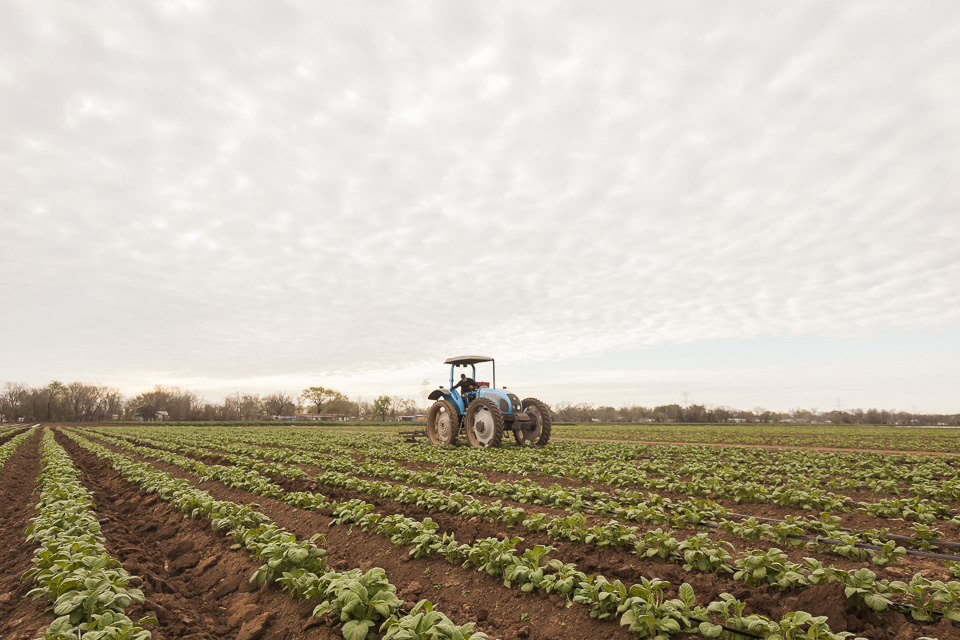 Photo by Scott David Gordon.
 Do you have the Spring Picnic and Garden Gallop on your calendar yet? Photo by Scott David Gordon.
JBG ONIONS: ALL(IUM) YOU NEED TO KNOW
03/16/18 — Heydon Hatcher
Not only does SXSW mean the beginning of springtime here in Austin, but here at the farm, spring means ONIONS! That’s right, we thought this week we would dive into a little history, relay some fun facts, delve into how we cultivate this labor-intensive crop, and generally praise this lovely allium.
This veggie has been part of the human diet for over 7000 years! There have been traces of onions found by archaeologists dating back to 5000 BC. Being easily transportable, storing well and for long periods of time, and growing in a vast array of climates and soil, this bulb has been ubiquitous throughout history. Tracing back to Chinese gardens thousands of years ago, referenced in Indian Vedic writings, mentioned in the Bible, the pilgrims even brought onions on the Mayflower only to discover that Native Americans already grew a different varietal. Talk about a veggie that has really helped the human race thrive - this one has really run the gamut. Egyptians worshipped onions - they saw eternity in the concentric rings that make up its anatomy. They would place onions in Pharaohs' tombs to ensure a full and prosperous afterlife. Greek athletes would consume massive amounts of this veggie prior to significant athletic contests as they believed it would make them significantly stronger! Throughout the years, onions have been thought to aid vision, eliminate dysentery, strengthen joints, alleviate sores of all sorts, and even heal snake bites. What CAN’T this vegetable do?! We cannot get enough of onions, and hope that this post will make your heart grow fonder of them, too.
![]() Montana and the onion. Photo by Scott David Gordon.
Montana and the onion. Photo by Scott David Gordon.
Onions hail from the Allium family... its members are often distinguished for having high sulfur compounds which contribute to their unique aroma and taste (sulfenic acid is what makes you cry when you cut into a fresh onion!). Leeks, garlic, scallions, shallots, and chives are some of the other veggie members of this perennial, flowering, and bulb-producing veggie fam. Despite the first paragraph’s talk of the onion’s omniscience throughout history, don’t be fooled, this crop is one of our more complicated vegetables to cultivate, and also one of our most important. Onions are one of our head farmer's favorites. He loves to tell the long and storied past of his travails with figuring out the cultivation of this bulb as it was so elusive to him for years, back when his farm fit in his backyard. He stumbled upon an onion mentor in the midst of his allium endeavors: Bruce “Onionman” Frasier, the head farmer of Dixondale Farms - one of the biggest producers of onions in the United States. Bruce really aided Brenton in his slow-learning onion education, and taught him one very important thing - the perfect onion has 13 rings.
“The size of an onion bulb is dependent upon the number and size of green leaves at the time of bulb maturity. For each leaf, there will be a ring of onion; the larger the leaf, the larger the ring will be. The perfect onion has 13 rings, which means that you should strive for 13 leaves if you want the biggest onions you've ever grown. The 9th leaf is usually the largest leaf on the plant, and that's when the nitrogen fertility should peak. When the 13th leaf appears, the onion is getting ready to start curing. This occurs at about the same time that the rest of the larger leaves have transferred most of their carbohydrates to the rings, so the onion's neck will start getting soft. It won't need as much moisture, which means you should stop irrigating the crop from this point on.” -Bruce Frasier, onion farmer extraordinaire.
Here at JBG, onions are started from seed in the bare ground. At the end of summer/fall, we prepare about 15 beds (want to learn more about the bed-making process? Click here!), plant onion seeds very tightly together, and let them grow for about 6 to 8 weeks. When they get to pencil-length thickness, we pull them out of the ground, yank the tops off (leaving a few inches of green), and move them to another plastic-covered bed. This is to allow them space to spread out, grow, and bulb. This transplanting process usually begins in October or November and takes about 5 or 6 weeks to complete as there are so many beds of onions, plus a massive amount of plant going into those beds! Onions are frost-resistant and massively resilient, so during the winter, they just hang onto the field until the days lengthen and spring sun returns. They really don’t start to grow until around early March, and when this time rolls around, the growth rate really starts to quicken.
![]() Bare ground growing of onions! Photo by Scott David Gordon.
Bare ground growing of onions! Photo by Scott David Gordon.
![]() Transplanting onions. Photo by Scott David Gordon.
Transplanting onions. Photo by Scott David Gordon.
Fun fact: There three different kinds of onions - short-day (bulbing at 10-12 hours of sunlight), day-neutral (bulbing at 12-14 hours of sunlight), and long-day onions (bulbing at 14-16 hours of sunlight). Here in Austin, short-day onions thrive (we are on the verge of day-neutral, though!); thus, we focus on those. What triggers an onion to bulb is the number of hours of daylight it receives. They will only bulb if they get at least the amounts mentioned above. We plant short-day onions in the fall, while we plant the one day-neutral onion varietal we cultivate during the spring. The day length is why we plant at two different times, to make sure the length of light during a day will trigger bulbing. It’s really quite critical to plant onions at the right time of year to get the right amount of growth.
We don’t usually harvest the full bulb onions until around May. However, you might be wondering how to explain those green onions or spring onions you might be seeing at market? These are just tiny baby bulbs of the full-grown bulbs to come in later months. This allium is edible at every point of growth; thus, we harvest all throughout its lifecycle. It’s easy to differentiate green and spring onions because you can spot that spring onions have little baby bulbs, whereas green onions are long, skinny, and slender. We also grow multiplying onions, in late summer and fall to provide green onions during those times. These onions don’t ever form a bulb; however, when they become fully grown, they divide themselves. When you plant one, you’ll get a full chunk of them. These are also super resilient and hardy.
![]() Green onions. Photo by Scott David Gordon.
Green onions. Photo by Scott David Gordon.
![]() Spring onions! Photo by Brenton.
Spring onions! Photo by Brenton.
When we harvest, we cut off the tops with a specialized tool, called onion shears, then cut the roots off of each bulb. We bag them up in 30 lb mesh bags and cure them in the greenhouse in high heat for a week. This removes the excess moisture and lengthens their longevity. Once they are good and papery on the outside, we lay them all out at the barn. We sic a leaf blower on them to remove dry excess skin and then pack them in bulk bins. We get them into cold storage, and they can last 4 to 5 months! Talk about storage crop!
![]() Curing in the greenhouse. Photo by Scott David Gordon.
Curing in the greenhouse. Photo by Scott David Gordon.
This year we are looking forward to a fruitful and long-lasting onion season! We have yellow, red, and white varieties that we are ecstatic to unveil to you in your CSA box and at market. Have fun(ion) out there in the SXSW fray! ‘Til next time.
This veggie has been part of the human diet for over 7000 years! There have been traces of onions found by archaeologists dating back to 5000 BC. Being easily transportable, storing well and for long periods of time, and growing in a vast array of climates and soil, this bulb has been ubiquitous throughout history. Tracing back to Chinese gardens thousands of years ago, referenced in Indian Vedic writings, mentioned in the Bible, the pilgrims even brought onions on the Mayflower only to discover that Native Americans already grew a different varietal. Talk about a veggie that has really helped the human race thrive - this one has really run the gamut. Egyptians worshipped onions - they saw eternity in the concentric rings that make up its anatomy. They would place onions in Pharaohs' tombs to ensure a full and prosperous afterlife. Greek athletes would consume massive amounts of this veggie prior to significant athletic contests as they believed it would make them significantly stronger! Throughout the years, onions have been thought to aid vision, eliminate dysentery, strengthen joints, alleviate sores of all sorts, and even heal snake bites. What CAN’T this vegetable do?! We cannot get enough of onions, and hope that this post will make your heart grow fonder of them, too.
 Montana and the onion. Photo by Scott David Gordon.
Onions hail from the Allium family... its members are often distinguished for having high sulfur compounds which contribute to their unique aroma and taste (sulfenic acid is what makes you cry when you cut into a fresh onion!). Leeks, garlic, scallions, shallots, and chives are some of the other veggie members of this perennial, flowering, and bulb-producing veggie fam. Despite the first paragraph’s talk of the onion’s omniscience throughout history, don’t be fooled, this crop is one of our more complicated vegetables to cultivate, and also one of our most important. Onions are one of our head farmer's favorites. He loves to tell the long and storied past of his travails with figuring out the cultivation of this bulb as it was so elusive to him for years, back when his farm fit in his backyard. He stumbled upon an onion mentor in the midst of his allium endeavors: Bruce “Onionman” Frasier, the head farmer of Dixondale Farms - one of the biggest producers of onions in the United States. Bruce really aided Brenton in his slow-learning onion education, and taught him one very important thing - the perfect onion has 13 rings.
“The size of an onion bulb is dependent upon the number and size of green leaves at the time of bulb maturity. For each leaf, there will be a ring of onion; the larger the leaf, the larger the ring will be. The perfect onion has 13 rings, which means that you should strive for 13 leaves if you want the biggest onions you've ever grown. The 9th leaf is usually the largest leaf on the plant, and that's when the nitrogen fertility should peak. When the 13th leaf appears, the onion is getting ready to start curing. This occurs at about the same time that the rest of the larger leaves have transferred most of their carbohydrates to the rings, so the onion's neck will start getting soft. It won't need as much moisture, which means you should stop irrigating the crop from this point on.” -Bruce Frasier, onion farmer extraordinaire.
Here at JBG, onions are started from seed in the bare ground. At the end of summer/fall, we prepare about 15 beds (want to learn more about the bed-making process? Click here!), plant onion seeds very tightly together, and let them grow for about 6 to 8 weeks. When they get to pencil-length thickness, we pull them out of the ground, yank the tops off (leaving a few inches of green), and move them to another plastic-covered bed. This is to allow them space to spread out, grow, and bulb. This transplanting process usually begins in October or November and takes about 5 or 6 weeks to complete as there are so many beds of onions, plus a massive amount of plant going into those beds! Onions are frost-resistant and massively resilient, so during the winter, they just hang onto the field until the days lengthen and spring sun returns. They really don’t start to grow until around early March, and when this time rolls around, the growth rate really starts to quicken.
 Bare ground growing of onions! Photo by Scott David Gordon.
 Transplanting onions. Photo by Scott David Gordon.
Fun fact: There three different kinds of onions - short-day (bulbing at 10-12 hours of sunlight), day-neutral (bulbing at 12-14 hours of sunlight), and long-day onions (bulbing at 14-16 hours of sunlight). Here in Austin, short-day onions thrive (we are on the verge of day-neutral, though!); thus, we focus on those. What triggers an onion to bulb is the number of hours of daylight it receives. They will only bulb if they get at least the amounts mentioned above. We plant short-day onions in the fall, while we plant the one day-neutral onion varietal we cultivate during the spring. The day length is why we plant at two different times, to make sure the length of light during a day will trigger bulbing. It’s really quite critical to plant onions at the right time of year to get the right amount of growth.
We don’t usually harvest the full bulb onions until around May. However, you might be wondering how to explain those green onions or spring onions you might be seeing at market? These are just tiny baby bulbs of the full-grown bulbs to come in later months. This allium is edible at every point of growth; thus, we harvest all throughout its lifecycle. It’s easy to differentiate green and spring onions because you can spot that spring onions have little baby bulbs, whereas green onions are long, skinny, and slender. We also grow multiplying onions, in late summer and fall to provide green onions during those times. These onions don’t ever form a bulb; however, when they become fully grown, they divide themselves. When you plant one, you’ll get a full chunk of them. These are also super resilient and hardy.
 Green onions. Photo by Scott David Gordon.
 Spring onions! Photo by Brenton.
When we harvest, we cut off the tops with a specialized tool, called onion shears, then cut the roots off of each bulb. We bag them up in 30 lb mesh bags and cure them in the greenhouse in high heat for a week. This removes the excess moisture and lengthens their longevity. Once they are good and papery on the outside, we lay them all out at the barn. We sic a leaf blower on them to remove dry excess skin and then pack them in bulk bins. We get them into cold storage, and they can last 4 to 5 months! Talk about storage crop!
 Curing in the greenhouse. Photo by Scott David Gordon.
This year we are looking forward to a fruitful and long-lasting onion season! We have yellow, red, and white varieties that we are ecstatic to unveil to you in your CSA box and at market. Have fun(ion) out there in the SXSW fray! ‘Til next time.
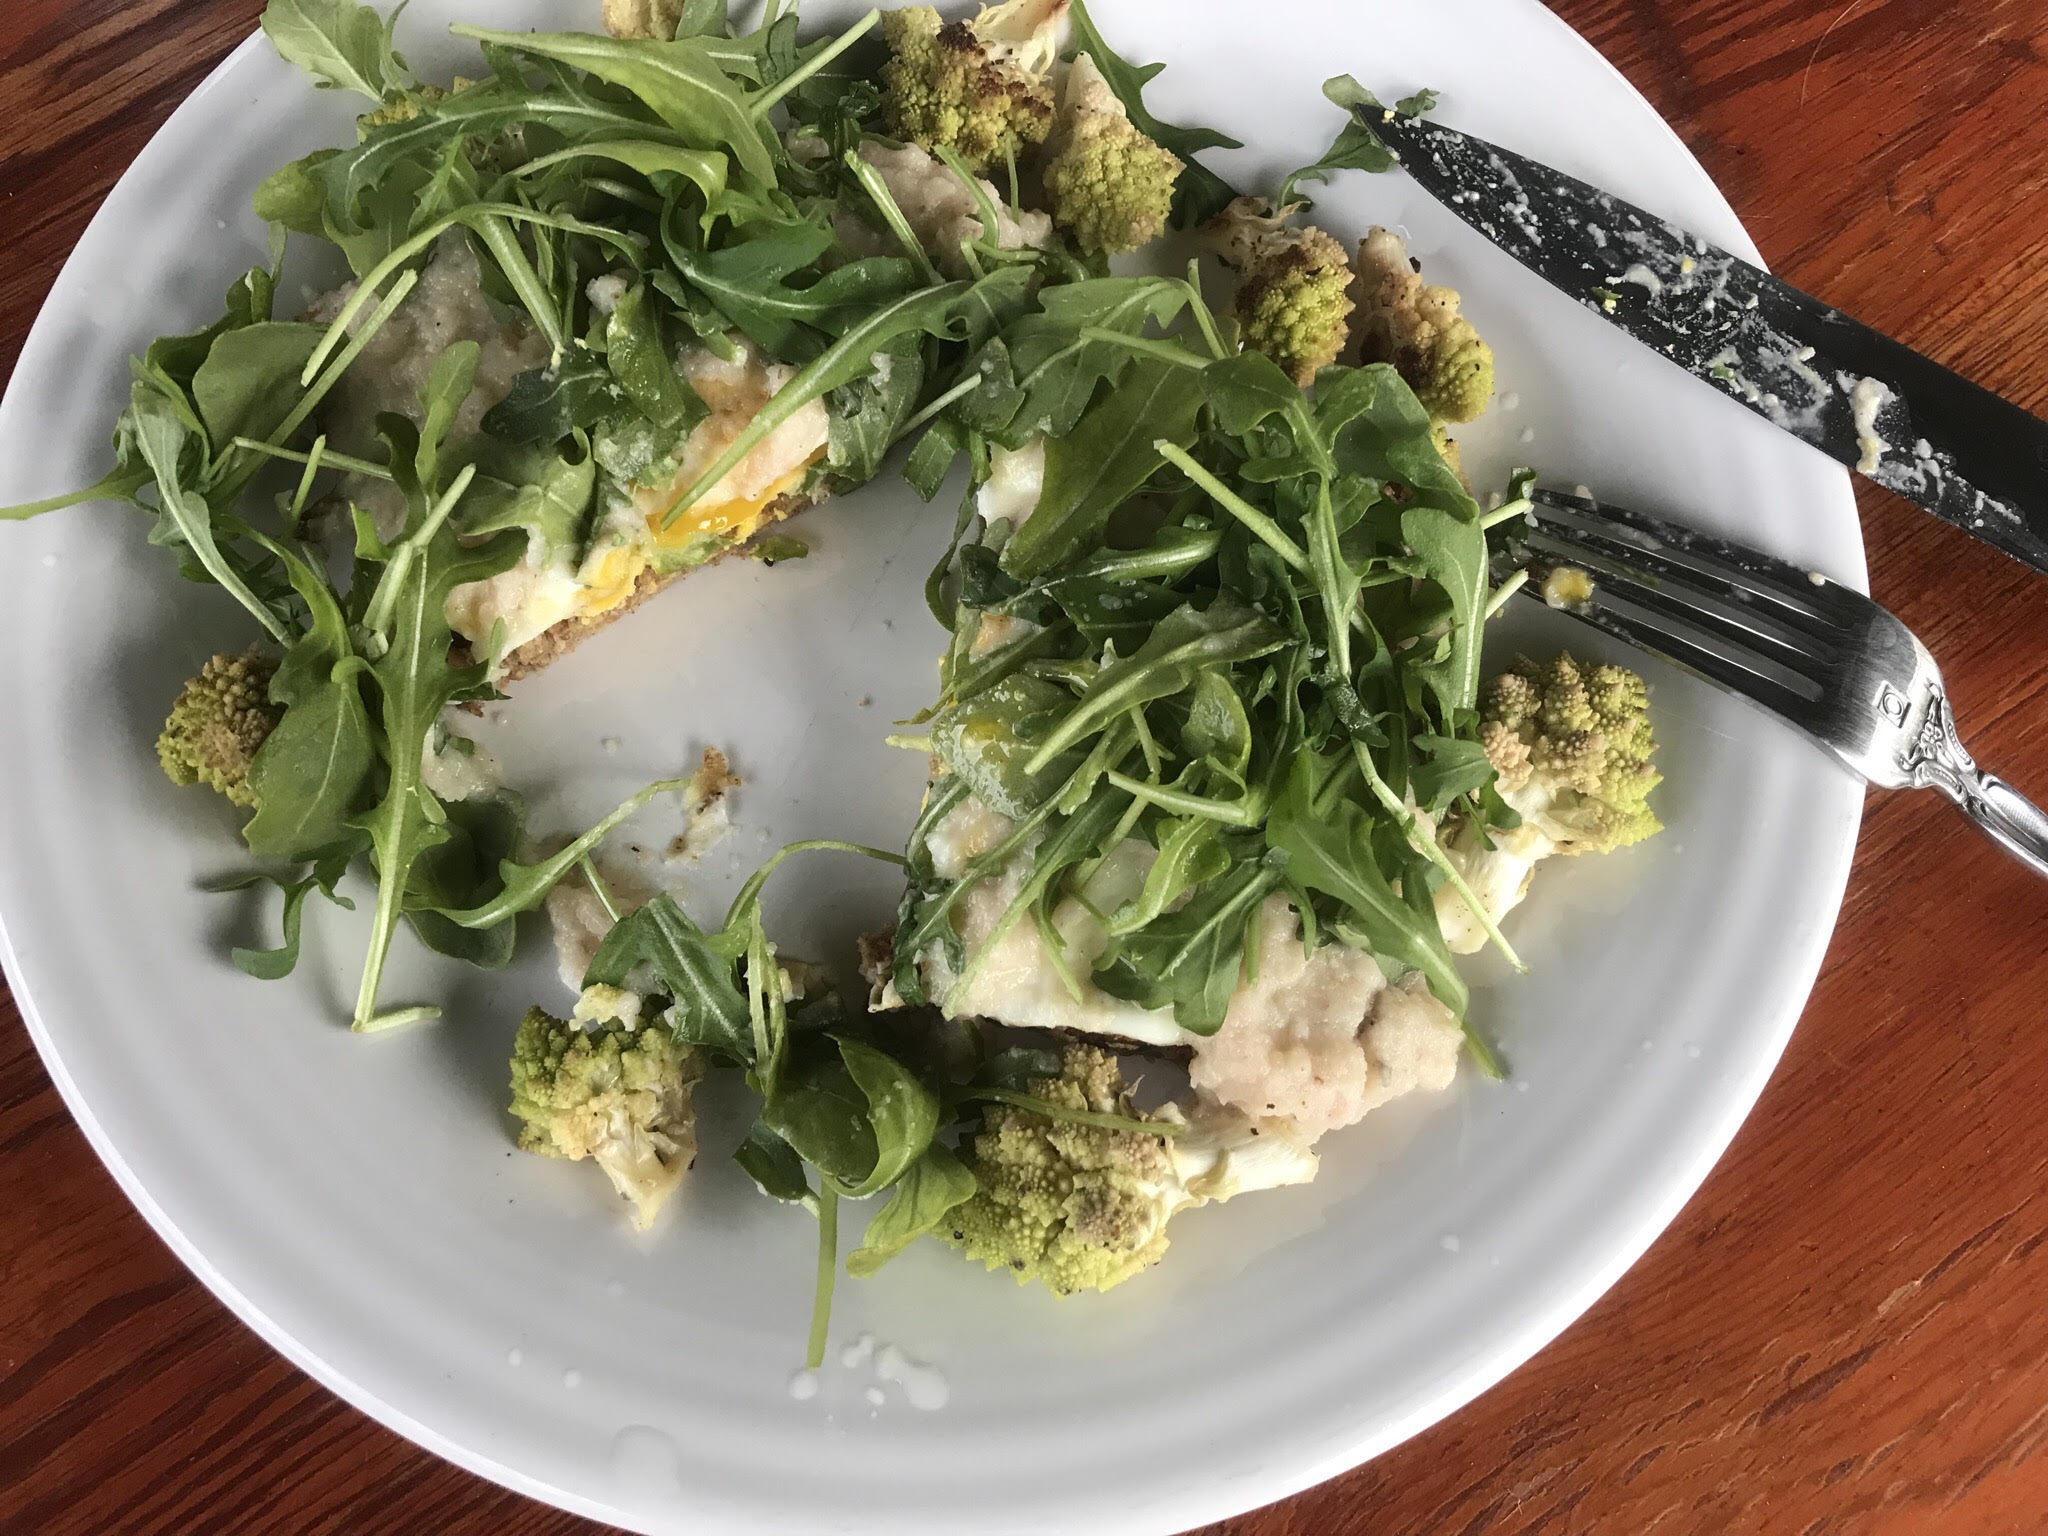
BREAKFAST TURNIPS
03/15/18 — Heydon Hatcher
Recipe and Photos by Megan Winfrey
With the influx of turnips and rutabagas of late winter, I've been making a lot of mashes. I love turnip mash and make it in big batches, so it ends up on our plates quite frequently. Lucky for me, I don't live with picky eaters...usually.
Funny story. My husband usually makes breakfast. It's his favorite meal of the day. One weekend recently, I told him to sleep in and that I would make breakfast. I was almost done when he came into the kitchen, potatoes, bacon, and eggs ready in their pans. "Mmmm," he said, clearly very excited about sitting down with his favorite food groups. I chimed in "I'm making breakfast bowls with turnip mash on the bottom." "Umm, no thanks I'll just have everything else, no turnips," he replied.
Well, I'm a bit stubborn. My mother's old quip "You'll eat it, and you'll like it!" came to mind. So I assembled our breakfast bowls and we sat down to eat. He took two bites, and a look of annoyance washed over his face. He really, really didn't like it. And now all the good stuff was covered in turnip mash. Watching him rake his bowl into the compost bin was so incredibly sad, I wished I hadn't been so stubborn. I, however, cleaned my bowl and hope you will too.
Breakfast Turnips![]() Turnip mash on toast.
Turnip mash on toast.
For the mash, place the turnips and potatoes in a large pot with enough water to cover. Boil for 25-30 minutes, or until tender. Drain the water and mix in the milk, 2 tbs. of butter, and salt and pepper to taste. Mash, keeping it slightly lumpy.
Bowl: A thin layer of turnip mash topped with anything and everything breakfast-y ie. eggs, bacon, beans, greens, toast, hot sauce.
![]() Yummy breakfast bowl.
Yummy breakfast bowl.
Toast: Make toast. Add a thin layer of turnip mash and top with arugula, sunny side up egg, and roasted romanesco or other roasted veggies. Top with hot sauce. See picture above.
![]() The process.
The process.
With the influx of turnips and rutabagas of late winter, I've been making a lot of mashes. I love turnip mash and make it in big batches, so it ends up on our plates quite frequently. Lucky for me, I don't live with picky eaters...usually.
Funny story. My husband usually makes breakfast. It's his favorite meal of the day. One weekend recently, I told him to sleep in and that I would make breakfast. I was almost done when he came into the kitchen, potatoes, bacon, and eggs ready in their pans. "Mmmm," he said, clearly very excited about sitting down with his favorite food groups. I chimed in "I'm making breakfast bowls with turnip mash on the bottom." "Umm, no thanks I'll just have everything else, no turnips," he replied.
Well, I'm a bit stubborn. My mother's old quip "You'll eat it, and you'll like it!" came to mind. So I assembled our breakfast bowls and we sat down to eat. He took two bites, and a look of annoyance washed over his face. He really, really didn't like it. And now all the good stuff was covered in turnip mash. Watching him rake his bowl into the compost bin was so incredibly sad, I wished I hadn't been so stubborn. I, however, cleaned my bowl and hope you will too.
Breakfast Turnips
- 3 turnips, peeled and cubed
- 1 white potato, peeled and cubed
- 1/4 cup milk
- 3 tbs. butter
 Turnip mash on toast.
For the mash, place the turnips and potatoes in a large pot with enough water to cover. Boil for 25-30 minutes, or until tender. Drain the water and mix in the milk, 2 tbs. of butter, and salt and pepper to taste. Mash, keeping it slightly lumpy.
Bowl: A thin layer of turnip mash topped with anything and everything breakfast-y ie. eggs, bacon, beans, greens, toast, hot sauce.
 Yummy breakfast bowl.
Toast: Make toast. Add a thin layer of turnip mash and top with arugula, sunny side up egg, and roasted romanesco or other roasted veggies. Top with hot sauce. See picture above.
 The process.