
 0 ITEMS IN CART

BRUSSELS SPROUT WRAP
02/12/15 — Farm
By Jessye Hipp
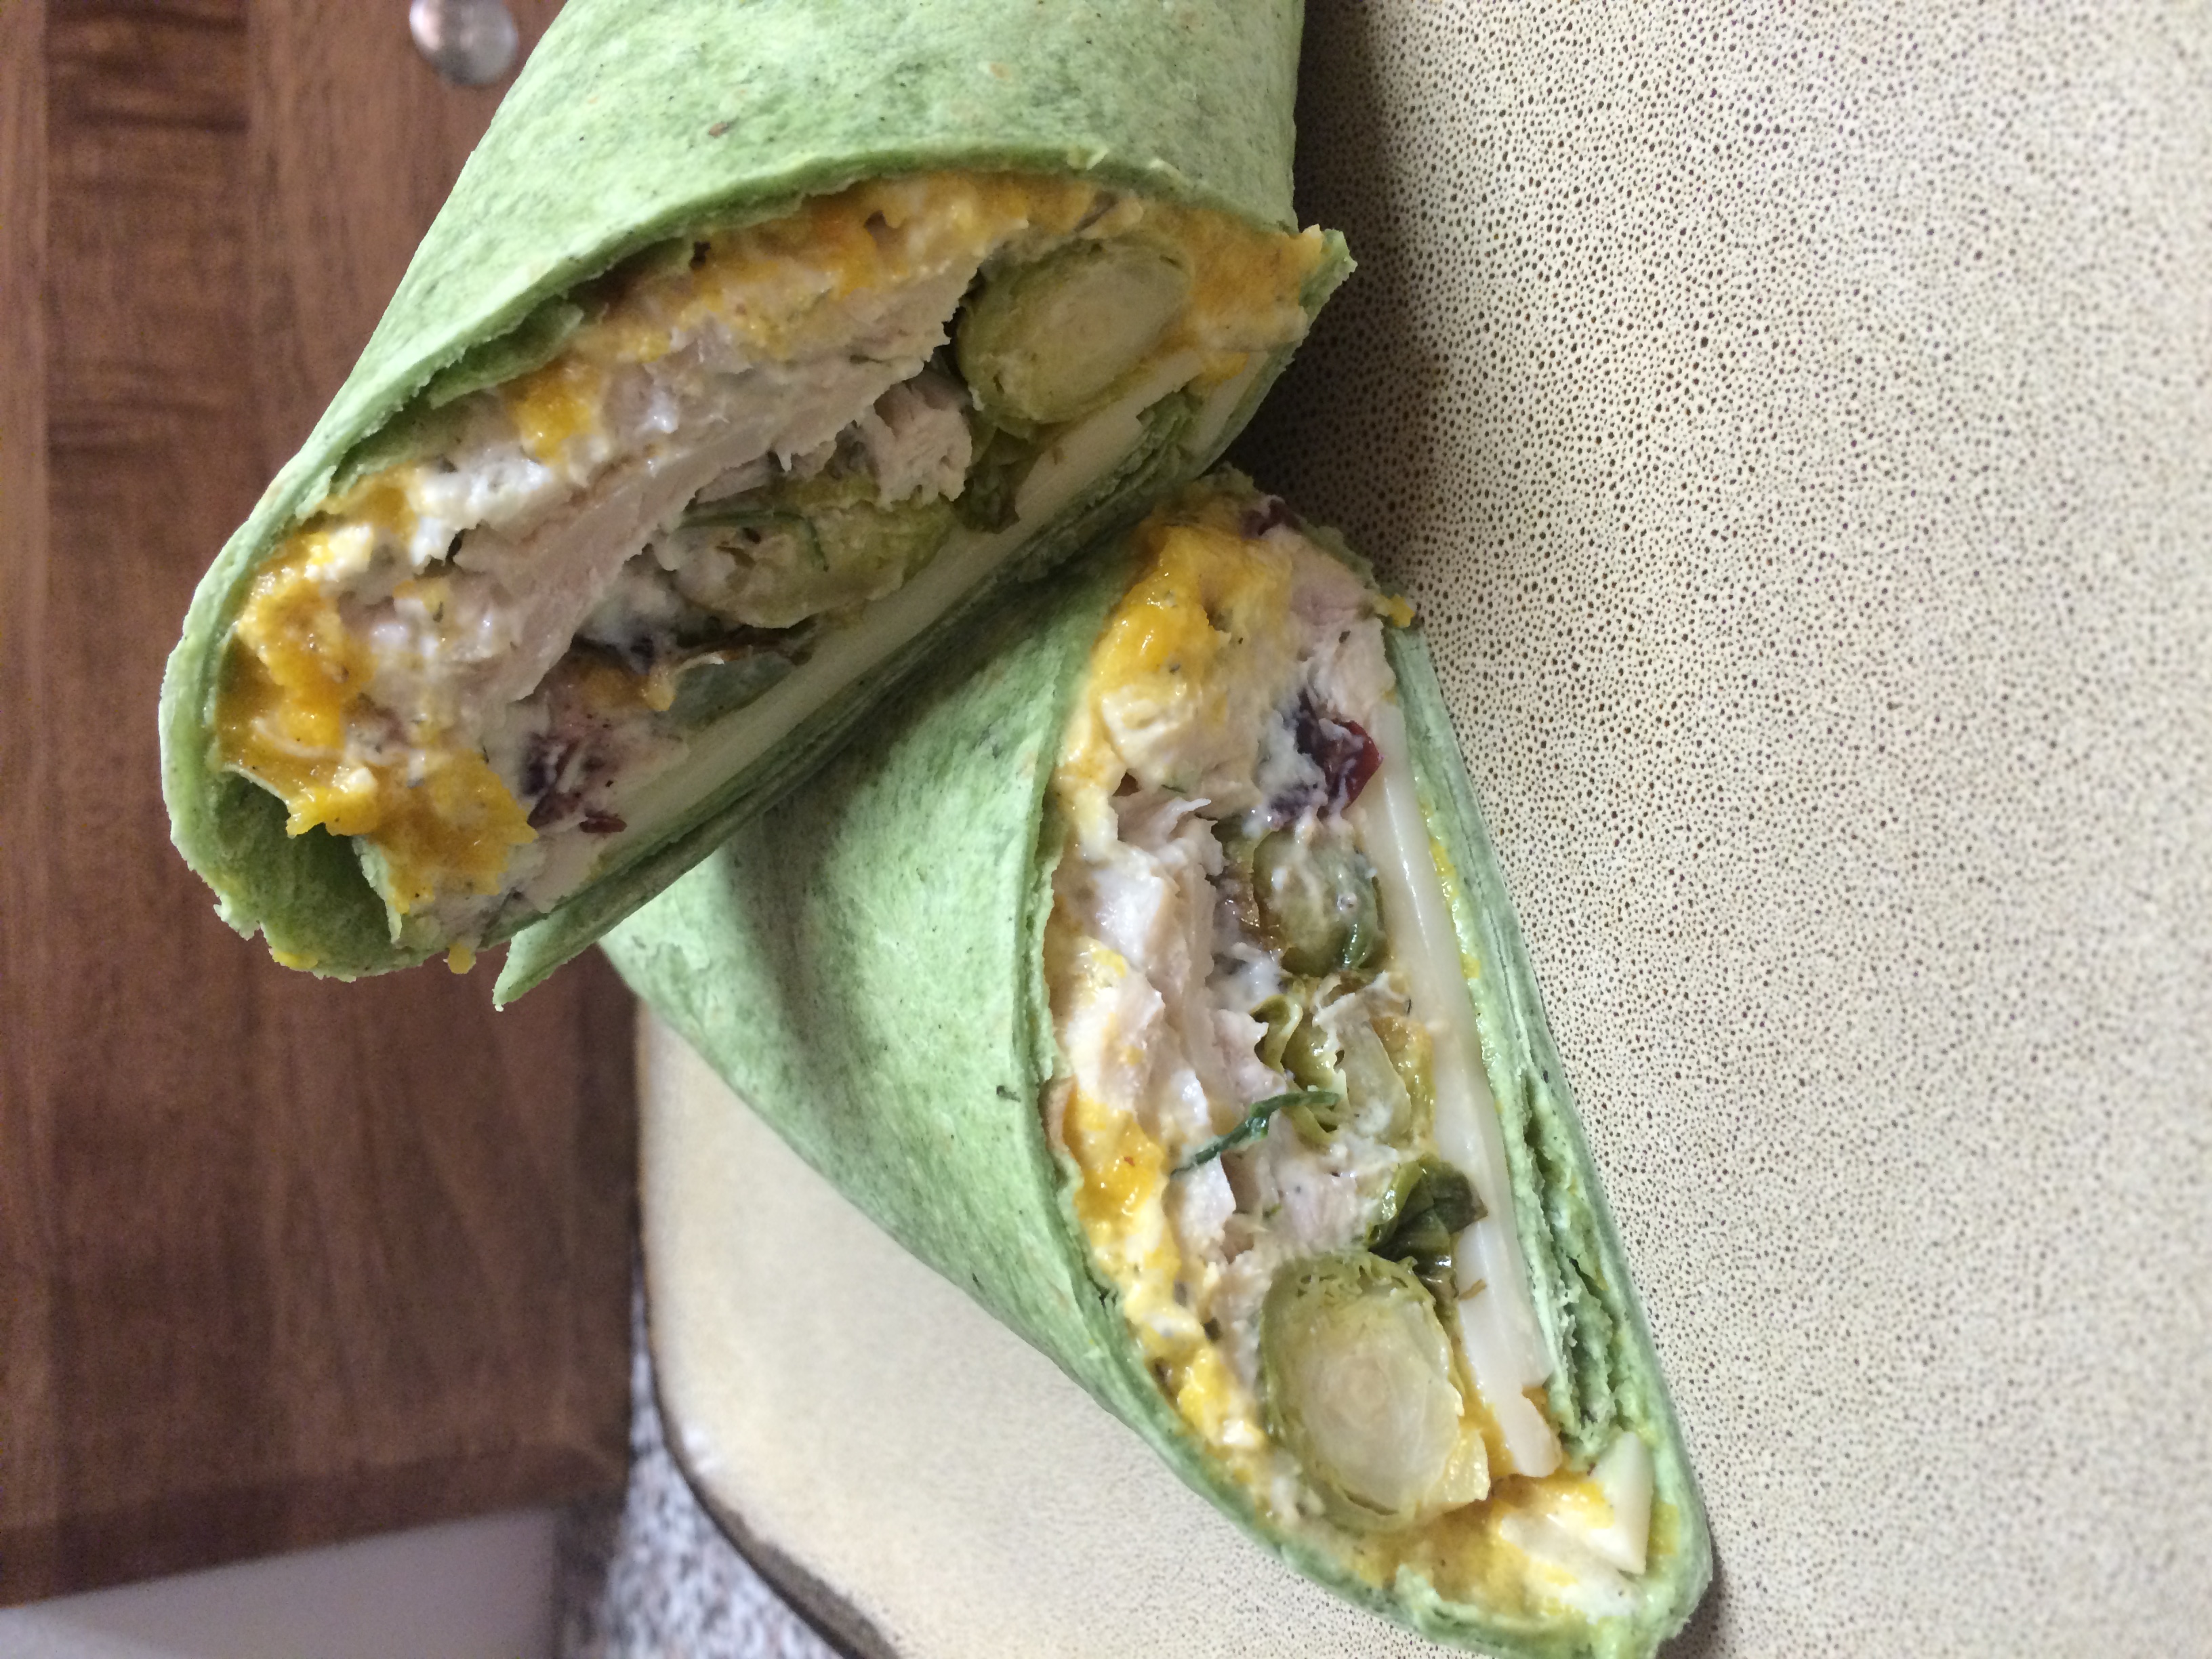
I don't know about you, but this is about the time when I start missing the holiday grub. Thanksgiving and Christmas dinners seem like a distant memory and a far, far future, I'm just about over my "dieting" New Years Resolutions, and I start to daydream about turkey and all the fixin's!! Those day dreams is how this "Thanksgiving Wrap" came into existence. Lucky for me, my local grocery store always has some pre-made containers of chicken salad, but also... wait for it... Cranberry Turkey Salad!!! Yes, it is a little bit of heaven when you cannot look at another carrot stick and are ready for a big cheat! :) You can also make this wrap using your holiday dinner leftovers! I know we are always looking for new ways to re-invent the Thanksgiving left-over sandwhich. This is it! The butternut squash puree, rather than mustard or mayo, and roasted brussel sprouts, rather than lettuce, give this wrap the holiday kick you are looking for! And it's delicious! YUM! Enjoy!
Thanksgiving Wrap
Time: 40 mins Makes: 6 servings
-1 butternut squash, peeled, seeded, and diced into 1 inch pieces
-1 bunch of brussel sprouts, halved
-2 tblsp olive oil
-salt & pepper
-2 tbls chicken stock
-cranberry & turkey salad (my local grocery store always has this, but feel free to use leftover turkey and cranberry sauce if you have it)
-1/2 stalk of celery, thinly sliced
-tortilla wraps
-sliced swiss cheese
Preheat the oven to 375 degrees.
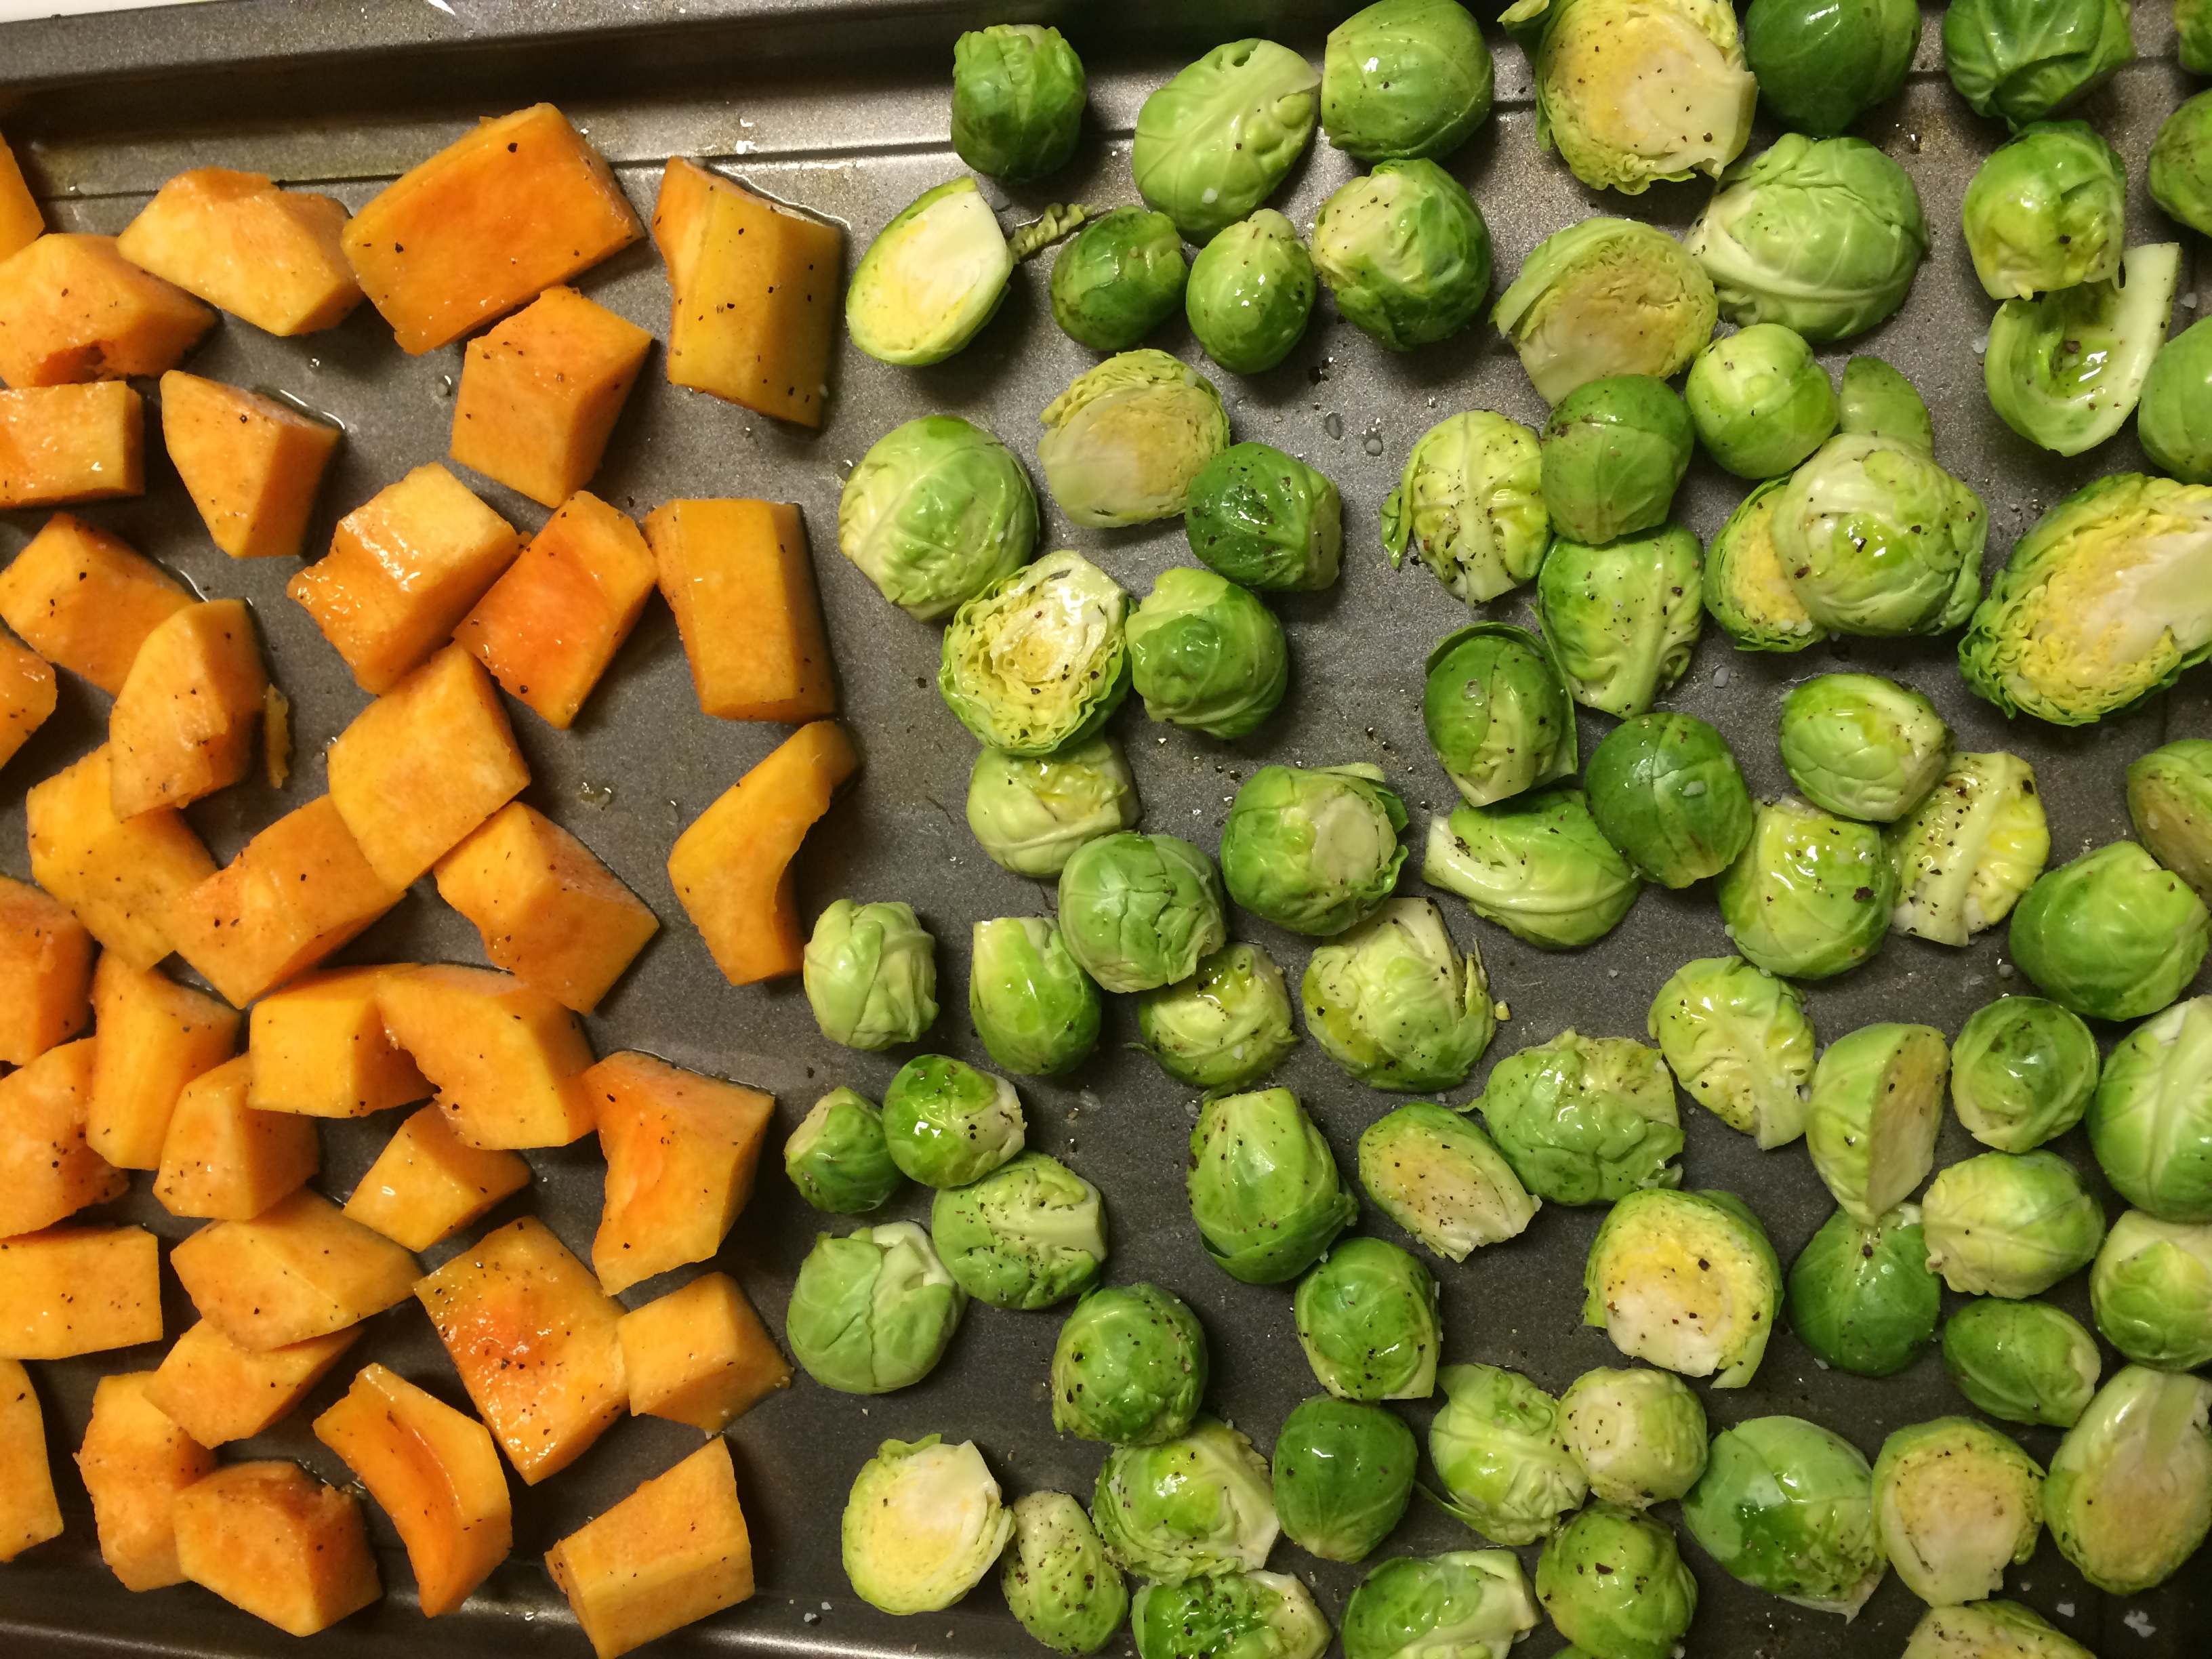
Toss the butternut squash and brussel sprouts with the olive oil, and place on a sheet tray. Sprinkle with salt and pepper.
Roast the veggies for 30 minutes, and the squash is tender and the brussel sprouts are slightly charred.
Place the butternut sqash in a small bowl with the chicken stock. Using an immersion blender, blend the squash until it is a smooth puree. (If you do not have an immersion blender, you can use a food processor or standard blender.)
Allow the squash puree to cool to room temperature and then refridgerate.
To assemble the wrap:
Slather a good amount of butternut squash puree onto the center of your tortilla wrap.
Next, make a layer of celery slices.
Next, add one slice of swiss cheese. I cut my slice in half to make it the length of the tortilla.
Next, add your cranberry/turkey salad.
Lastly, top it off with some of your roasted brussel sprouts!
Now just roll it up! Enjoy! A little bit of the holidays in a easy, tasty wrap!
CSA BOX CONTENTS WEEK OF FEBRUARY 9TH
02/10/15 — Scott
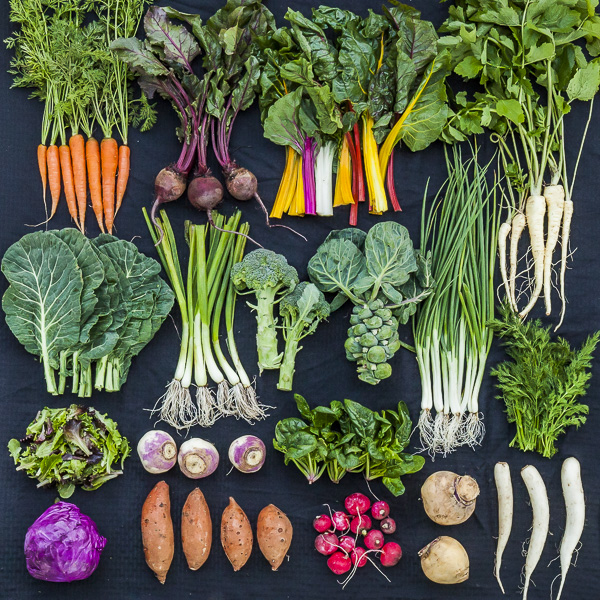 CSA Box Contents Week of Feb 9th
Large Box
Beet, Red
Cabbage, Red
Carrot, Orange
Greens, Chard, Rainbow
Greens, Kale, Curly
Greens, Spinach
Herb, Parsley, Flat
Lettuce, Braising Mix
Parsnip
Potato, Sweet
Scallions
Turnip, Purple Top
Turnip, Rutabaga
Beet, Red
Cabbage, Red
Carrot, Orange
Greens, Chard, Rainbow
Greens, Kale, Curly
Greens, Spinach
Herb, Parsley, Flat
Lettuce, Braising Mix
Parsnip
Potato, Sweet
Scallions
Turnip, Purple Top
Turnip, Rutabaga
Medium Box
Beet, Red
Cabbage, Red
Carrot, Orange
Greens, Chard, Rainbow
Greens, Spinach
Herb, Parsley, Flat
Parsnip
Potato, Sweet
Scallions
Turnip, Purple Top
Beet, Red
Cabbage, Red
Carrot, Orange
Greens, Chard, Rainbow
Greens, Spinach
Herb, Parsley, Flat
Parsnip
Potato, Sweet
Scallions
Turnip, Purple Top
Small Box
Beet, Red
Brussels Sprouts
Carrot, Orange
Greens, Kale, Curly
Potato, Sweet
Scallions
Turnip, Purple Top
Beet, Red
Brussels Sprouts
Carrot, Orange
Greens, Kale, Curly
Potato, Sweet
Scallions
Turnip, Purple Top
Individual Box
Brussels Sprouts
Carrot, Orange
Greens, Kale, Curly
Radish, Daikon
Turnip, Purple Top
Brussels Sprouts
Carrot, Orange
Greens, Kale, Curly
Radish, Daikon
Turnip, Purple Top
FROM THE FARMER'S PERSPECTIVE
02/05/15 — Farm
 Picking out irrigation parts to bring to Denton with our Irrigation Manager, Temo. Photo by Carrie Kenny
Earlier this week, I was busy preparing for a trip up to our farm in Denton, TX (check out the Facebook page and "like" it so you can see what's going on in Denton!). This farm is run by our employee, Ryan Crocker, who, like me, started with a small garden plot. Now, thanks to a new land lease we have, this little plot has grown to 10 acres! That's quite a jump, so I decided to drive up to there to see if I could help out. This got me thinking about my own transition from a backyard gardener to a farmer and how hard it was. Even though our property on Hergotz totaled 20 acres, I only farmed one acre at first. It's funny to think about it now, but back then, one acre felt like a lot to me! Given my experience, I thought I could lend Ryan a hand with laying out a new irrigation system.
Oh, and there's one other thing - I had a tractor I needed to bring to Denton, too! For a tractor, it was on the smaller side (a Massey Ferguson 245, 45hp with a loader that we found on Craigslist last week for just over $5,000). We got it loaded up onto our goose neck trailer and attached to an old '93 Ford diesel 4x4 we use on the farm. When I got behind the wheel, I felt like a true Texan.
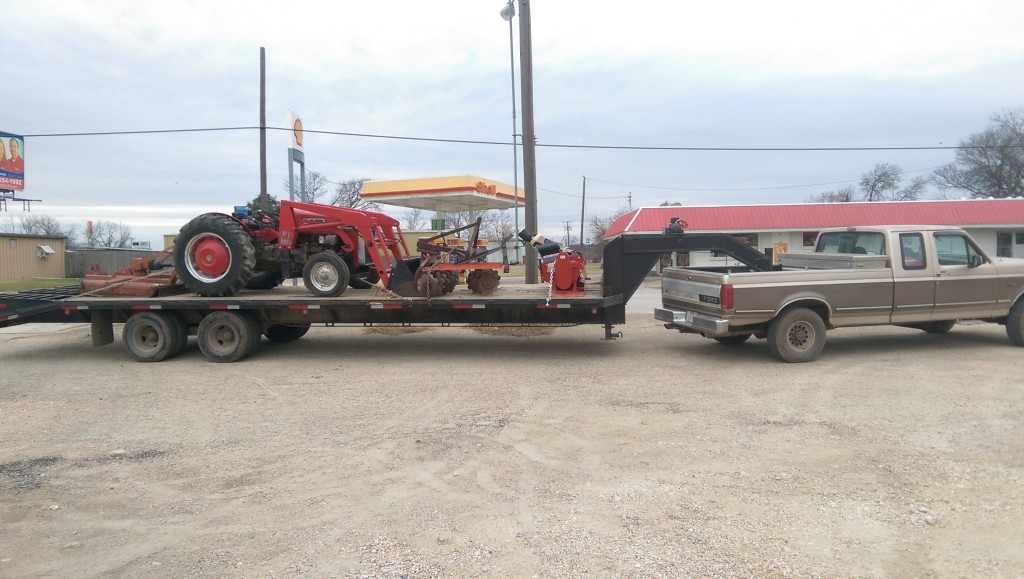 All loaded up and ready to go. Photo by Brenton Johnson
The good news is that old '93 Ford was no problem at all. In fact, I even stopped in Belton to pick up a new roto-tiller for Ryan. This piece of equipment gets used so much I wanted to have a new one that would hold up. It was after I got to Denton that things got a little difficult. The problem, it turned out, was the tractor. For one thing, it needed a new key; luckily, Ryan knew just the place for this. He took me to a little shop tucked away in the middle of an industrial park that, when you walked in, truly was like going back in time. It was pretty dimly lit in there, but it was amazing. They had about ten antique tractors crammed into a little space, and there were people hard at work restoring these machines. The owner said they'd been in business for twenty-plus years, and it looked to me like everyone loved working there. Personally, I just loved seeing those old tractors! I took in all the details as they tried out a few old tractor keys until finding one that fit.
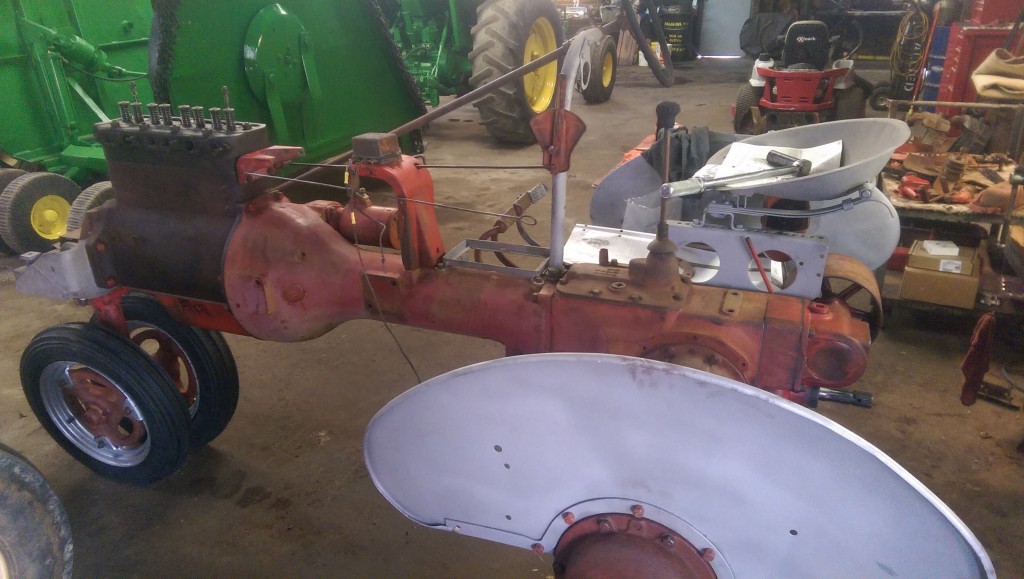 Antique tractor at Dentex Tractor Repair. Photo by Brenton Johnson
Another problem happened when we took the tractor off of the flatbed in Denton. It ended up getting stuck in the mud three times! This tractor, in addition to being small and over 30 years old, only has two wheel drive, so it makes getting out of the mud a challenge. By the end of it, I was really frustrated. My anger at the limitations of that piece of equipment had no effect on Ryan - truth is, he couldn't have been happier with the tractor. To him, having it meant not having to do everything by hand anymore. Watching his reaction made me realize how spoiled I have become! I'm so used to the newer, more capable tractors we have in Austin that I was blinded to how much of a help this tractor would actually be to Ryan.
Ryan and I came up with a plan for the new irrigation system, and as soon as I got back to Austin, I showed it to Krishna, our Operations Manager. Krishna immediately put his mind to it and came up with an even better layout! Now, Ryan is hard at work getting this new and improved design installed as well as planting for Spring. Luckily, he now has a little red tractor to help him get it done.
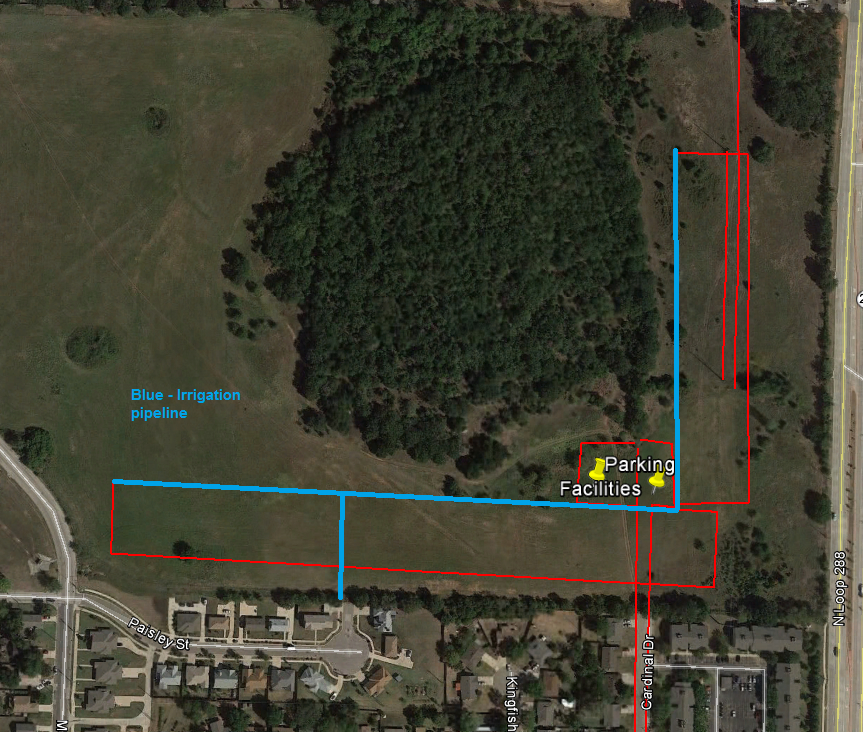 New irrigation design for Denton.
HOW DOES YOUR GARDEN GROW?
02/05/15 — Farm
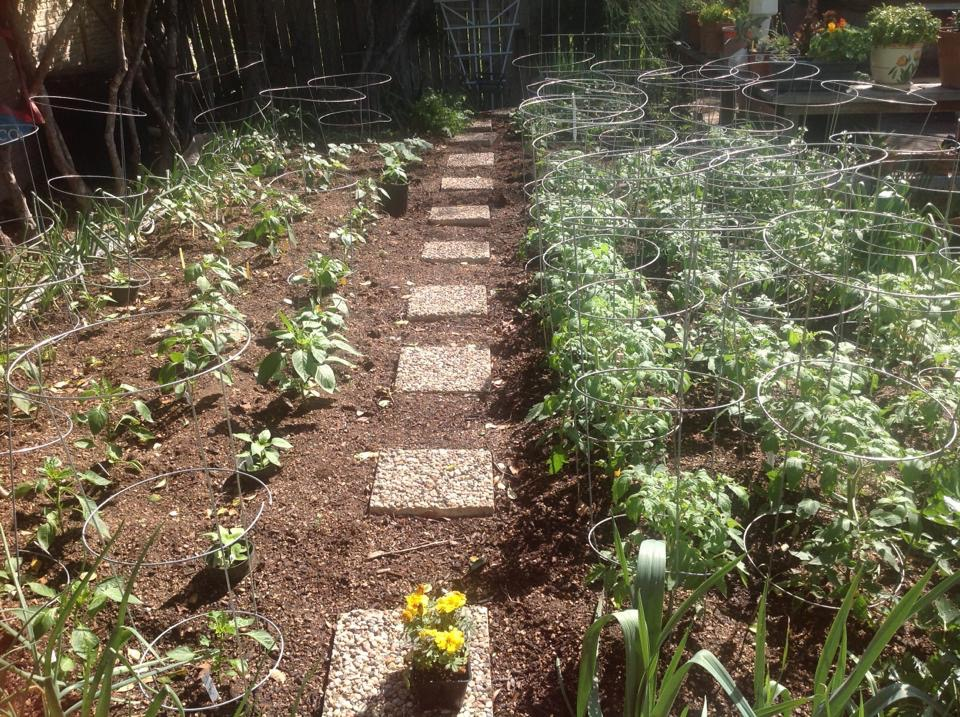
Thank you, Amy Donavan, for sending in this picture of your beautiful garden from last year.
On the topic of gardening, Amy writes,
"I learned to love gardening from my dear departed Mother and now I think of her every time I'm there. My wonderful husband helped me build my beautiful raised bed garden. We grow lots of organic tomatoes, peppers, carrots, etc. "
Amy, what a lovely way to remember your mother. Thank you again for sharing this photo and your reasons for gardening with us.
Do you have a garden? If so, we want to see it! Please send any images you'd like to share to carrie@jbgorganic.com.
And all gardeners - those with experience and those just beginning - please remember that our organic transplant sale is coming up soon. Here are the details:
On March 7th, March 14th, and March 21st, we will host our Annual Spring Organic Transplant Sale. This year, it will be out at our River Road Farm, located just ten miles east of Austin-Bergstrom International Airport. So, get busy and start planning your Spring garden now!
ROASTED PANCETTA & BRUSSEL SPROUT PIZZA
02/05/15 — Farm

By Jessye Hipp
No carb pizza? Cauliflower crust pizza satisfies your every craving and daily vegetable quota… Sign me up!
I have been making pizzas with a cauliflower crust now for years. It is the perfect indulgence, without the guilt or bloating afterwards. Dive in! Have seconds!! Can you believe it? Seconds on pizza??!?!
There is a price to pay for this trickery… it takes time. You can’t whip up a cauliflower crust in the time it takes to order pizza online, but your body with thank you for saving it all the unnecessary sugar and overly processed ingredients. Plus, you can make extra “dough” and freeze it for your next pizza adventure!
My partnership with Johnson’s Backyard Garden is always pushing me to be more and more creative with my recipes, and I love it! I find myself packing vegetables into every meal, and as a result loosing some meats, carbs, and fats. Yet, never loosing flavor; and my body thanks me.
Vegetables are powerful in their unlimited uses… who thought we’d ever be able to have pizza without starches and carbs! Embrace the power of the cauliflower, and now you can eat pizza until your heart’s content! J Enjoy!
Roasted Pancetta & Brussel Sprout Pizza
Time: 1hr 15mins Serves: 4
Cauliflower Crust
-2 medium heads of cauliflower, pulsed in a food processor until a “rice” texture
-1 egg
-1/2 cup of shredded “pizza” cheese (any cheese you prefer here, such as: mozzarella, asiago, smoked provolone, etc.)
-1/4 cup of shredded parmesan
-1/2 tsp dried Italian seasoning
-1/2 tsp dried red pepper flakes
-salt & pepper
Caramelized Onions
-1 medium onion, thinly sliced
-2 tbls unsalted butter
-1 tbls olive oil
-1/2 tsp red pepper flakes
-salt & pepper
Roasted Brussel Sprouts
-1 stalk or bag of brussel sprouts, trimmed & halved
-1 tbls olive oil
-salt & pepper
Roasted Pancetta
-6 thinly sliced pieces of pancetta
Toppings
-1/2 lb fresh mozzarella, thinly sliced
-1/2 cup of “pizza cheese”
-3 tbls pizza sauce
-1/2 tbls olive oil
-1/2 tsp garlic powder
-2 scallions, thinly sliced for garnish (optional)
Begin by putting the riced cauliflower into a microwave safe bowl. Microwave the cauliflower for 6 minutes, then allow to cool.
Next, melt the 2 tbls of butter and 1 tbls of olive oil together over medium heat. Add the onions, pepper flakes, and a sprinkle of salt & pepper. Cook until the onions are softened and beginning to brown. Lower the heat to medium-low and continue to cook until the onions are caramelized. About 20 minutes.
Heat the oven to 375 degrees.
Roast the pancetta on a baking sheet lined with parchment paper until slightly crisp. (they will continue to crisp out of the oven.) About 10 minutes.
Toss the brussel sprouts with the olive oil, salt & pepper, and roast them on a sheet tray until crisp and browned. About 20 minutes.
Once the cauliflower rice has cooled, squeeze out as much of the moisture as possible by wringing the cauliflower in a clean kitchen towel.
When all of the moisture is removed, add the egg, cheese, and spices to the “dough”.
Once it is well combined, form the dough into a pizza shape on a foil lined baking sheet. Make sure the crust is fairly thin to allow it to crisp up in the oven.
Bake the crust at 375 degrees for 30 minutes until the edges are golden brown and the crust has set.
Layer the toppings as follows:
-Spread a thin layer of pizza sauce over the sauce, you really don’t want a lot, it will cause the crust to get soggy.
-Sprinkle the sauce with the garlic powder.
-Spread the caramelized onions over the surface of the pizza. Feel free to be as generous as you like.
-Layer the thinly sliced mozzarella
-Add the slices of pancetta
- Throw on the roasted brussel sprouts (you should be getting EXTREMELY excited by this point! YUM!)
-Sprinkle the entire pizza with shredded cheese and Parmesan.
-Lastly, lightly drizzle the pizza with olive oil.
Bake the pizza at 375 degrees for 10 minutes so the cheese can melt.
After 10 minutes have passed, raise the oven to a 410-degree broil so the top layer of cheese may become golden.
Allow the pizza to rest for five minutes, garnish with scallions, slice and serve! Enjoy!
CSA BOX CONTENTS WEEK OF FEBRUARY 2ND
02/02/15 — Scott
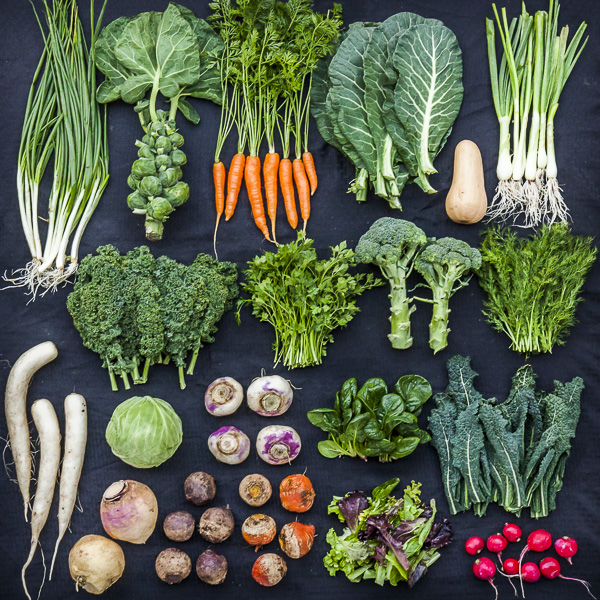 CSA Box Contents Week of Feb 2nd
Large Box
Beet, Red
Broccoli
Cabbage, Red
Carrot, Orange
Greens, Chard, Rainbow
Greens, Collards
Greens, Salad Mix
Herb, Dill
Onion, Spring Yellow
Parsnip
Potato, Sweet
Radish, Red
Turnip, Purple Top
Beet, Red
Broccoli
Cabbage, Red
Carrot, Orange
Greens, Chard, Rainbow
Greens, Collards
Greens, Salad Mix
Herb, Dill
Onion, Spring Yellow
Parsnip
Potato, Sweet
Radish, Red
Turnip, Purple Top
Medium Box
Beet, Red
Brussels Sprouts
Carrot, Orange
Greens, Chard, Rainbow
Greens, Collards
Greens, Spinach
Herb, Dill
Radish, Red
Scallions
Turnip, Purple Top
Beet, Red
Brussels Sprouts
Carrot, Orange
Greens, Chard, Rainbow
Greens, Collards
Greens, Spinach
Herb, Dill
Radish, Red
Scallions
Turnip, Purple Top
Small Box
Broccoli
Carrot, Orange
Greens, Chard, Rainbow
Greens, Spinach
Radish, Daikon
Scallions
Turnip, Rutabaga
Broccoli
Carrot, Orange
Greens, Chard, Rainbow
Greens, Spinach
Radish, Daikon
Scallions
Turnip, Rutabaga
Individual Box
Beet, Red
Greens, Chard, Rainbow
Greens, Spinach
Potato, Sweet
Scallions
Beet, Red
Greens, Chard, Rainbow
Greens, Spinach
Potato, Sweet
Scallions
FROM THE FARMER'S PERSPECTIVE
01/29/15 — Farm
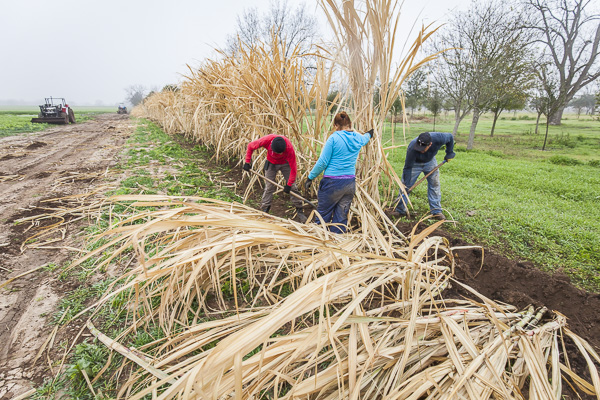 A sugar cane fence! Photo by Scott David Gordon
This week, we decided to build a fence (of sorts) along one of the property lines of the farm. I know that good fences can make good neighbors, but, really, this isn't why we did it - I will be happy, though, if this ends up being one of the outcomes! What we were really looking for was available land on which to plant sugar cane. Sugar cane is an unusual crop because it can stay in the ground for up to two years prior to harvest. Given that we need to rotate our vegetable and cover crops at JBG more frequently than that, this two-year time period presents a problem. The solution we came up with was to plant the sugar cane along the border between our farm and our neighbor's. This allows us to use a part of the farm not needed for vegetable cultivation and to create a natural division of the property. Thank you to the crew for all of their hard work in making this happen. And, don't worry - I'm not going to turn into a sugar cane grower. It's a small crop for us but one with an emotional connection for me because, when I was a kid in Alabama, I would get locally grown sugar cane as a treat.
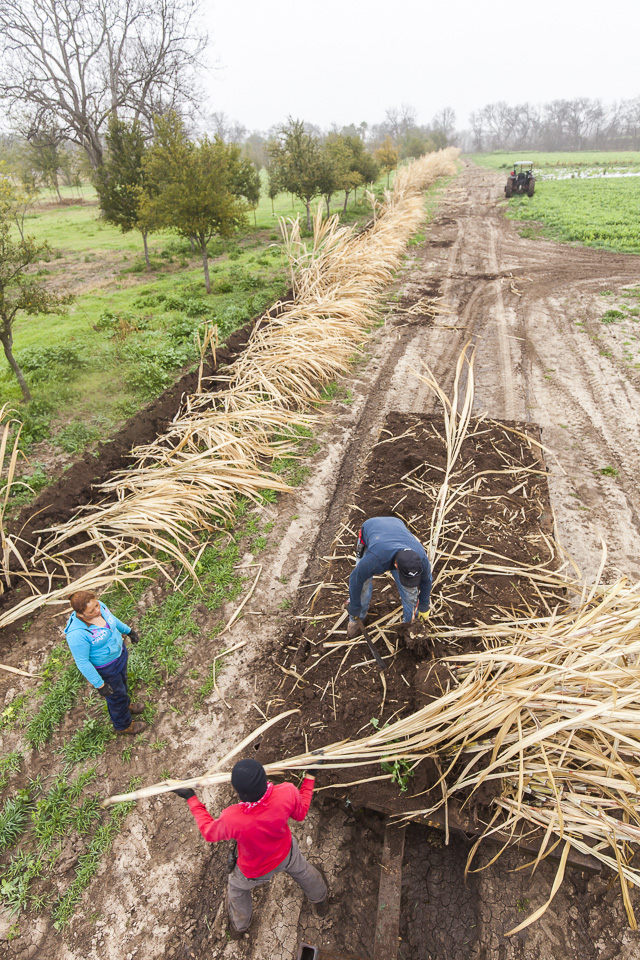 Sugar cane fence - a view from above. Photo by Scott David Gordon
Despite having built four new greenhouses, we are already bursting at the seams with Spring transplants. To accommodate all of these, we've laid down ground cloth to put the transplants on that, when totaled, matches the space of four more greenhouses. That's a lot of transplants! Our farm manager, Mike Reed, has been working overtime to figure out where all of these new transplants will be planted. This means not only mapping it out but also managing our crew to make sure the beds are prepped and ready to go when its time to plant. From now until May, we will all be working extra hours to get those plants into the ground for Spring.
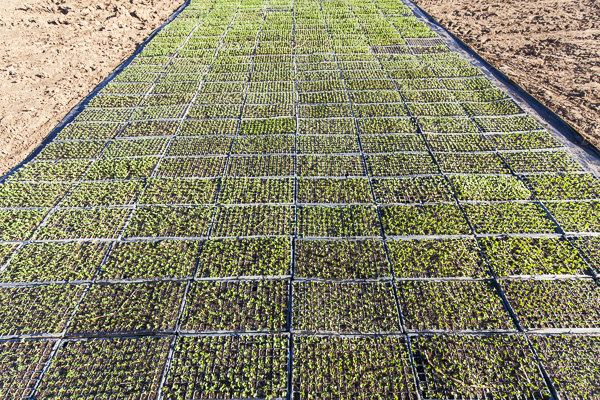 Look at all of those transplants! Photo by Scott David Gordon
As we are gearing up for Spring planting, my hope is that you will do the same. Now is the time to start planning your own gardens! Just as a reminder, we will be having our Annual Spring Organic Transplant Sale on March 7th, March 14th, and March 21st. We will host it out at our farm at River Road in Cedar Creek for the first time - this way, you can also see our new greenhouses and get a look at what's growing in the fields. Believe me, it's not too far out - just 10 short miles from the Austin-Bergstrom International Airport down 71 and well worth the trip. See you out there soon! Send Us Photos of Your Garden! If you are a gardener, we'd love to see photos of your garden! Send us a picture of your garden from last year so we can post it in the newsletter. Who knows? Your efforts may inspire others to grow their own vegetables, too! Just email the photo to carrie@jbgorganic.com along with your contact info. Thanks so much!
Also, want to learn about organic gardening? Farmshare Austin is hosting a series of organic gardening classes beginning February 7th - just in time for Spring! To lean more, please click here.