 0 ITEMS IN CART
WATERMELON: A HISTORY
08/06/21 — Farm
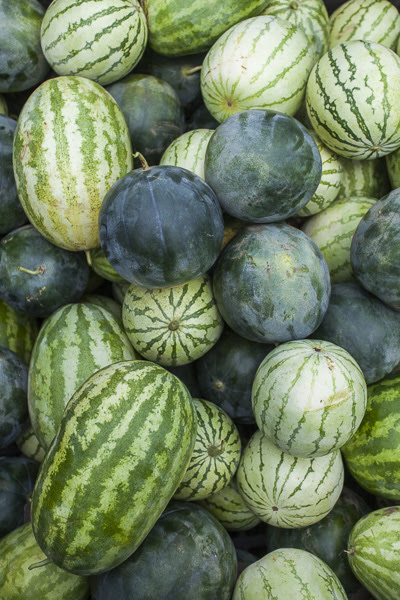
In honor of National Watermelon Day last week, we thought it about ripe time to delve into the history of this darling of the summer crops. Did you know that the watermelon, or the Citrullus lanatus, has been cultivated for around 5,000 years? This trailing and flowering vine hails from the Cucurbitaceae family. The progenitor of the modern watermelon is known as the ur-watermelon and was cultivated in Africa before spreading to the Mediterranean, Europe and beyond. Watermelon arrived in India in the 7th century and China in the 10th. Fun fact: did you know that China is currently the world’s largest watermelon producer? By the late 1500s, colonists were cultivating watermelons in the New World, and by the 17th century, these melons were ubiquitous in European gardens. Another fun fact: in ancient Greece, watermelons, or “pepon”, were thought to have healing properties, and were used as a diuretic and a treatment for heatstroke.
With regard to where in Africa the ancestor of the watermelon originated, there is no real consensus. Harry Paris, horticulturist at the Agricultural Research Organization in Israel, thinks that the true ancestor of the watermelon is from Northeastern Africa, and is known as Citrullus lanatus var. colocynthoides, otherwise known as gurum in Sudan and gurma in Egypt. These bitter melons grow wild and rampant in the deserts of Sudan and Egypt, and were small, green, and bitter compared to the modern melon.
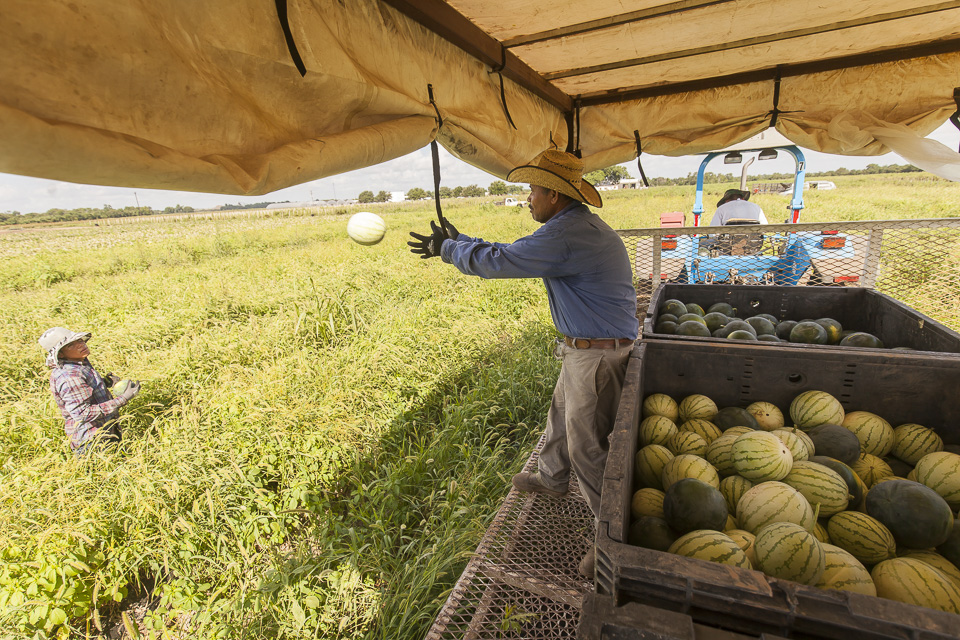 Photo by Scott David Gordon.
Evidence from tomb paintings suggests that Egyptians were farming and cultivating watermelons as early as 4,000 years ago. The the fruit portrayed in these paintings is more round compared to the modern day oblong watermelon, meaning that the Egyptians probably cultivated these fruits over time, changing their taste, toughness, and shape.
Despite the ancestral varieties being bitter and not very tasty, these crops were kept around because of all the water they retained and because of their storage life. During the hot and dry seasons in Northern Africa, these gourds were great sources of water when pummeled, and could last for a considerable period when stored in a shady and cool place. The Egyptians placed them in tombs so that the deceased Pharaohs would have a source of water on their long after-life journeys. Watermelons were perfect vessels for water during long nautical expeditions, as well.
Photo by Scott David Gordon.
Information from Hebrew tithing records shows that by the third century , watermelons had been grouped with figs, grapes, and pomegranates. Meaning that by then, they had been cultivated to be point of being considered sweet! These watermelons were described as having yellowish flesh in the earlier cultivations, but as the fruit got sweeter, it became redder in hue. Why you ask? Genes that contribute to a watermelon’s sweetness and sugar content are paired with genes that turn the flesh red.
At JBG, we grow a plethora of melon varieties with three different kinds of watermelon in the mix: Red, Yellow, and Sugar Baby. Since you know the aged and colorful past of this crop, visit us at markets this weekend and enjoy some while you still can! 'Til next time.
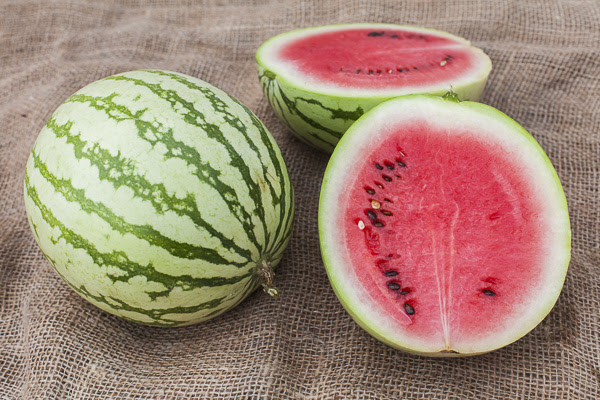 Photo by Scott David Gordon.
THE GREENS OF SUMMER
07/30/21 — Ada Broussard
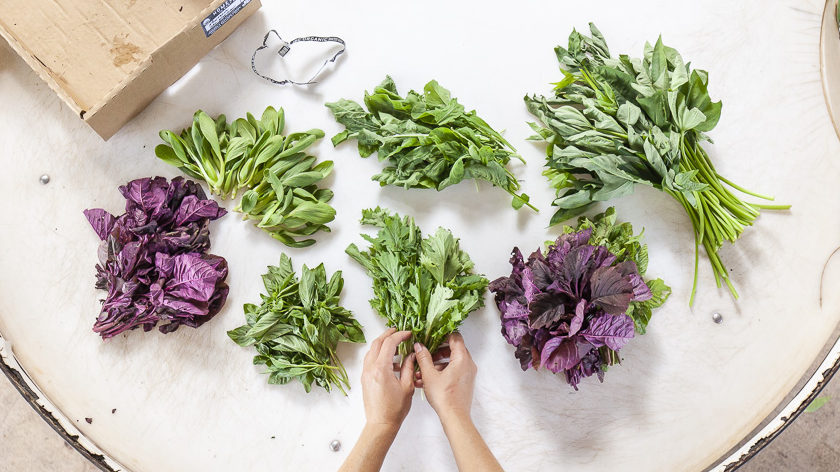 Behold: The Summer Greens. Photo by Scott Gordon
The greens that we usually associate with a healthy diet (kale and collards) are out of season during the hot Texas summers. They’re about as distant of a memory as sweatshirts. The kale in most grocery stores right now is being shipped from faraway farms and the high summer sun is no place for green leaves… or is it?
We got to thinking, or rather, looking around the farm… there is, in fact, plenty of green to go around! The greens we’re growing this summer are especially well-suited to grow in warm… err… scorching weather, and this means they may be greens you’re accustomed to seeing. In fact, many of you have called and asked what the star-shaped leaf in your CSA box is (sweet potato greens), or what to do with the small but dense bunch of amaranath that you picked up at market. Today on the Daily Dirt, we’re here to introduce to The Greens of Summer. Your best leafy friends, harvested in the early morning hours before the sunshine has gained her strength, here to add some verdency to the usual pallet of red peppers and purple eggplant.
Behold: The Summer Greens. Photo by Scott Gordon
The greens that we usually associate with a healthy diet (kale and collards) are out of season during the hot Texas summers. They’re about as distant of a memory as sweatshirts. The kale in most grocery stores right now is being shipped from faraway farms and the high summer sun is no place for green leaves… or is it?
We got to thinking, or rather, looking around the farm… there is, in fact, plenty of green to go around! The greens we’re growing this summer are especially well-suited to grow in warm… err… scorching weather, and this means they may be greens you’re accustomed to seeing. In fact, many of you have called and asked what the star-shaped leaf in your CSA box is (sweet potato greens), or what to do with the small but dense bunch of amaranath that you picked up at market. Today on the Daily Dirt, we’re here to introduce to The Greens of Summer. Your best leafy friends, harvested in the early morning hours before the sunshine has gained her strength, here to add some verdency to the usual pallet of red peppers and purple eggplant.
 Lush greenery... with some pops of purple. Photo by Scott David Gordon.
A note on the recipes list below: Guess what? Any of the greens you find in your CSA box this summer (and winter, for that matter) will work with just about any of these recipes. If you’re interested in experimenting in Caribbean flavors, chop your greens and head to the callaloo recipe mentioned under amaranth. Needing some soy sauce in your life? Use any summer green, and make the simple Chinese stir fry mentioned under bok choy. Just make sure to eat your greens. But first, let's meet your greens.
Lush greenery... with some pops of purple. Photo by Scott David Gordon.
A note on the recipes list below: Guess what? Any of the greens you find in your CSA box this summer (and winter, for that matter) will work with just about any of these recipes. If you’re interested in experimenting in Caribbean flavors, chop your greens and head to the callaloo recipe mentioned under amaranth. Needing some soy sauce in your life? Use any summer green, and make the simple Chinese stir fry mentioned under bok choy. Just make sure to eat your greens. But first, let's meet your greens.
GREEN (and purple): Amaranth
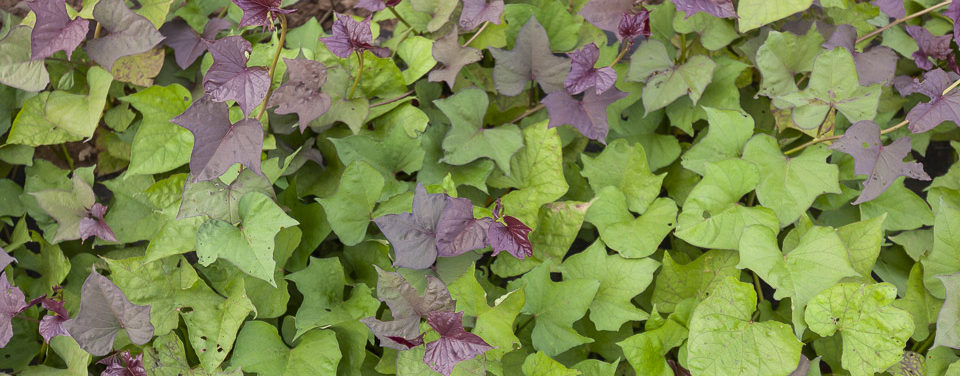
ORIGIN & NUTRITION: You may be familiar with amaranth in its grain-form (a superfood of its own), but we’re here to talk-leaves. Amaranth is indiginous to South America, and not surprisingly, the Aztecs cultivated the plant, and consumed both the grain and leaf form. Because of the plant’s hardiness, amaranth's popularity spread and it has a long culinary history across the globe, used in cuisines in South America, Africa, Asia, and the Carribean (where it’s referred to as “callaloo”). What do these regions and Texas have in common? Well, the unrelenting summertime heat, of course. Amaranth was born to stand up to the heat, and in fact the name comes from the Greek amarantos meaning “one that does not wither,” or “the never-fading”. Amaranth is dense in nutrients: it contains tocotrienols, a special type of vitamin E good for brain and body function, as well as vitamin C, calcium, carotenes,, magnesium, potassium, as well as a good helping of iron. LIKES: Amaranth likes being transformed into a West Africian/Carribean Callaloo Soup, or if you’re feeling particularly adventurous (and in the mood to track down a couple of unusual ingredients) make Efo Riro - a traditional Nigerian stew featuring this green. Amaranth enjoys taking the place of spinach in the North Indian preparation of Chaulai Ka Saag. When in doubt, use amaranth in any recipe calling for spinach. Both the green and purple varieties will work beautifully. WHY WE LOVE IT: If there was one superhero of the group, it would be amaranth. It’s probably the most nutritionally dense, and is also the most well-traveled green of the group. If you need recipe inspiration for this green, you can go to just about any continent and find something tasty. We love the vigor and versatility of this plant - it often crops up (ha) as a weed in gardens, and every part of the plant from root to stem to leaf to seed is edible. Don’t be alarmed by some of the tiny holes you might find in amaranth greens. These are purely cosmetic, and should be a reminder that you’re eating organic produce - void of any pesticides or insecticides.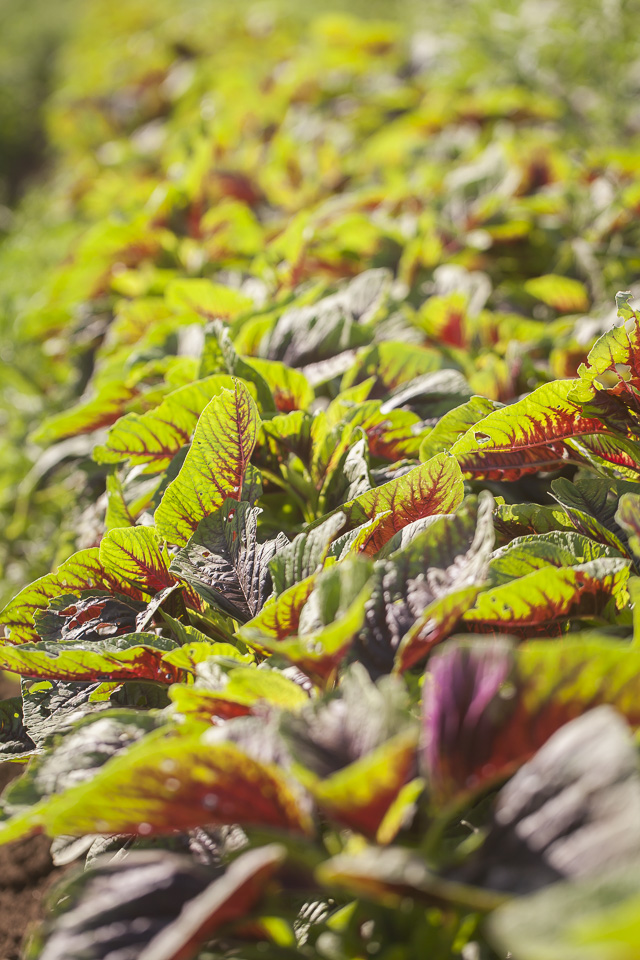 Amaranth in the fields. Photo by Scott David Gordon.
GREEN: Sweet Potato Greens
ORIGIN & NUTRITION: Sweet potatoes are indigenous to Central America, and along with other crops like white potatoes, corn, tomatoes, amaranth (!) and tobacco, sweet potatoes made their way to Europe via the Colombian exchange. They are rich in vitamin B, ßcarotene, iron, calcium, zinc and protein. Even NASA took notice of sweet potato greens’ nutritional value - it’s one of the crops they selected to be grown in a life support system - aka the environments designed to keep humans living and working in space alive. But you don’t need to leave earth’s atmosphere to enjoy these greens... LIKES: Sweet potato greens like any recipe that calls for spinach. We think sweet potato greens are the closest substitute to spinach, though it’s noteworthy that they lack oxalic acid--the substance in spinach that sometimes leaves an astringent feeling in your mouth; one point, sweet potato greens. Sub sweet potato greens in your quiche lorraines or classically Louisiana spinach madeleine. Please, simmer sweet potato greens in coconut milk to spoon over rice, or add variance to a simple stir fry with this Malasian version which adds belecan, or shrimp paste, as well as hot chilies to the wilted green. WHY WE LOVE IT: At JBG, we love the industrious nature of this green: While sweet potatoes dutifully grow underground getting ready for an early fall harvest, their tops soak in the sun and provide food for the summer. Two crops, in one! Plus, sweet potato greens are highly pest resistant, and we can often get multiple cuttings of sweet potato greens from any given bed. Last, we love sweet potato greens because they feel so southern - the perfect green to replace collards in a slow cooked, ham-hocky preparation. When cooked, sweet potato greens are tender and silky, practically melting in your mouth. You're welcome.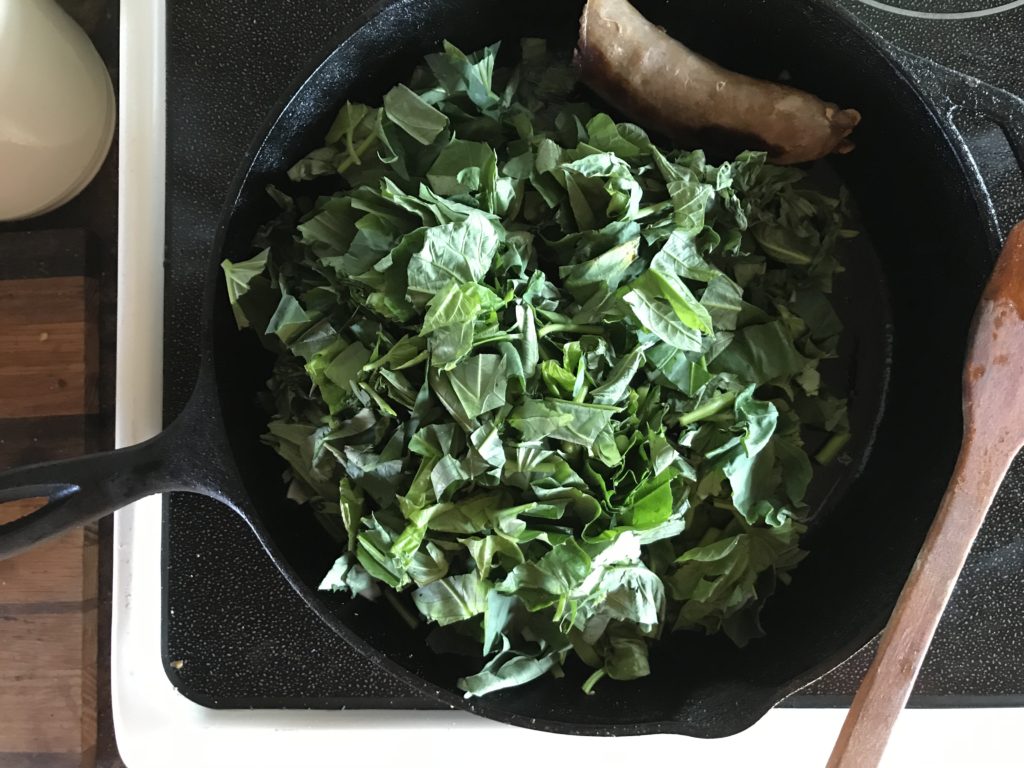 Sweet potato greens in the skillet. Photo courtesy of Club Home Made.
GREEN: Mizuna
ORIGIN: Mizuna, sometimes called Japanese lettuce, hails from… you guessed it, Japan. LIKES: Mizuna likes any recipe that shows off its delicate peppery flavor - including both raw and cooked preparations. It’s a traditional ingredient in Sukiyaki, or Japanese hot pot, and would also make a wonderful sub for spinach in this Japanese ohitashi (sauteed greens in broth). To truly appreciate this green, try it fresh in a simple salad, like this one with lemon juice, radishes, and sunflower seeds. We think the peppery flavor would even stand up nicely to a thin Cesar dressing, perhaps skipping on the bulky croutons and instead adding crunch with something smaller, like toasted breadcrumbs or bacon bits, if you dare. WHY WE LOVE IT: We love the introduction to Asian flavors that Mizuna begs. Though it’s gaining popularity in some home kitchens, it’s still somewhat of a specialty crop and we relish in the opportunity to give our CSA Members and market customers the interesting ingredients that are normally reserved for fancy chefs. Our mizuna seeds come from Kitazawa, a very unique and specialty seed company founded in 1917 by Japanese Americans who longed for the vegetables of their homeland. Kitazawa is one of the oldest, if not the oldest, seed company in the United States, and their offerings of heirloom Japanese vegetable varieties is unparalleled. We’ve worked with Kitazawa for many years, and can’t help but think of this seed company's lovely history and their awesome seed reps when growing this crop.GREEN: Baby Bok Choy
ORIGIN AND NUTRITION: As the name implies, this is the baby version of grown up bok choy, or pak choy, or Chinese cabbage, or spoon cabbage. This baby belongs to the brassica family, and so it is, in fact, related to cabbage. This green, which is a brand new summer offering here at JBG, is indigenous to China and has been eaten for thousands of years---archaeologists found bok choy seeds dating back to 6,000 years ago. Compared to some of the other greens on this list, bok choy isn’t as impressive of a nutritional powerhouse, though the vegetable still does contain loads of vitamins A and C. LIKES: Two words, one technique: stir fry. Baby bok choy should be the star ingredient in any Asian stir fry, thrown in a hot pan for a quick flash until the tops are just wilted and the bottoms tender, but still with some structure. We love traditional and simple Chinese flavors with our bok choy, like this quick saute recipe. Bok choy would also be a wonderful addition to any soup, and a quick google search for “bok choy soup” will lead you to an arsenal of recipes featuring bok choy with other ingredients like garlic, ginger, lime, and mushrooms. You could even practice your fermentation skills and make kimchi with this baby bok choy, though honestly we suggest you wait till the bigger stuff starts to roll in and just enjoy these tender little treats with the simplest of preparations. Dare we even say, raw! WHY WE LOVE IT: Texture! One article we read warned readers not to confuse this vegetable with celery, and while we’d like to think our readers aren’t that vegetable-naive, it begs a good point: the stem of this veggie (in both baby and adult form) is deliciously crunchy, and actually not a bad substitution for celery. We are especially in love with JBG’s current crop of baby bok choy because of its small size and oh-so-tender flavors. Baby bok choy are just a joy to eat whole, or perhaps sliced in half (longways) to show off their shape. Think of these baby bok choy as tiny trees, just like broccoli florets, begged to be kept whole, maybe even requiring a knife at dinner time. We harvest these little babies tiny, before they have time to realize the hot world they’re sprouting into, and we hope you enjoy this small baby green as much as we do.GREEN: Arugula and Basil.
If you’ve never met these summer greens, you must be living under a rock. We don’t mean to diminish the excellence of these summer offerings, but this post is getting long and we think you know these greens well: bright arugula salads with goat cheese and toasted nuts. Simple summer pastas with torn basil or grilled bread smeared with fresh pesto. Both America and Italy honor these greens well, and we know you know how to make them shine (hint: olive oil).GREEN: Purslane
To read plenty on purslane, checkout the Daily Dirt post from a couple weeks ago. It was this summertime green that inspired today’s post.. .we wanted to you to meet the rest of the summer greens gang! Well, here the are! Now that you know them, don’t forget to eat them! Before you know it, we’ll be wallowing in kale and swimming in collards and the unique flavors of our summer greens will be a distant memory. If you have any favorite preparations of these greens, shoot us a line and let us know! Happy cooking!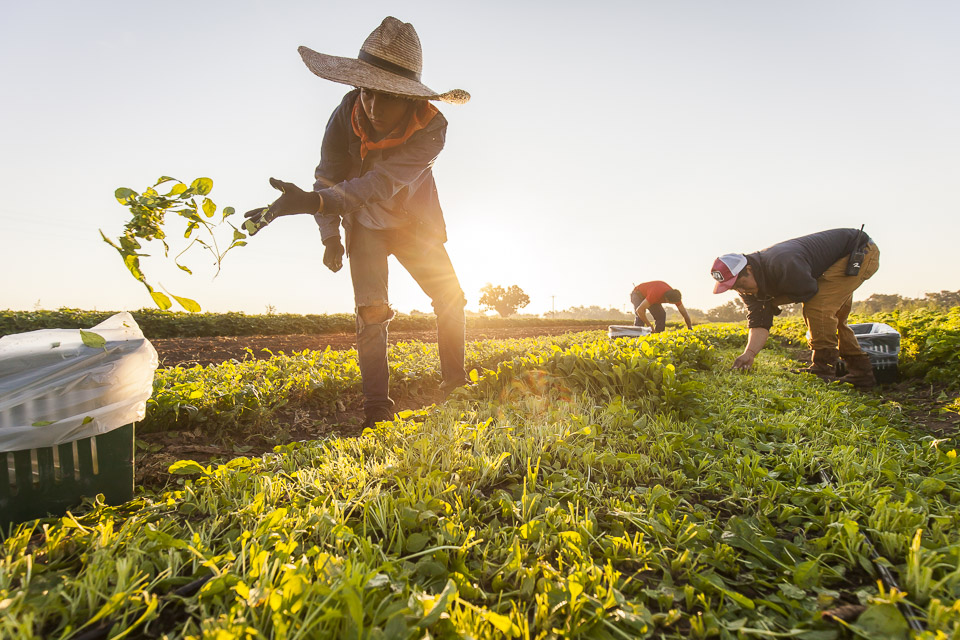 Arugula harvest. Summer greens are harvested first thing in the morning before the day really heats up. Photo by Scott David Gordon.
CSA BOX CONTENTS WEEK OF JULY 26
07/26/21 — Ada Broussard
Individual: okra, potato, beets, Farmer's Choice greens, carrots
Small: okra, potato, sweet peppers, Farmer's Choice greens, radish, beet, herb
Medium: okra, potato, carrots, onions, radish, hot peppers, dandelion greens, sweet potato greens, herb, eggplant
Large: okra, potato, carrot, onions, arugula, amaranth, radish, herb, eggplant, green pepper, hot pepper, Farmer's Choice
THE DIRT ON OUR HAND PAINTED VANS
07/23/21 — Ada Broussard
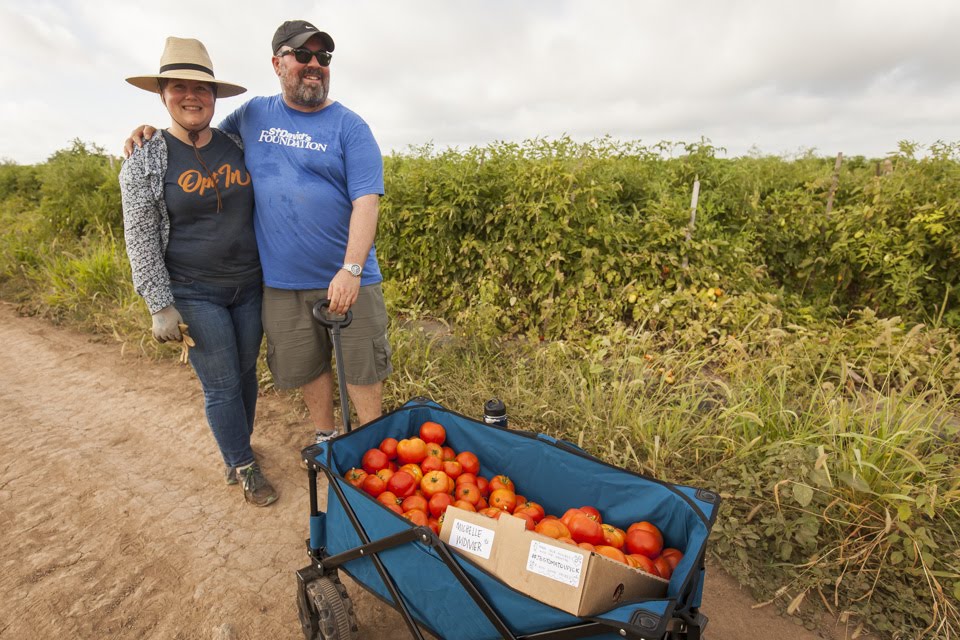
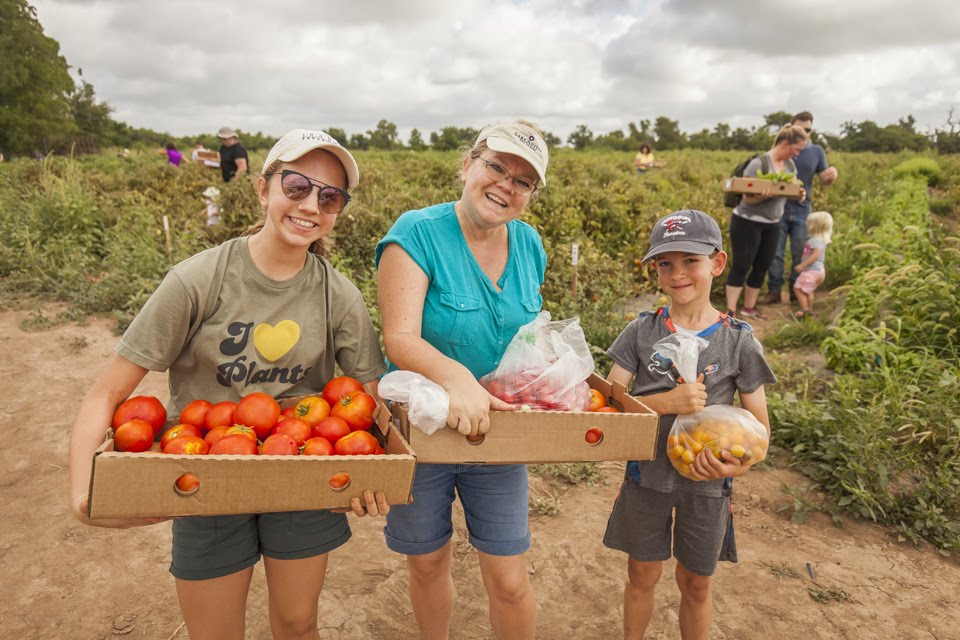
Happy Friday from the farm! Before we jump into this week’s blog post, we just wanted to send out a heartfelt THANK YOU to everyone who joined us for this year’s Tomato U-Pick. For two Saturdays in a row, hundreds of families came to the farm and picked thousands of pounds of tomatoes. It feels so wonderful to be able to slowly again open up the farm to the community in this way. If you missed the U-Pick, don’t fret. Our Saturday Farmstand is still open for business, and for the next few week’s we’ll still be selling tomatoes… the kind that you don’t have to pick yourself!
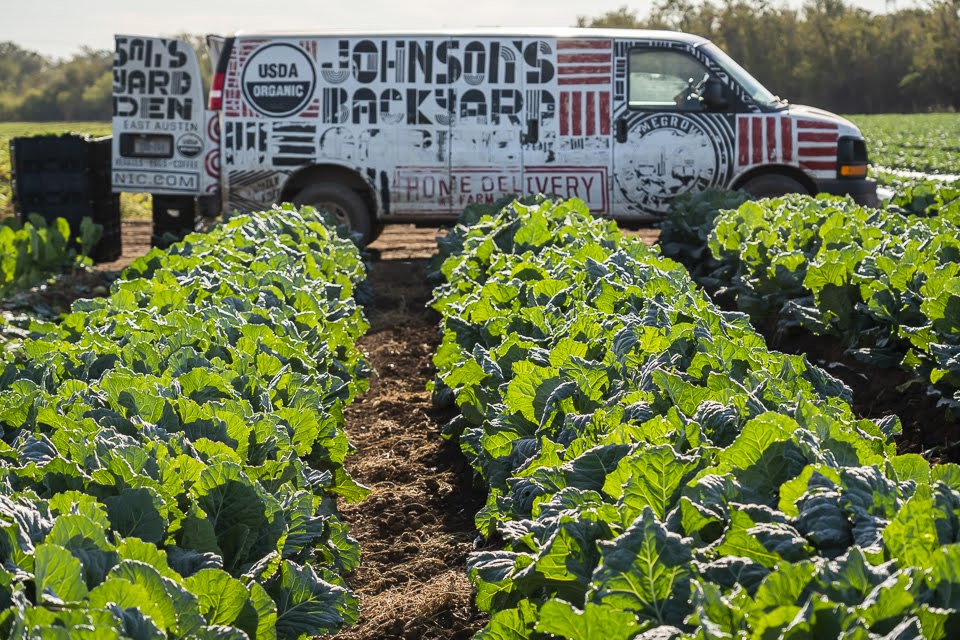
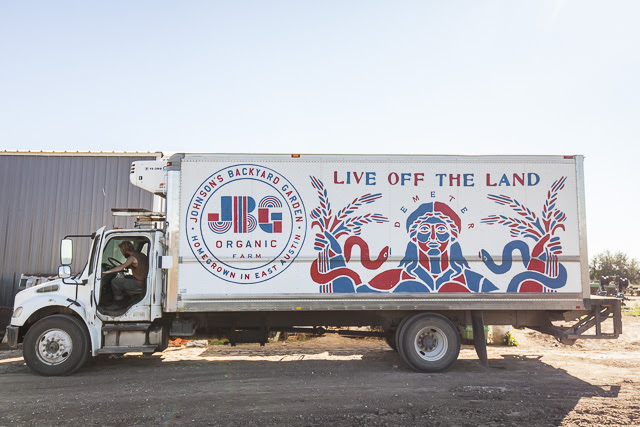
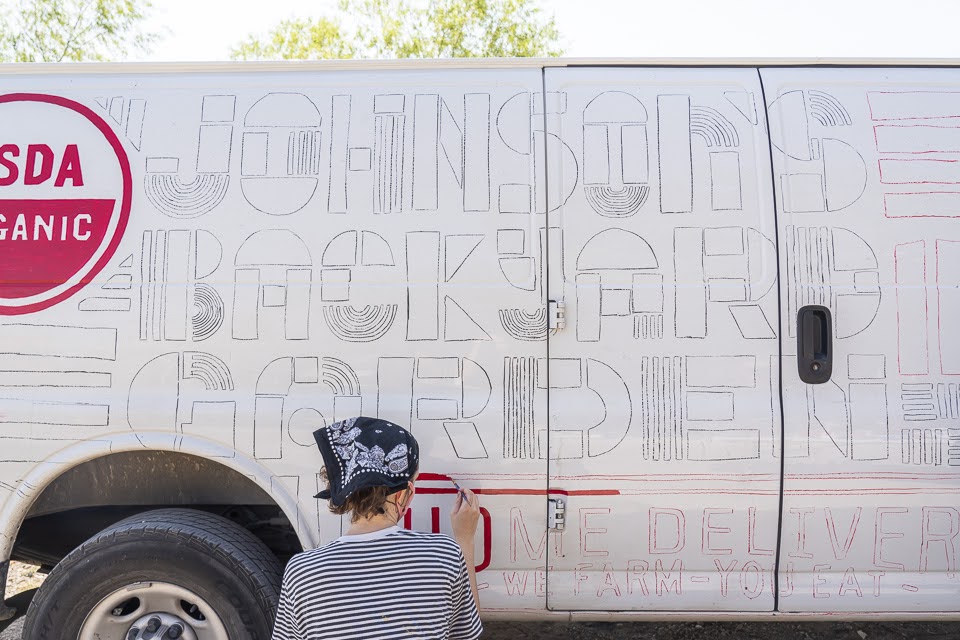
And now onto the post! This week on the blog we wanted to zoom in on an important set of tools that we couldn't run our business without: our fabulously hodgepodge fleet of hand-painted delivery vehicles. (P.S. Want to help us paint a van? Scroll to the bottom of this post for volunteering info.)
We often get telemarketer calls from big distribution companies who manage very large fleets of trucks, overseeing complex distribution networks.. It’s always a bit of a joy to quickly end those calls by simply saying, “We’re growers and distributors. We do all of our own distribution!”. It’s this fact which makes our veggies truly farm to table, and though managing our own vehicle fleet can often be a headache, we think it’s important. By doing our own deliveries, we can get food to its final destination quickly, meaning you’re eating vegetables that were often harvested just days before. It’s our tiny part at disentangling the complex food systems that move the majority of produce around our country.
Unlike a fleet owned by a large corporation, our fleet is… farmy. Currently, we have 5 vans (mostly used for home delivery and CSA pickup) and 5 box trucks (farmers’ markets, grocery distribution) and our team of amazing delivery drivers often drive a bit of both. Most of the vehicles we add to our fleet are on their second or third home, and though they arrive looking a bit weary, we give them some JBG love with a Tim-the-mechanic tune up and a hand-painted mural, the art for which was designed by JBG’s original graphic designer, Ryan Rhodes. For these vans and trucks, JBG is their forever home. When the time comes that they are no longer road-worthy, we send them to the farm fields where their paint can chip in peace, and where they can do some off-roading from the tomato block to the farm coolers.

These days, there are lots of options to vinyl wrap a vehicle or even get large magnets with logos printed on them. Perhaps we’re a glutton for punishment, but we just can’t bring ourselves to do these “easy” options, and though we’re always looking for ways to increase efficiency at the farm, our vehicles’ sweet decoration is the exception to this rule.There is just something so homegrown, so friendly, and so fun about the outcome when they’re hand-painted. Slight paint drips, like a tiny blemish on an organically grown pepper, are just a part of our branding, all a result from being homegrown and made by hand.
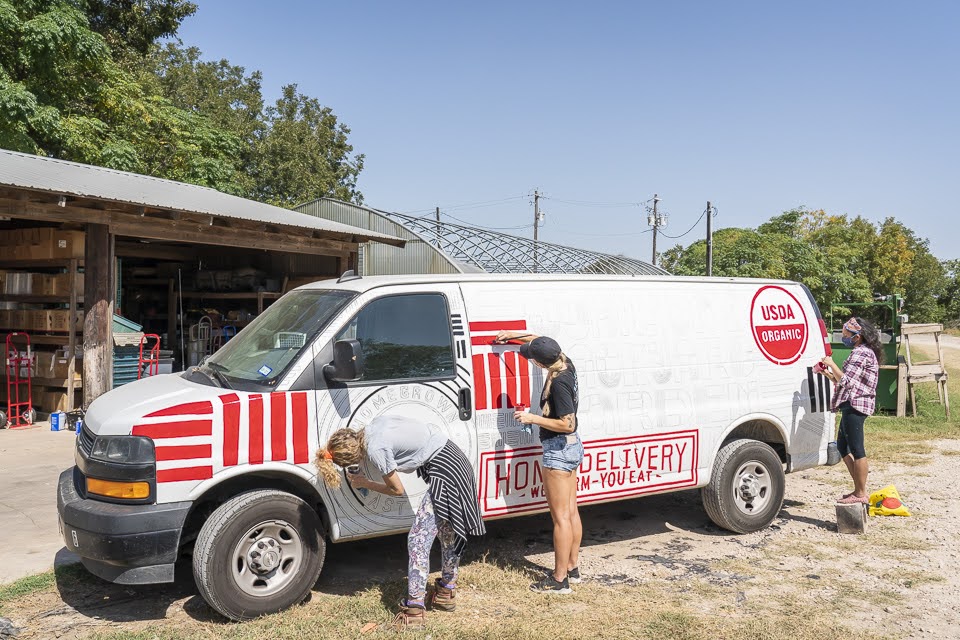
For the past few years, one of our long-time JBG employees, Lyndsie, has been in charge of overseeing our vehicle painting. She’s the perfect candidate - when she’s not slinging veggies at the weekend markets, Lyndsie is an artist. Before volunteers ever arrive to paint the vans, Lyndsie has to go to Hergotz after dark, and trace the artwork onto the vans. For this process, she uses crayon-like pens and an old-school overhead projector. Yes, the kind your teacher used to roll out on a cart. Once the designs are traced, it’s time to paint. Big box trucks and “reefers” (or refrigerated trucks) can take many sessions to finish, while the painting of a van can be knocked out in just one or two sessions of a handful of volunteers. After each painting day, volunteers leave the farm with a bounty of vegetables, and we are left with a tiny piece of their artistry that we proudly drive around Austin, delivering organic vegetables. Make sure to wave if you ever see one of our vans out and about!
We’re currently working on painting one of our box trucks and are looking for some help! We have two volunteer shifts scheduled for Monday August 2nd, and Tuesday, August 3rd from 10-2pm. If you’re comfortable wielding a paint brush and would like to join us for one of these days, please email Ada: ada@jborganic.com .
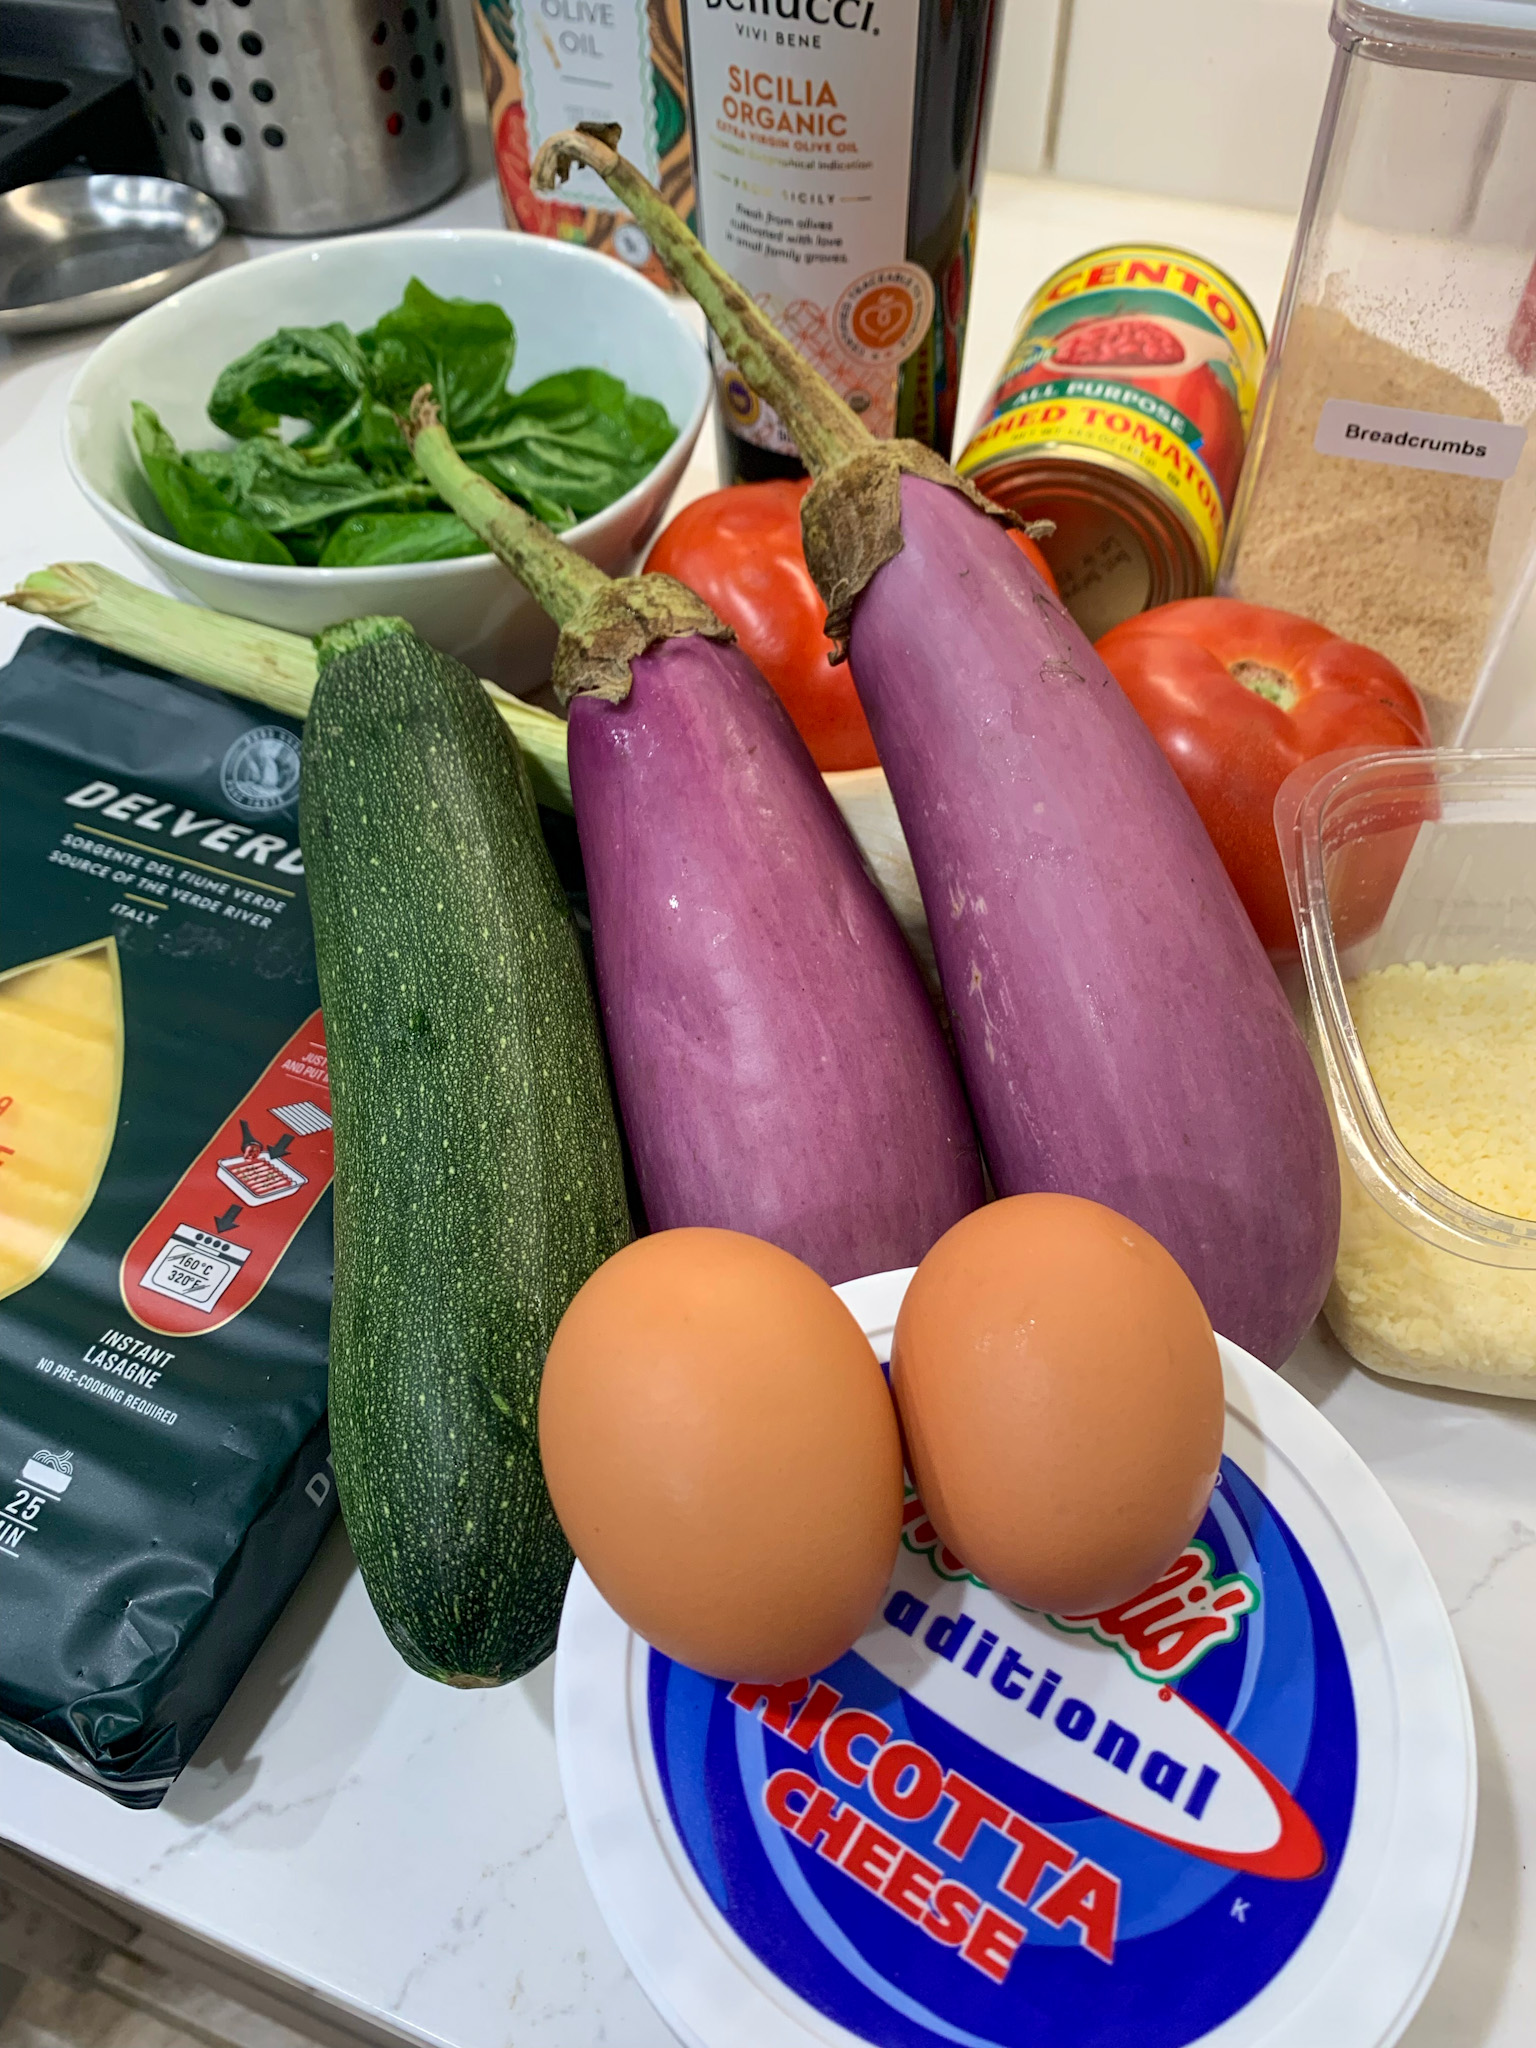
RATATOUILLE LASAGNE
07/16/21 — Ada Broussard
Recipe and Photos by The Migoni Kitchen.

Ratatouille Lasagna
Author: The Migoni Kitchen
Servings: 6
Growing up as kids, we didn’t always love all of the delicious summer veggies like zucchini and eggplant, but my mom was so savvy, she would always incorporate them into a pasta dish and we were none the wiser! This is where we got the idea to use lasagna pasta as a starch instead of the traditional potato in Ratatouille. Throw in lots of melted cheese and fresh herbs, and this dish will have even the most ardent vegetable haters asking for more!
Ingredients
- Sauce:
- 2 tbsp Olive Oil
- 4 Cloves Garlic (minced)
- 28 oz Crushed Tomatoes
- 2 tbsp dried parsley
- 1 tbsp dried basil
- 1 tbsp dried oregano
- 1 tsp crushed red chili flakes
- 1/2 tsp sugar
- Salt and Pepper to taste
- Lasagna:
- 15 oz Ricotta
- 2 Eggs
- 16 oz of Mozzarella (shredded)
- 8 oz of Parmesan (grated)
- 1 tsp Nutmeg
- ½ Cup of Fresh Parsley (chopped)
- 2 Medium Eggplants (thinly sliced)
- 2 Large Tomatoes (thinly sliced)
- 1 Large Zucchini (thinly sliced)
- 1 package of “no-boil” lasagna pasta
Instructions
1. Preheat your oven to 400o F.
2. Heat olive oil in a large saucepan over medium heat, add the garlic and fry for 2 minutes stirring frequently.
3. Add the crushed tomatoes, then the remainder of the ingredients for the sauce and stir to combine. Simmer uncovered for 20 minutes while you prepare the remaining ingredients.
4. In a medium bowl mix the ricotta, eggs, half of the mozzarella, parmesan, nutmeg, and parsley. Set aside.
5. Use a mandoline slicer to thinly slice all of the vegetables and set aside.
6. In a deep 9x13in. pan, add a generous amount of sauce to cover the bottom. On top of the sauce place one layer of pasta, then spread a ⅓ of the ricotta mixture on top of the pasta. Next, place a layer of tomato slices, then eggplant, and finally the zucchini.
7. Sprinkle a bit of salt and pepper over the vegetables, then repeat the layering process from step 6 at least 2 more times, or until you reach the top of the pan. Finish with a layer of pasta covered with remaining tomato sauce.
8. Cover with foil and bake lasagna for 45 minutes, then uncover the lasagna, sprinkle remaining mozzarella over the lasagna and return to the oven for an additional 15 minutes.
9. Slice and serve the lasagna topped with a little extra parmesan and fresh chopped parsley or other garden herbs.

CSA BOX CONTENTS WEEK OF JULY 12TH
07/12/21 — Farm

Individual: Tomato, Okra, Onion, Eggplant, Shishido Pepper, Farmer's Choice Herb
Small: Tomato, Cabbage, Harvest Highlight, Carrot, Okra, Farmer's Choice Herb, Watermelon Radish
Medium: Tomato x2, Butternut Squash, Harvest Highlight, Farmer's Choice Herb, Potato, Eggplant, Beet, Onion, Shishido Pepper, Leek
Large: Tomato x2, Dandelion Green, Farmer's Choice Herb, Potato, Harvest Highlight, Eggplant, Beet, Sweet Pepper, Leek, Onion, Carrot
U-PICK PROTIPS + FARM ANNOUNCEMENTS
07/09/21 — Ada Broussard
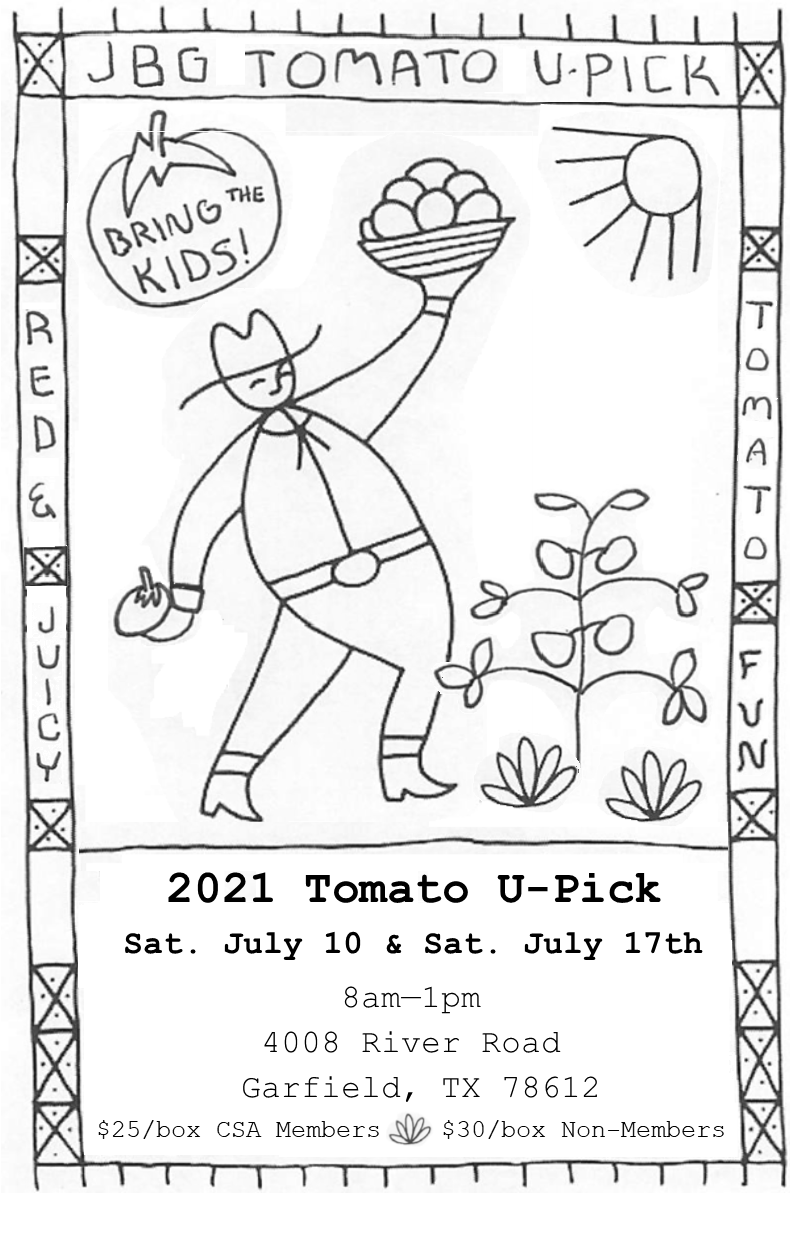
Hello! Happy Friday and happy July! We’re halfway through this year, a moment marked at the farm by tomatoes, cucumbers, melons, and fragrant bunches of basil to dress it all. This week, we’re here with several announcements and some tips for a successful U-Pick experience.
ANNOUNCEMENT 1:
Our 2021 Tomato U-Pick is HERE! We’ve scheduled two U-Pick dates: Saturday July 10th & Saturday, July 17th from 8am-1pm. The U-Pick is happening at our Garfield farm located at 4008 River Road, Garfield, 78612. Fill a box to the brim of our organic, homegrown tomatoes for just $30 ($25 for CSA Members). No need to pre-purchase a box this year. For U-Pick pro-tips, keep reading!
ANNOUNCEMENT 2:
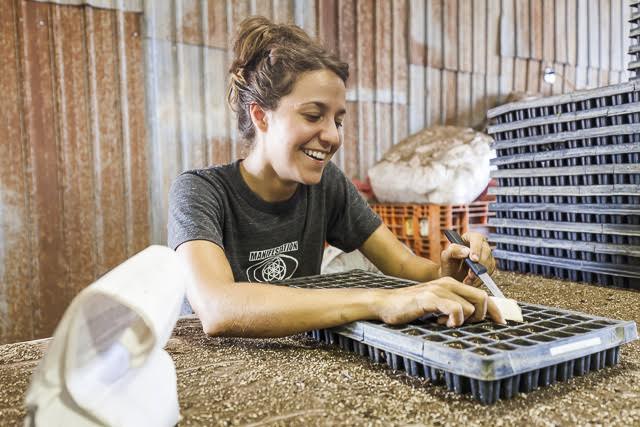
Beginning next Monday, we are once again accepting volunteers at our Garfield Farm! When Covid-19 became a reality last March, we paused our volunteer program, and only now are hitting the play button again. Since our JBG’s inception in 2004, we’ve always invited volunteers to the farm in one capacity or another. This is the longest stint we’ve gone without hosting the community on the farm, and we are beyond excited to resume. Meeting the community, face to face, can do a lot for a farmer’s morale in the dog days of summer! At this time, we are only accepting volunteers at our Garfield location. Per usual, volunteers are thanked with a big box of freshly-harvested veggies. To RSVP for a volunteer spot, simply fill out this Google Form which can also be found on our Volunteer Page. Jamie Lee will confirm your spot with an email.
ANNOUNCEMENT 3:
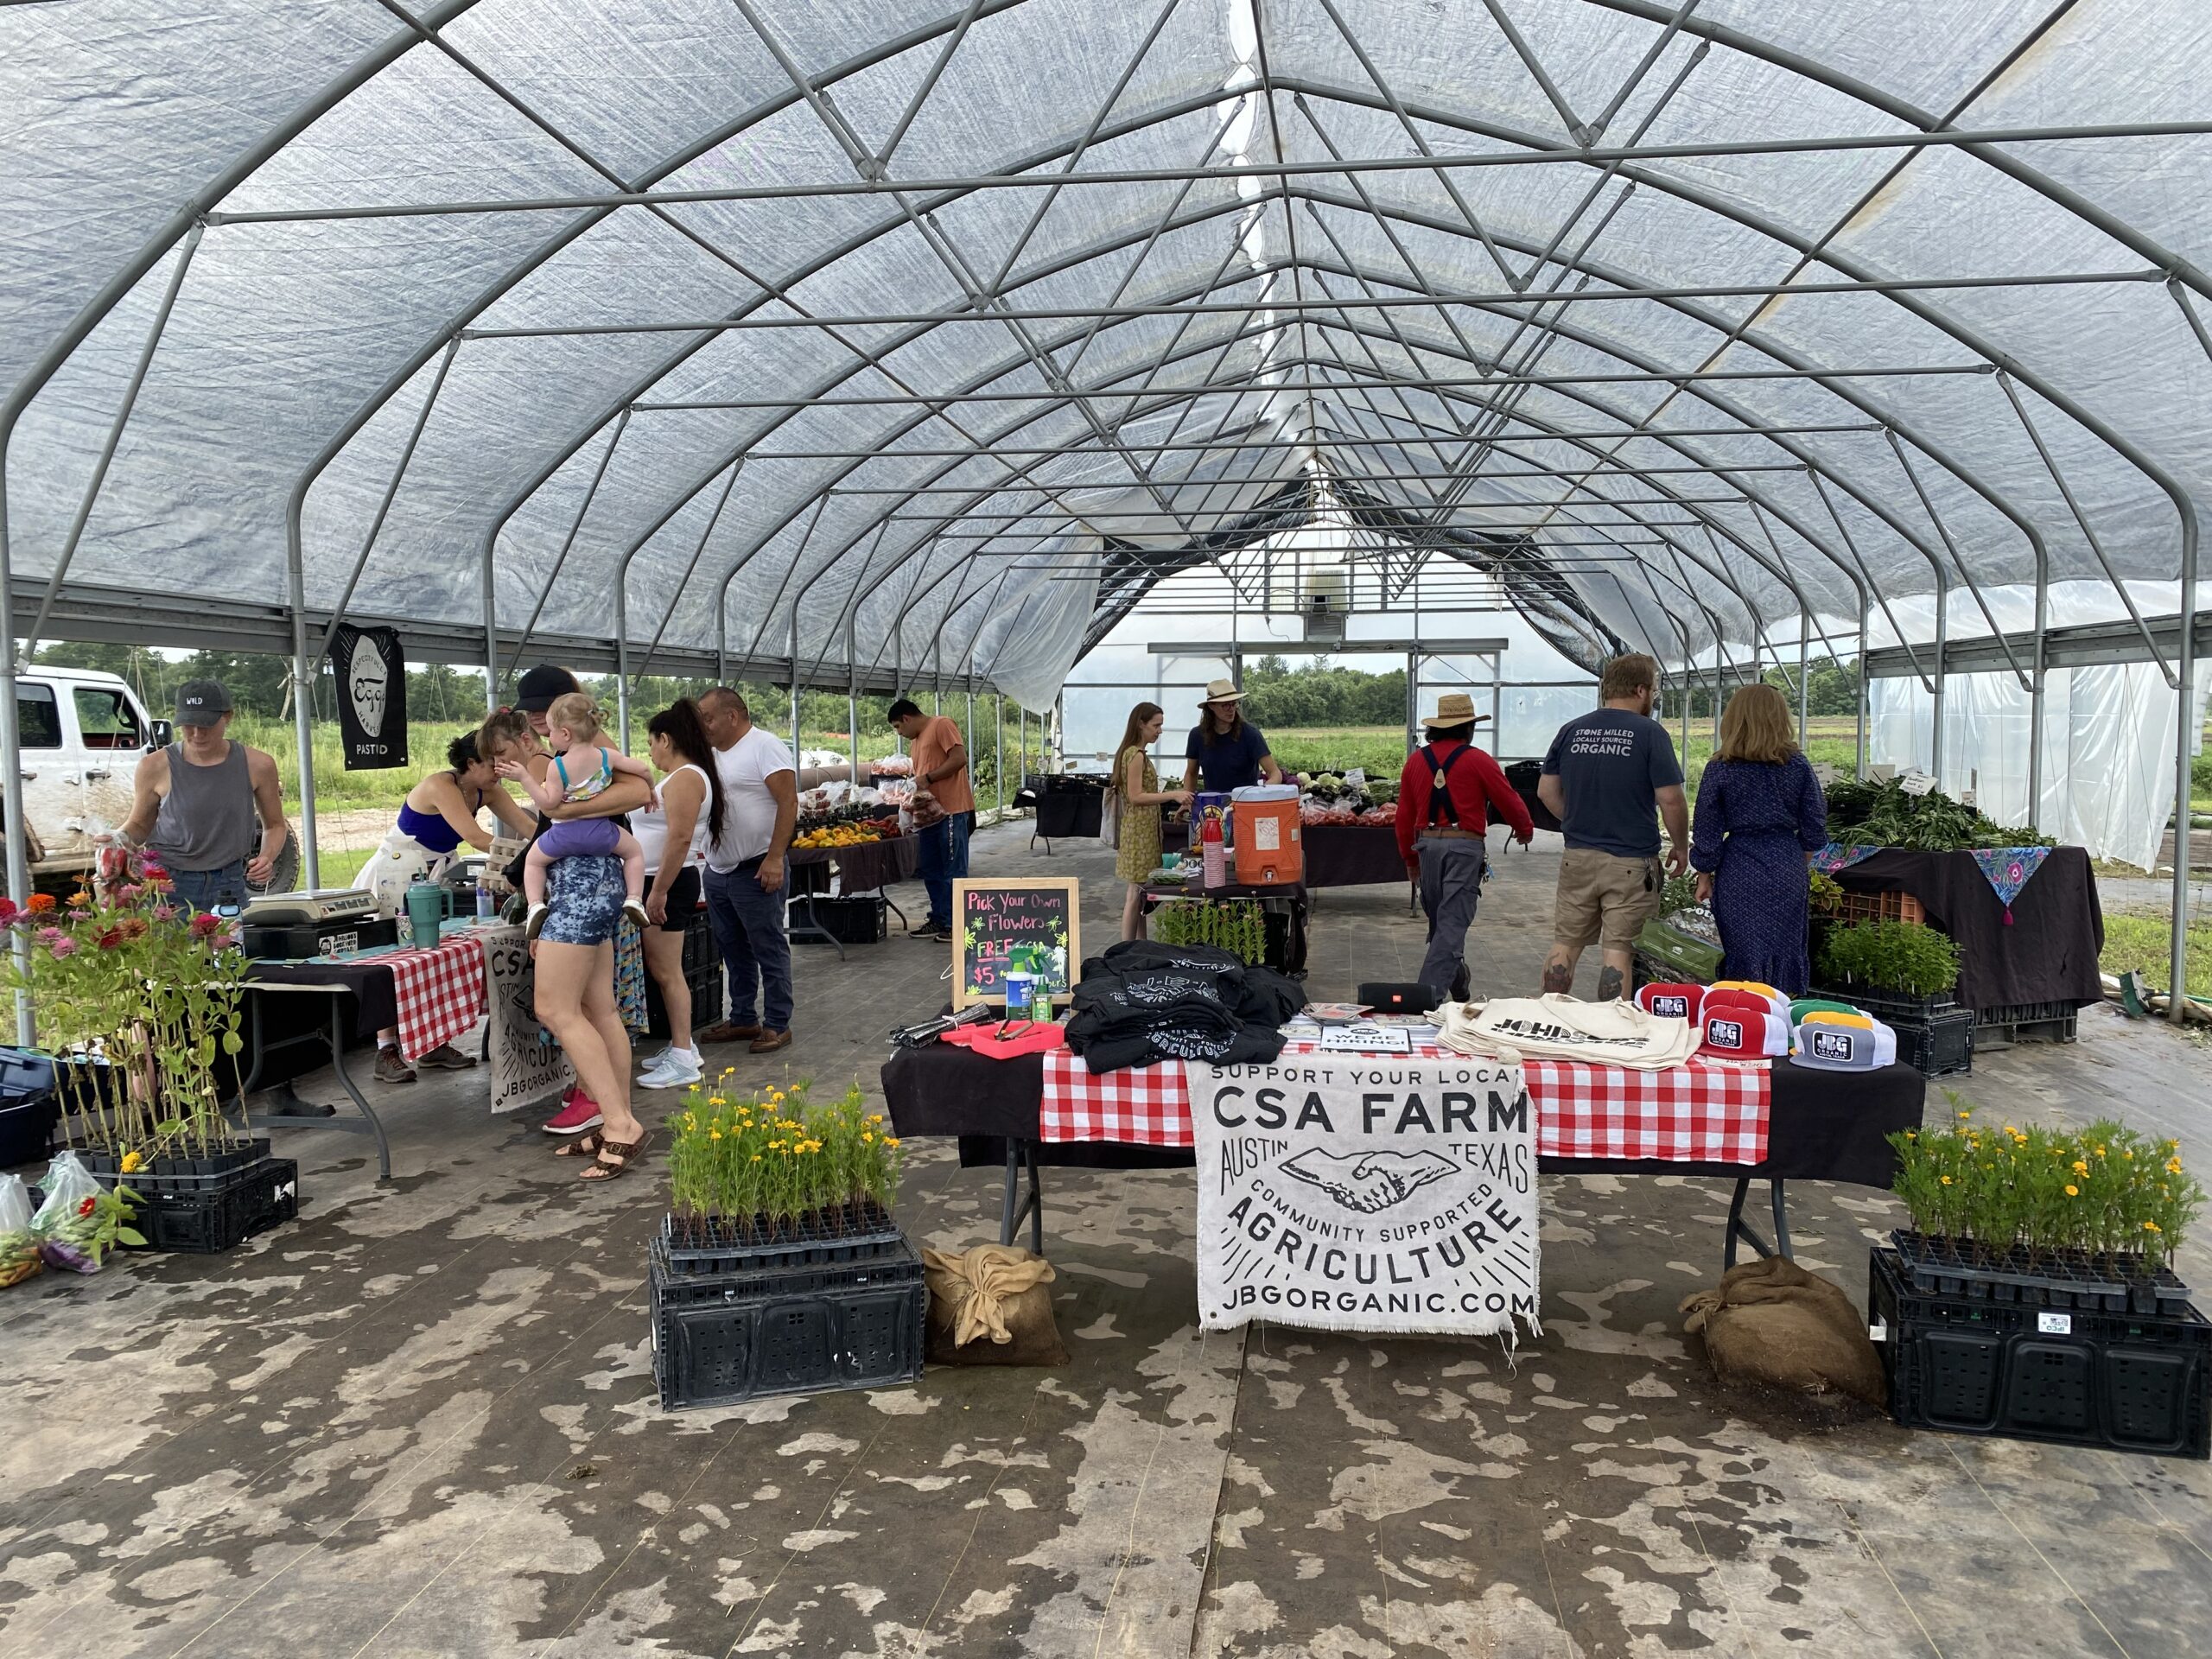
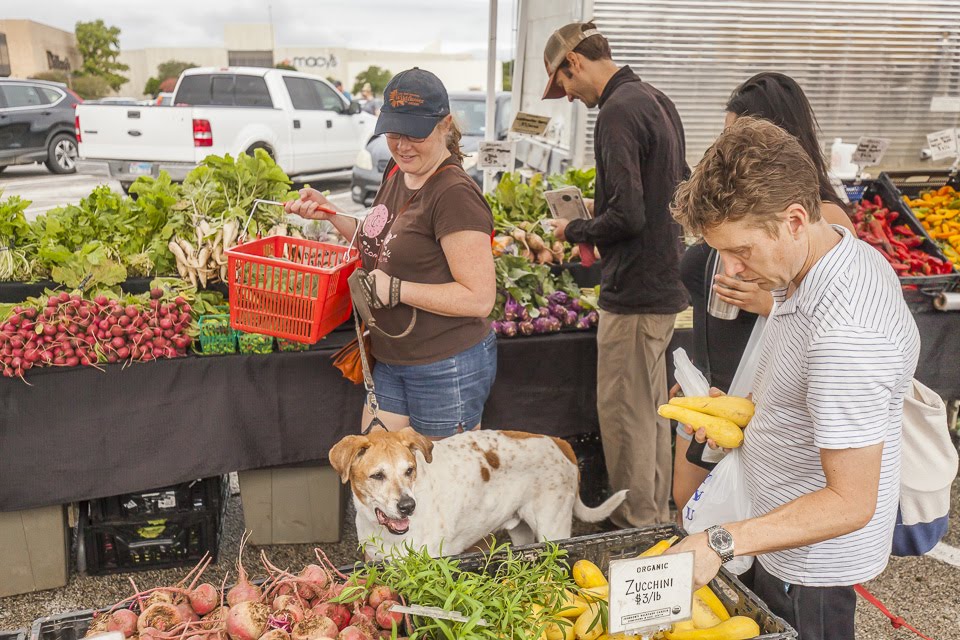
We are doing a market makeover and are reverting our booth setup to its pre-covid glory! In some ways, it seems like only yesterday that we had to swiftly adapt our entire operation in response to Covid-19. It’s hard to believe that we’ve been using the modified market setup for almost a year and a half. It’s become rather normal, and for some of our market staff who were hired during the pandemic, they don’t know anything else! We are very happy to revert to our “old” setup. The main difference will be that you are now welcome inside our market stand. No more tables blocking your entry, no more ‘ordering’ your vegetables from a JBG staff member. Just like the good ole’ days, you can knock on your watermelon, smell your basil, and choose the vegetable that speaks to you. Baskets are back, and maybe even tablecloths, too. CSA Members who pickup at market: Rejoice! You can once again swap out items from your box with items from our market stand. Please check in with our staff to do this. Together, we’ll all get used to the new-old normal.
ANNOUNCEMENT 4:
Last, it is with extreme emotion that we announce the fact that Krishna, our beloved leader and operations manager of many years, has retired from farm life. Of course, we will miss him immensely… we didn’t call him “Papa Krish” for nothing! But we are also filled with an overwhelming sense of happiness and joy for Krishna and his next adventure. His presence at the farm for the past 10+ years has not only shaped the trajectory of our business, but also the individual lives of our employees. There truly aren’t enough words to describe the gratitude we feel for Krishna’s kind, thoughtful, smart, and important leadership. We will miss you dearly, Krishna!

Without further ado, 10 Protips for a seamless U-Pick Experience:
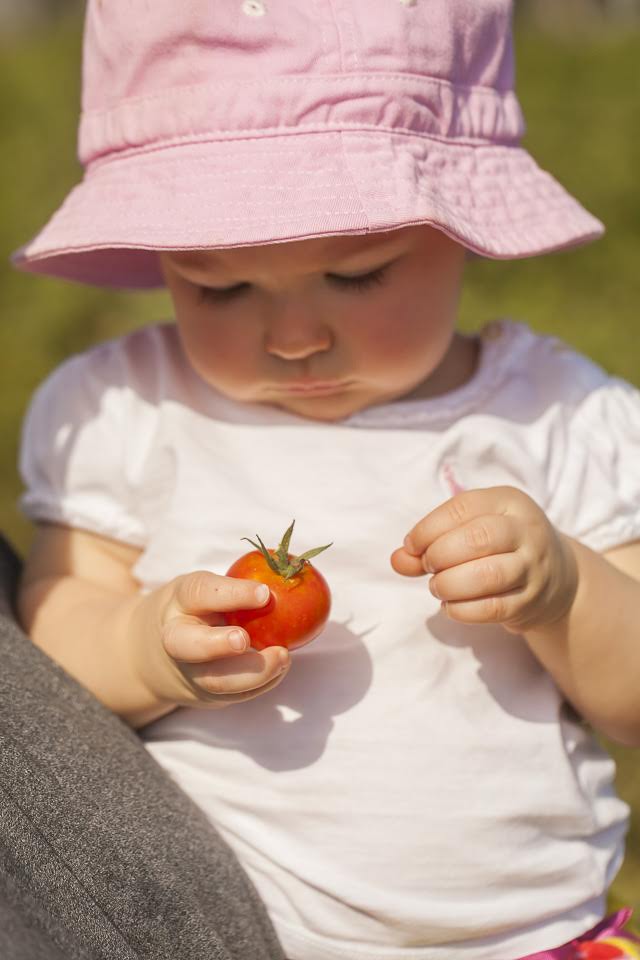
1) Come early and beat the heat! We plan to host the U-Pick rain or shine. It looks like there is some scattered rain forecasted for tomorrow, but we think there will be plenty of sunny moments in-between to pick your tomatoes. In the case of severe weather, we will postpone the event and make an announcement on social media. No cancellation announcement on Instagram or Facebook? U-Pick is on!
2) Wear appropriate clothing! Despite the heat, we actually recommend wearing long pants (and long sleeve shirts!) to pick your tomatoes. With all this rain, our weeds are just as happy as our tomatoes, and we think you’ll be more comfortable with pants, closed-toed shoes, and long sleeve shirts. This is how us farmers dress! Also, it’s worth mentioning, that you shouldn’t wear clothes/shoes that you don’t mind getting at least a little dirty.
3) Sun protection! Speaking of clothing, don’t forget your hat, sunscreen, and water bottle! The temperature in between the tomato rows can actually be a few degrees warmer than outside… protect yourself!
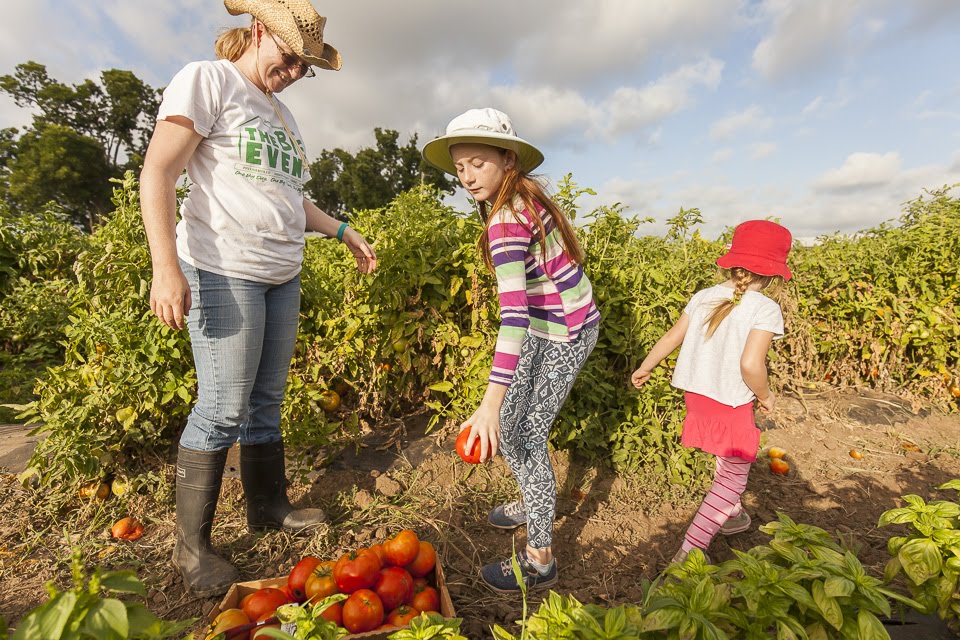
4) Bring a wagon! Kids are no kids, wagons are a great way to transport your tomatoes from the field to your car.
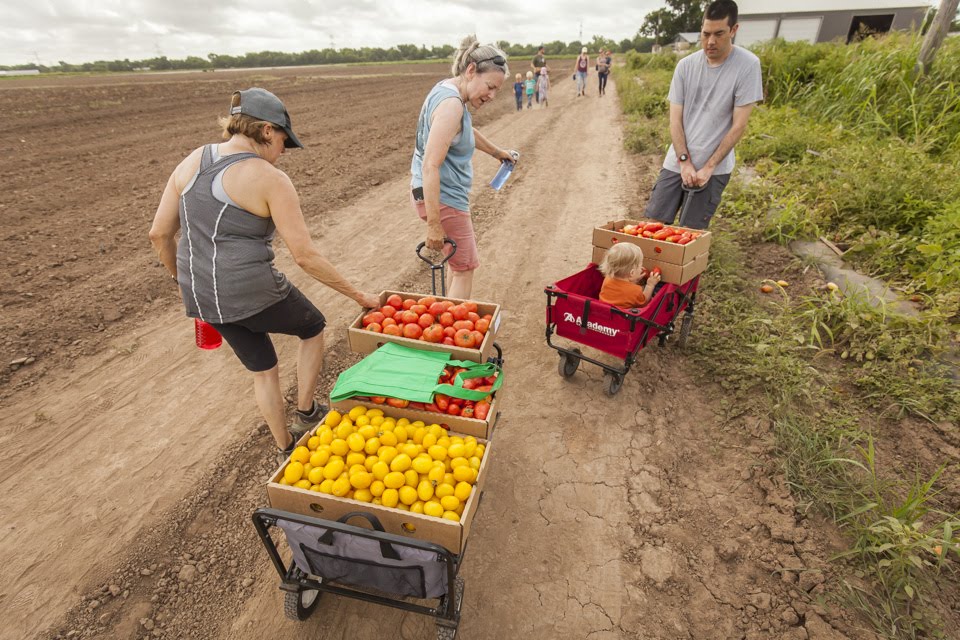
5) Improvise. Tomato box getting heavy? Leave your box at the end of the row, and venture down the line and collect ‘maters in your shirt or hat. It’s only natural.
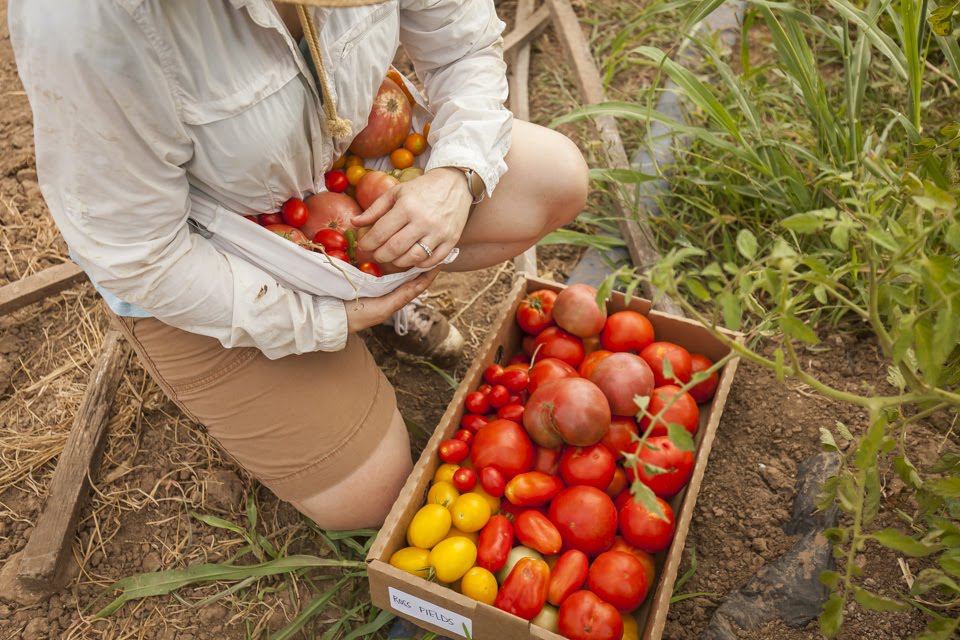
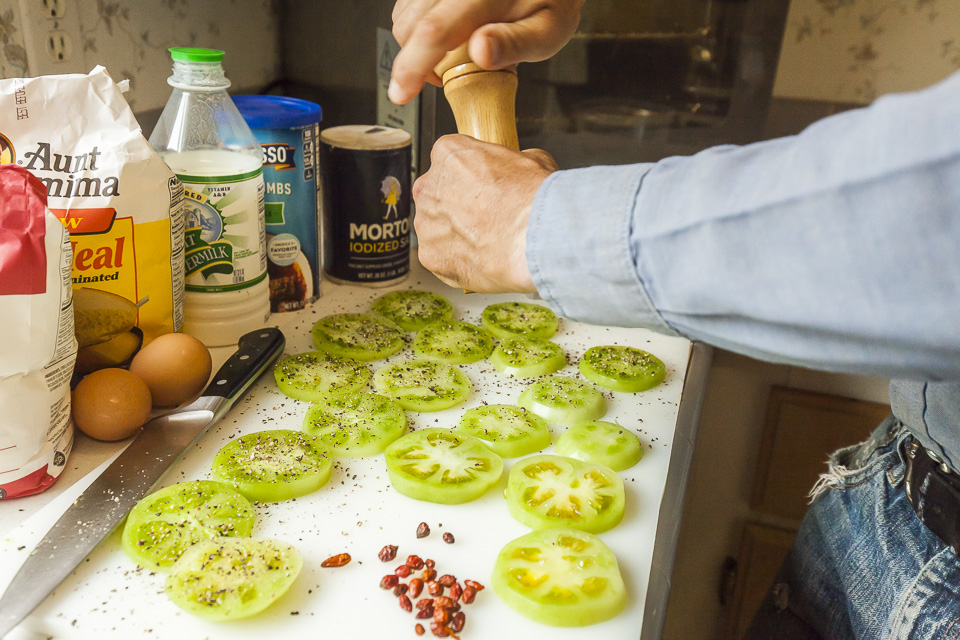
6) Don't forget to pick a few green tomatoes in addition to all the red ones! Fried green tomatoes are a worthy endeavor, and pickled green cherry tomatoes make the perfect bloody mary garnish. When else can you get your hands on green, cherry tomatoes?
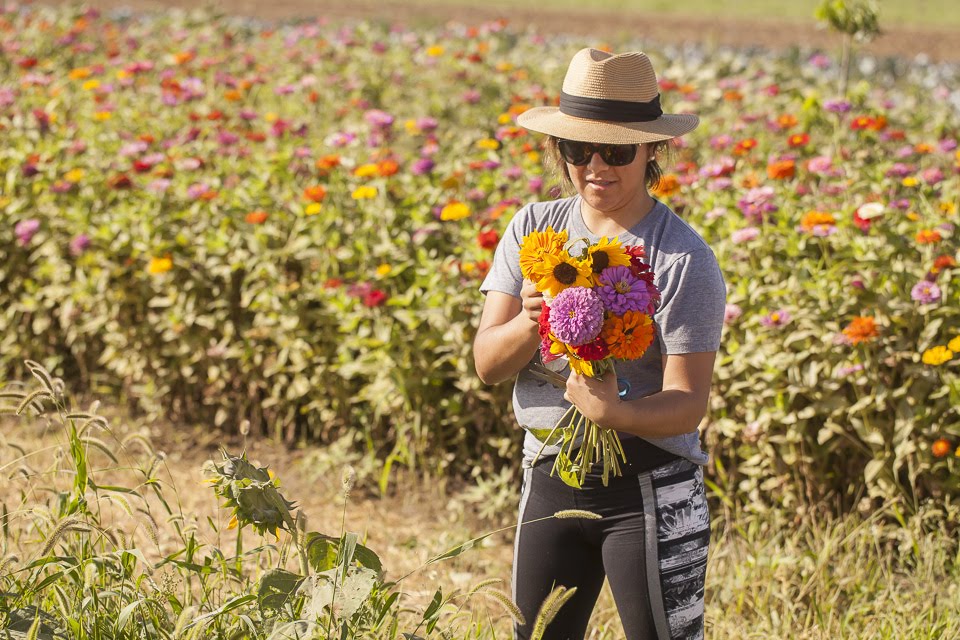
7) Bring a cold bag, and swing by our farmstand to grab some veggies for the week. Did you know you can pick your own flowers at the farm, too?
8) Know where you’re going: Make sure to use our River Road farm address! JBG actually has two locations - the farm where we grow everything (and where you pick your tomatoes!) and our office location. If you just search for “JBG”, Google may lead you to our offices. The address you need is 4008 River Road, Garfield, 78612.
9) Follow the rules: Please, bring all your friends and neighbors… the more the merrier! Your pets, however, are not invited. Sorry, farmers’ rules!
10) Last but not least: sample the product! Please!